Kilimanjaro Rongai Route Trip Report

Kilimanjaro Rongai Route Trip Report
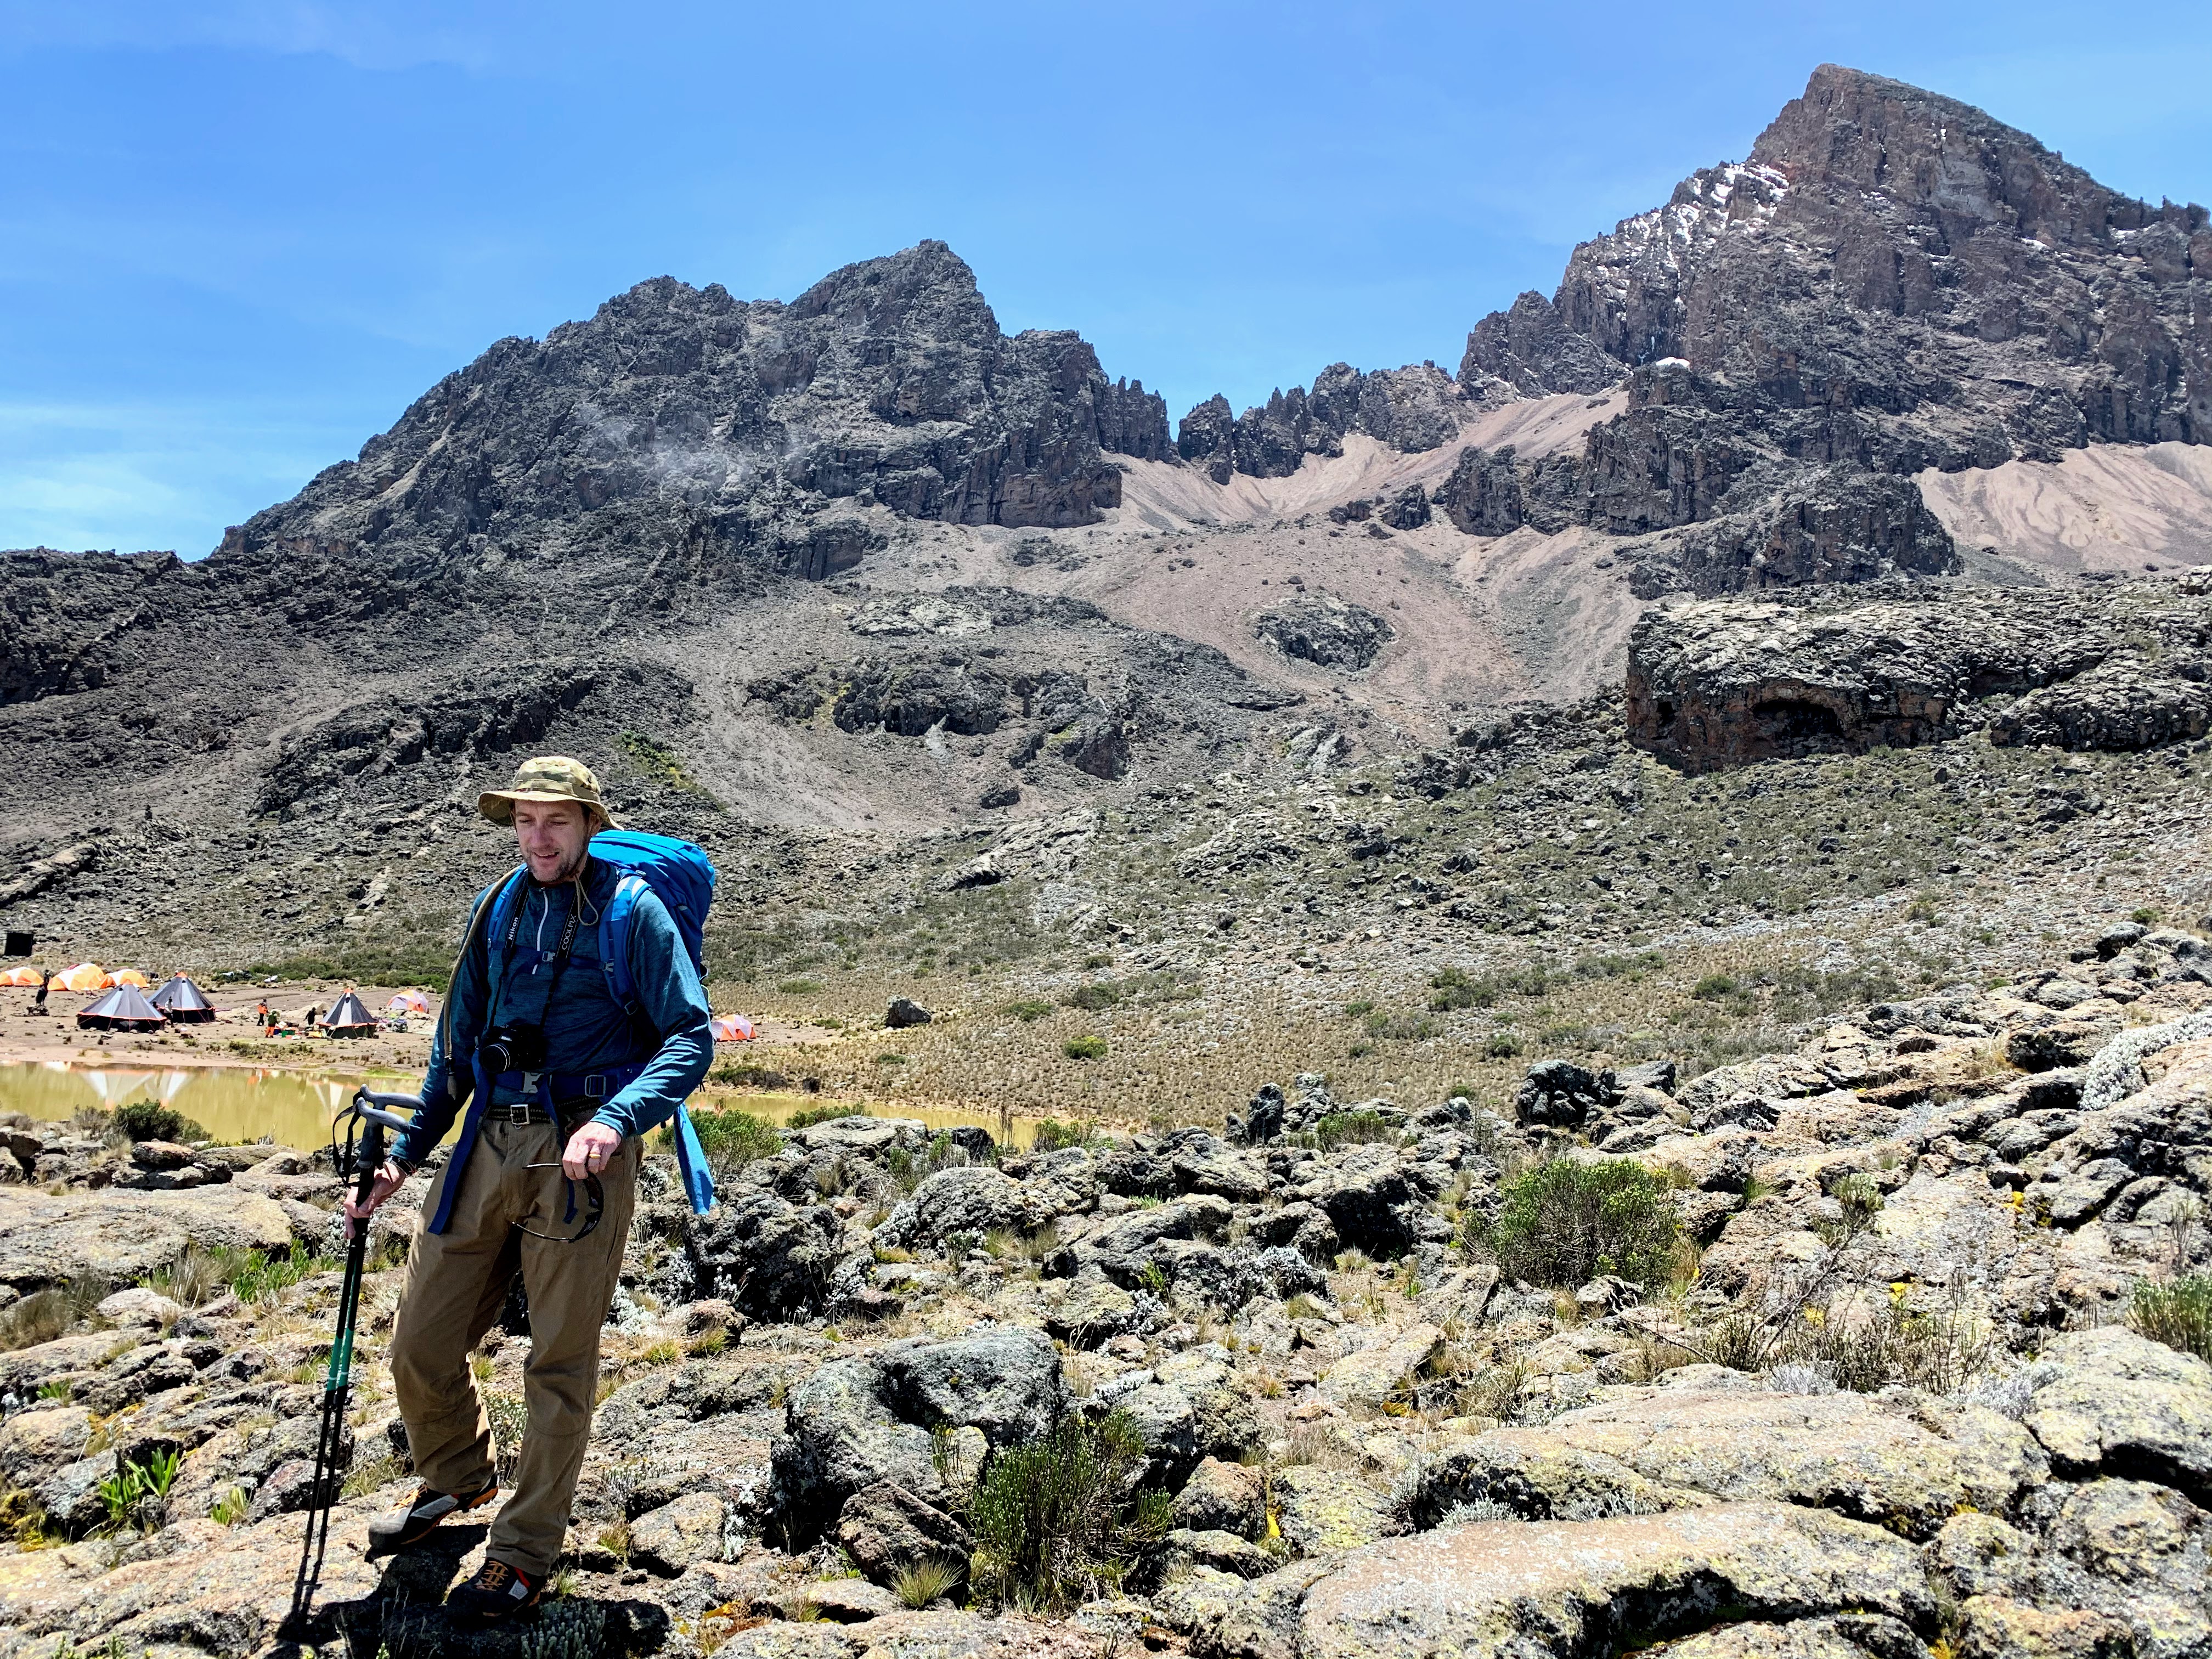
Hiking Kilimanjaro
Is climbing Kilimanjaro easy? You might be lulled into thinking that is so by day 5 on the Rongai Route, or at about the same point on the Machame Route. By that time you’d have negotiated a few steep and sometimes rocky uphill stretches, a couple of glacial valleys and notably, the Barranco Wall on the Machame route. And some long, grinding hikes at altitude. All in all though, you’re thinking that this is not going to be as hard as you’d imagined it might be. That is to say, if you’re not suffering too badly from the effects of altitude sickness, you’re sleeping ok and not overly fatigued.
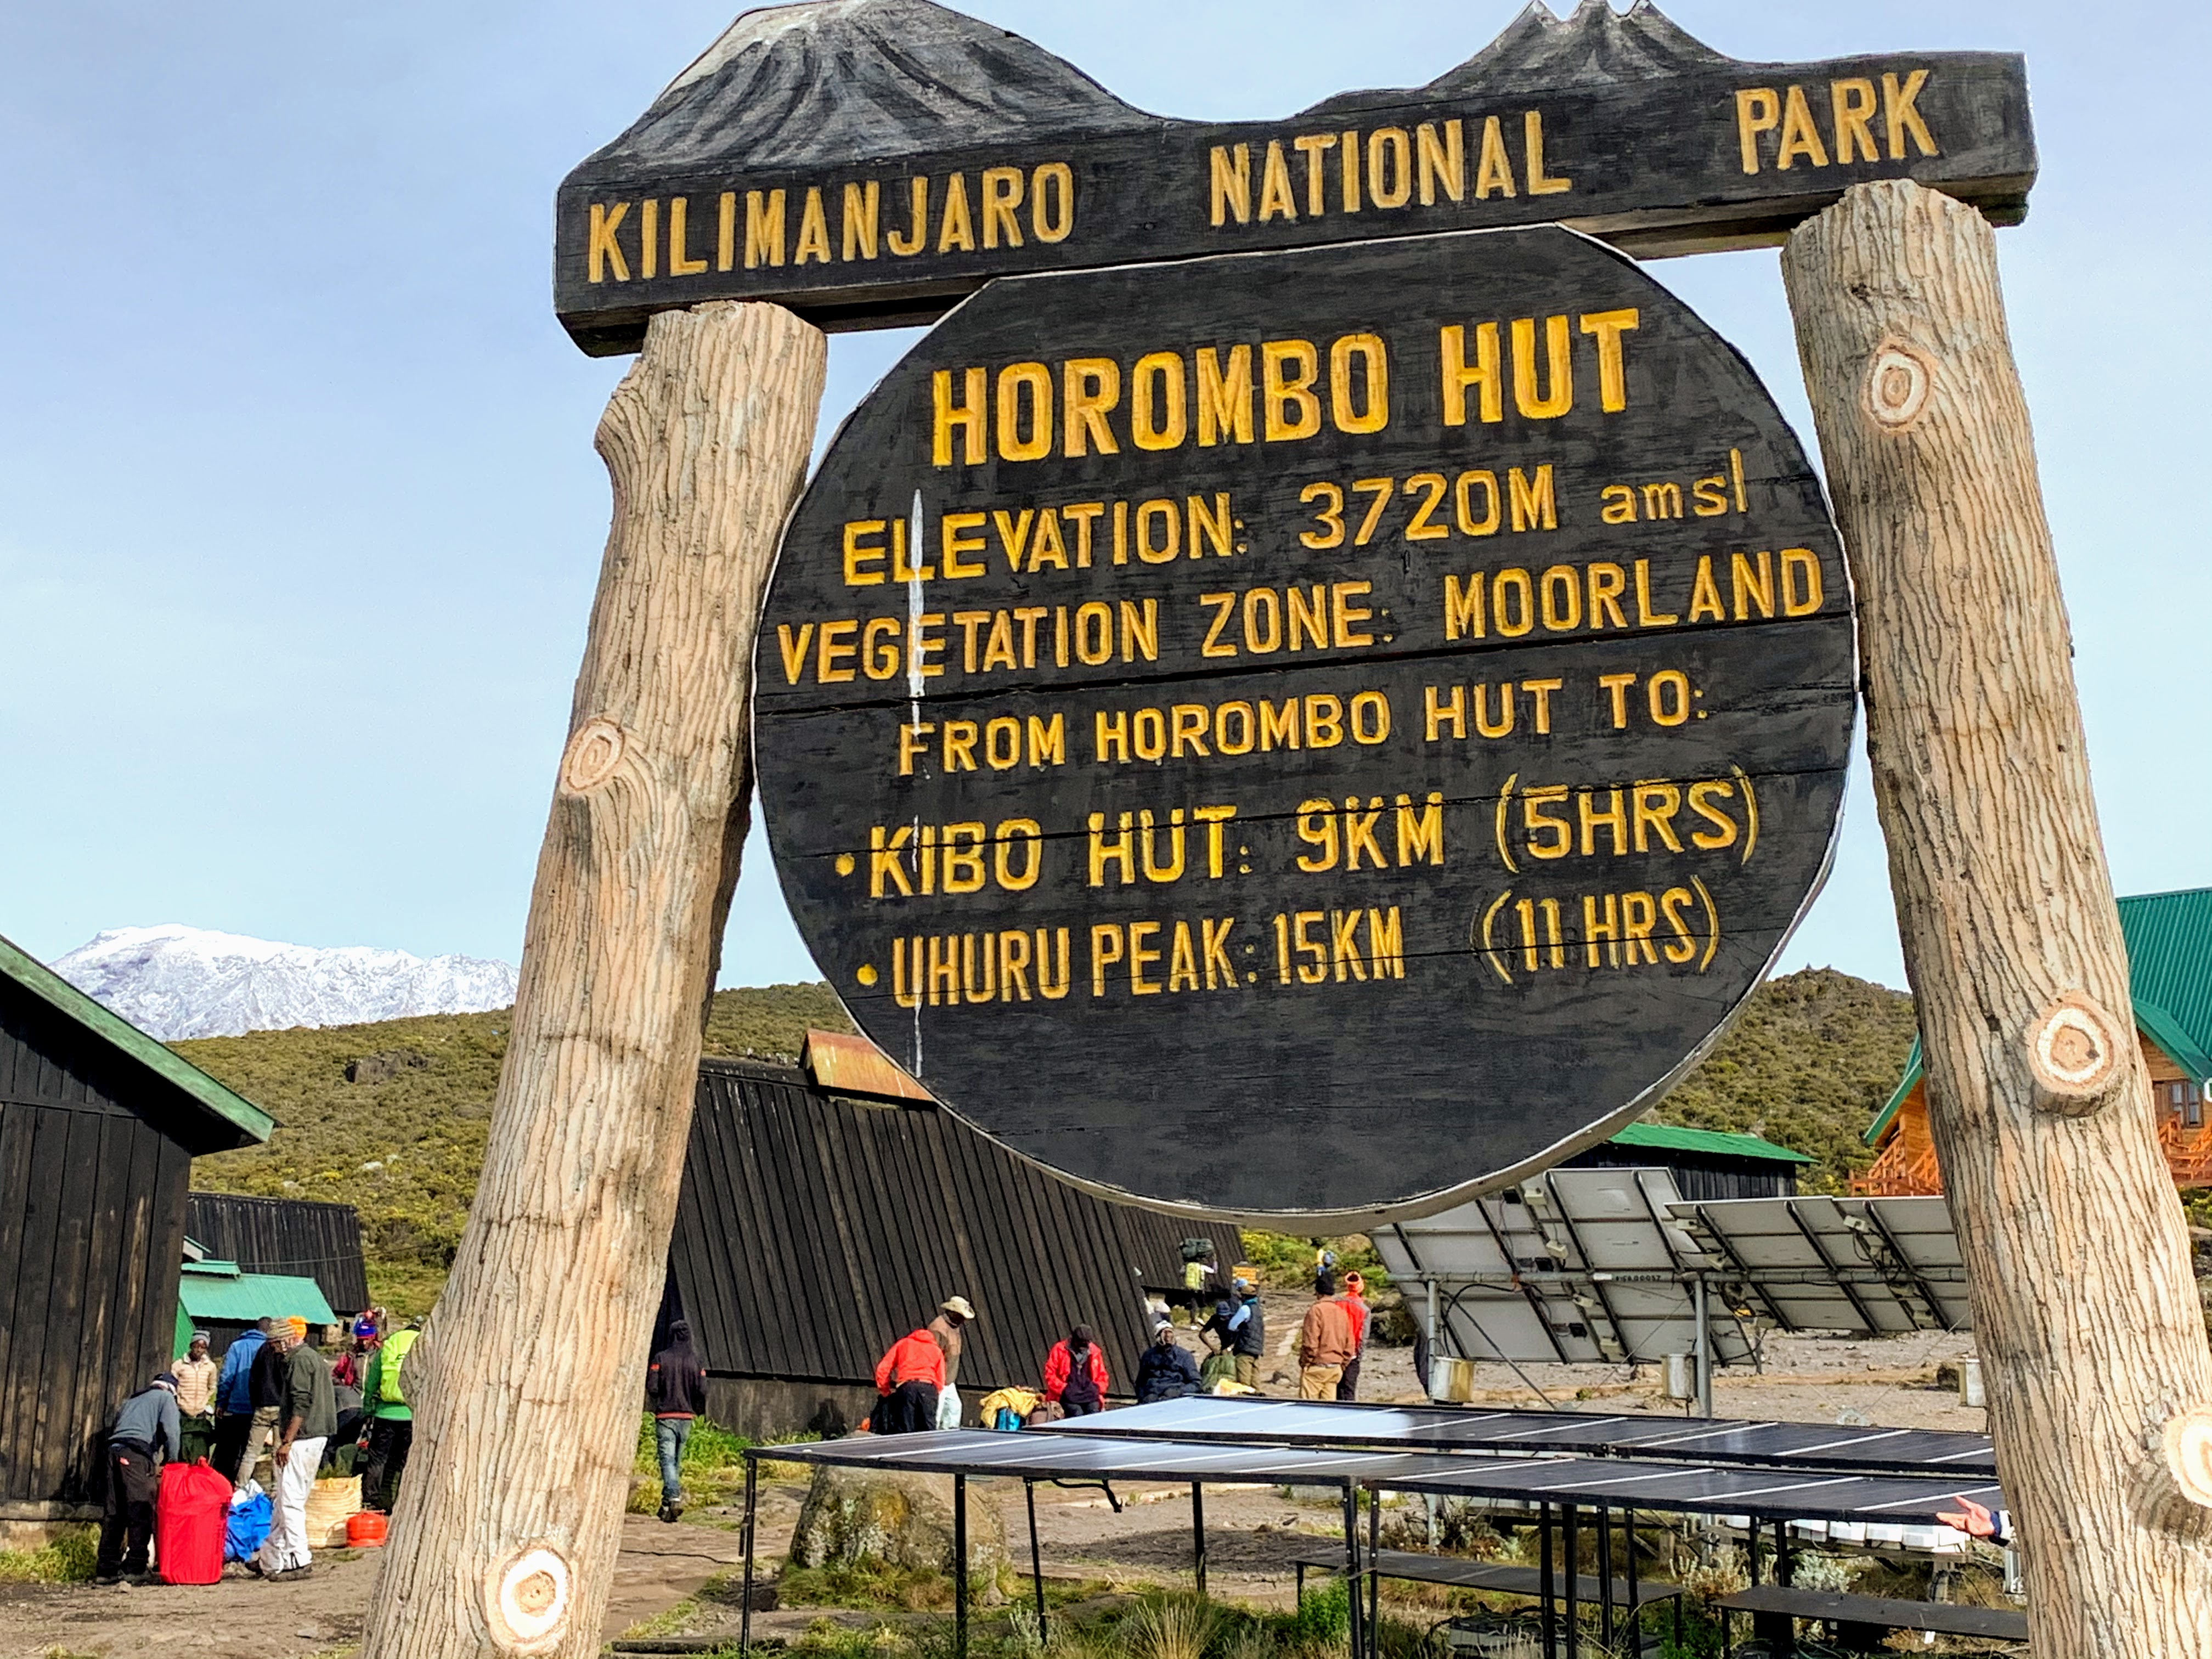
And then everything changes. Somewhere between leaving camp around midnight on summit day and getting down to the camp where you will be spending your last night on the mountain it becomes decidedly ‘not easy’. This is when you find out that Kilimanjaro is not a stroll in the park. In fact, most climbers will be tested to the very extreme of their limits, over the span of about 14 hours, starting around midnight on summit day, which lasts well into the afternoon of the following day. On the Rongai Route, the critical first five hours would be spent negotiating the steep and relentless ascent from Kibo to Gilman’s Point. Then another hour to Stella Point and one more hour to eventually reach Uhuru Peak. It would not be over until you had retraced every single step to Kibo Hut and then descended all the way to Horombo Huts at 12,250 feet above sea level.
You can do the math. From Kibo Huts to Uhuru Peak at 19,341 feet takes from 6 to 8 hours, and the journey down to Horombo 4 to 5 hours. So realistically you’d be looking at spending as much as 14 hours on your feet under less than ideal conditions, at altitude. It can be extremely cold and sometimes windy, there may be lots of ice and snow, and even if there’s not, there’s rocks to climb up or down, and loose scree which holds you back going up, and becomes slippery and treacherous, on the way down.
Easy? Absolutely not. Without the right equipment, preparation, training and above all expert guiding, you’d be setting yourself up for failure, if you approach a Kilimanjaro climb in a cavalier manner. Youth is not a panacea to the pitfalls of high altitude either. Traveling alongside us the entire time on the Rongai climb, three youngsters in their 20’s – lean and by the looks of it fit and healthy – all bailed out. One young Danish guy was forced to quit. When your blood oxygen level drops to the low 60 percentile as happened to him, hand in hand with other symptoms of altitude sickness, the decision to continue stops being yours. Your head guide steps in and essentially makes the hard choice for you. Nobody needs to risk their life to summit Kilimanjaro. Better to come back some other time.
Having dealt with equipment, trip preparation, the pre-climb briefing and other formalities in some depth in a previous Kilimanjaro trip report – this trip report will deal with the day to day experience, and provide some specific tips to improve one’s chances to summit.

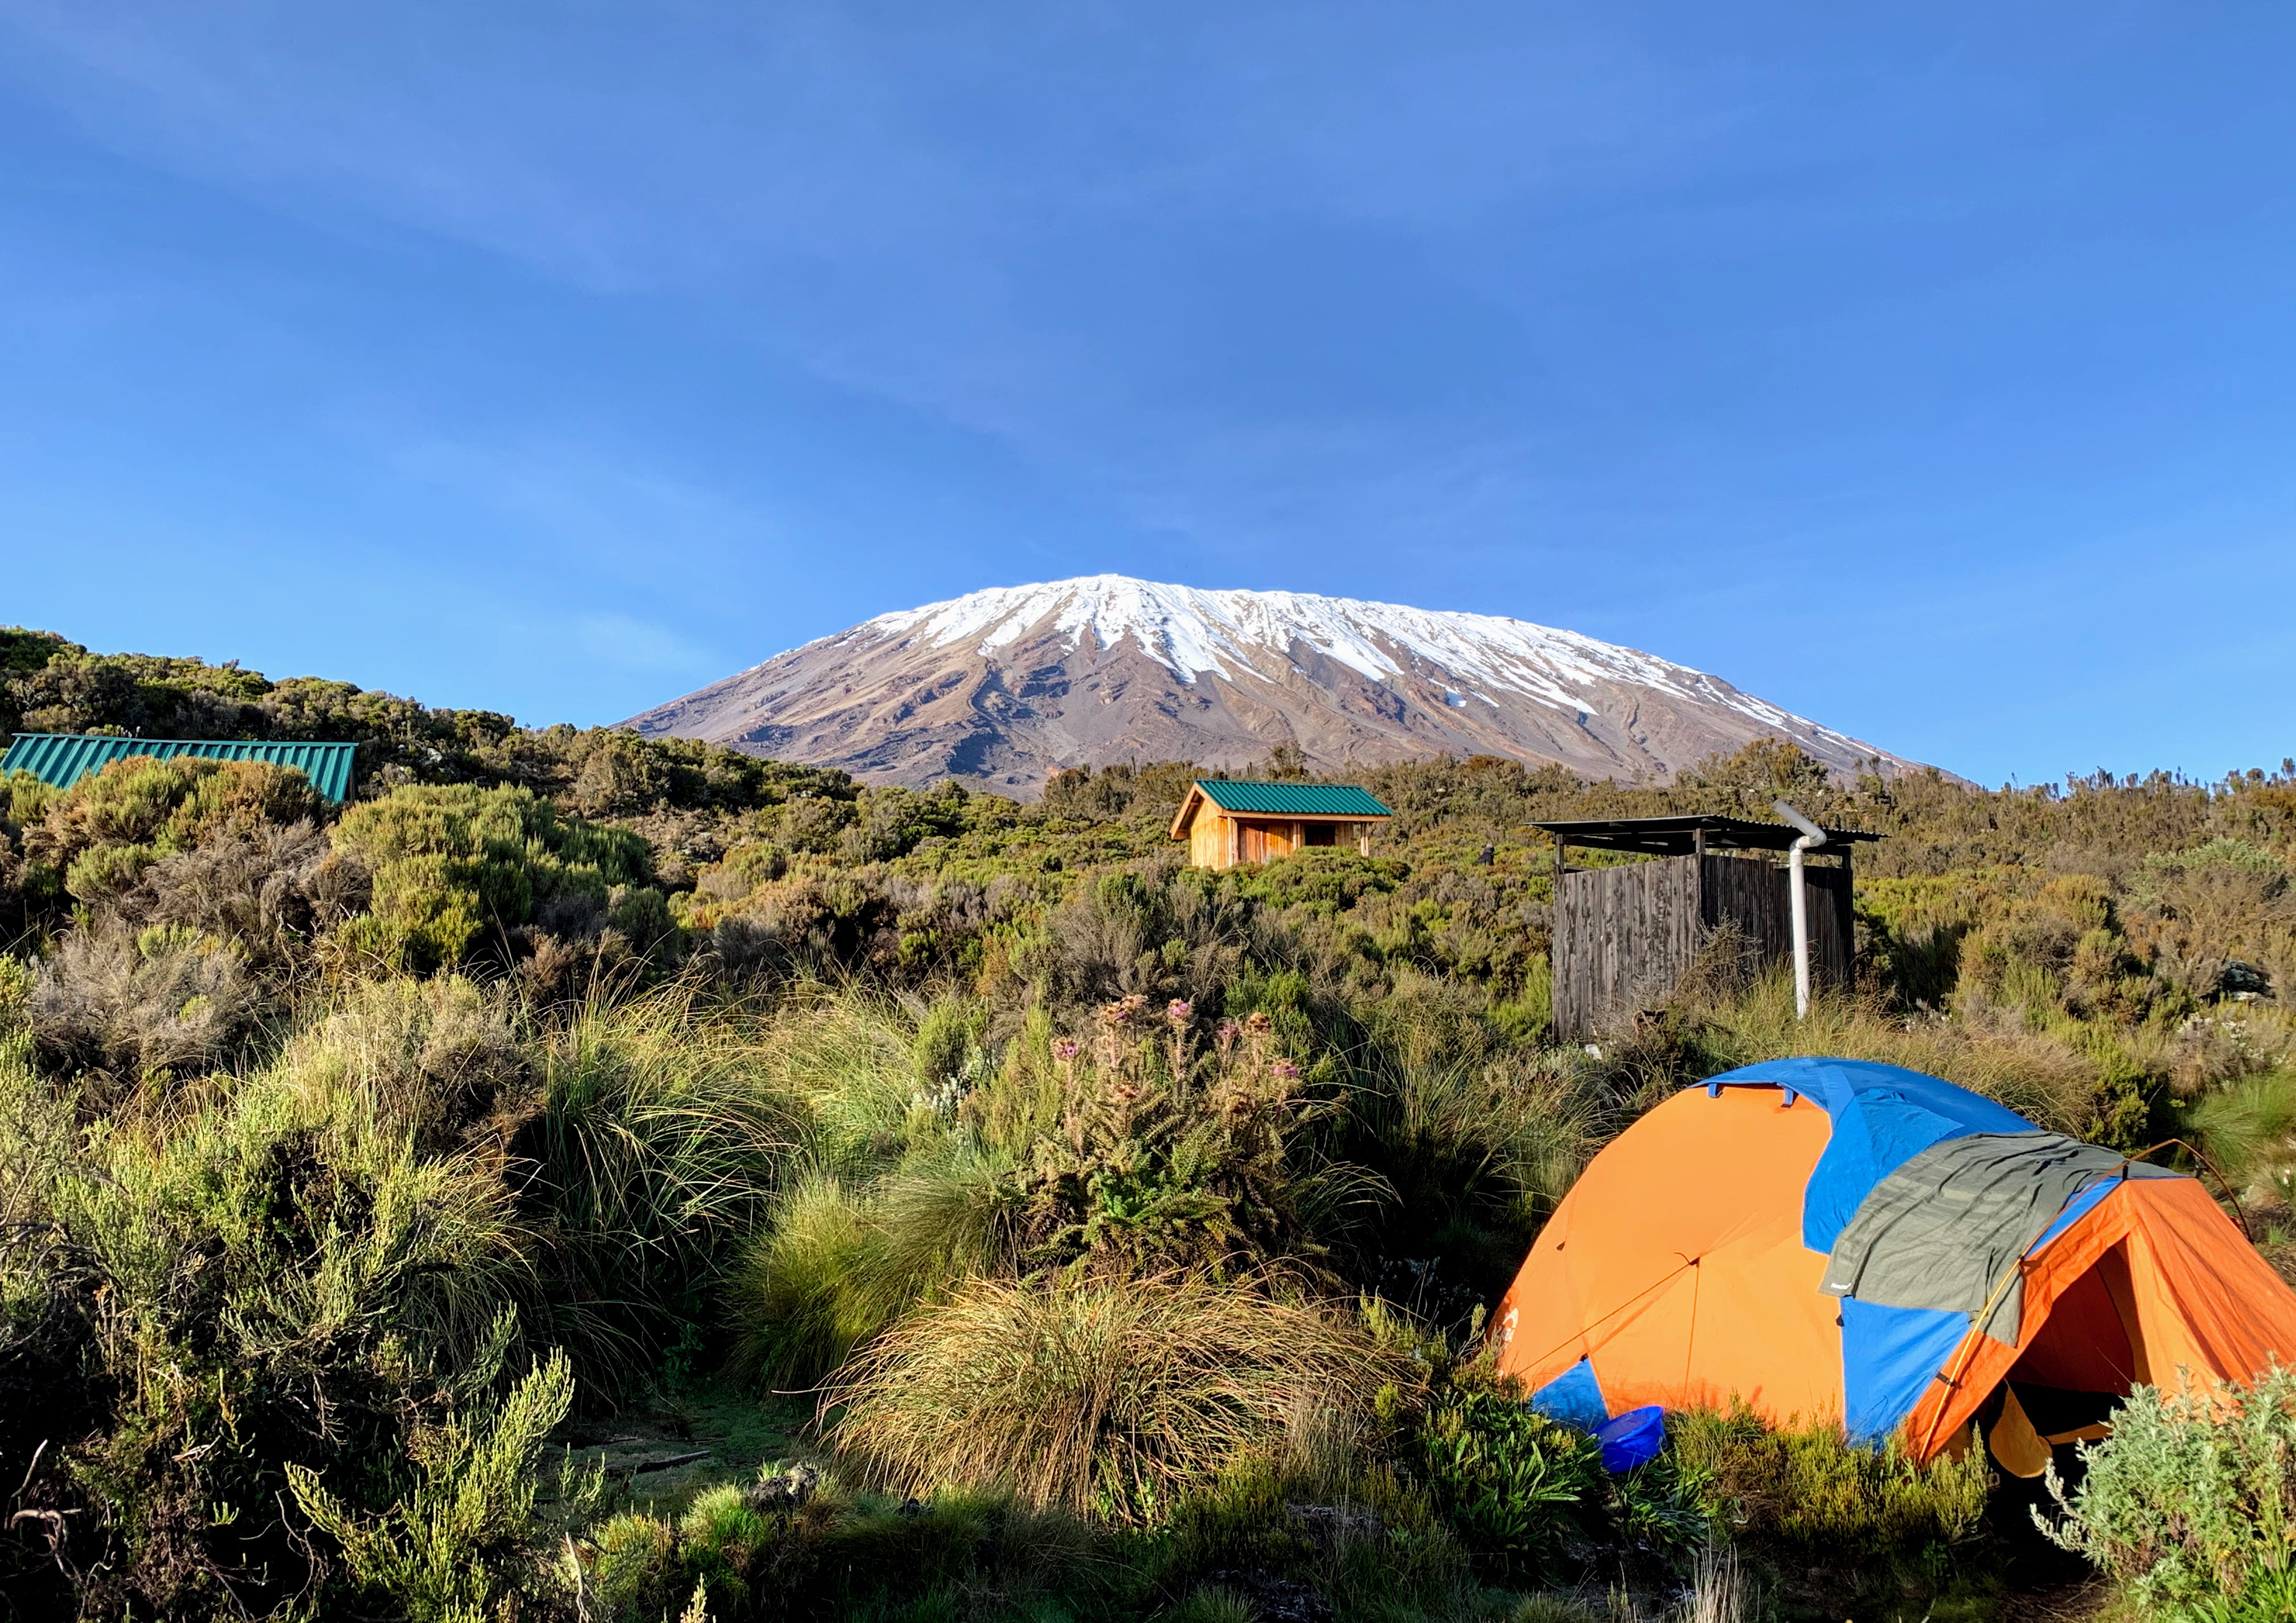
Day 1: Rongai Gate to Simba Camp
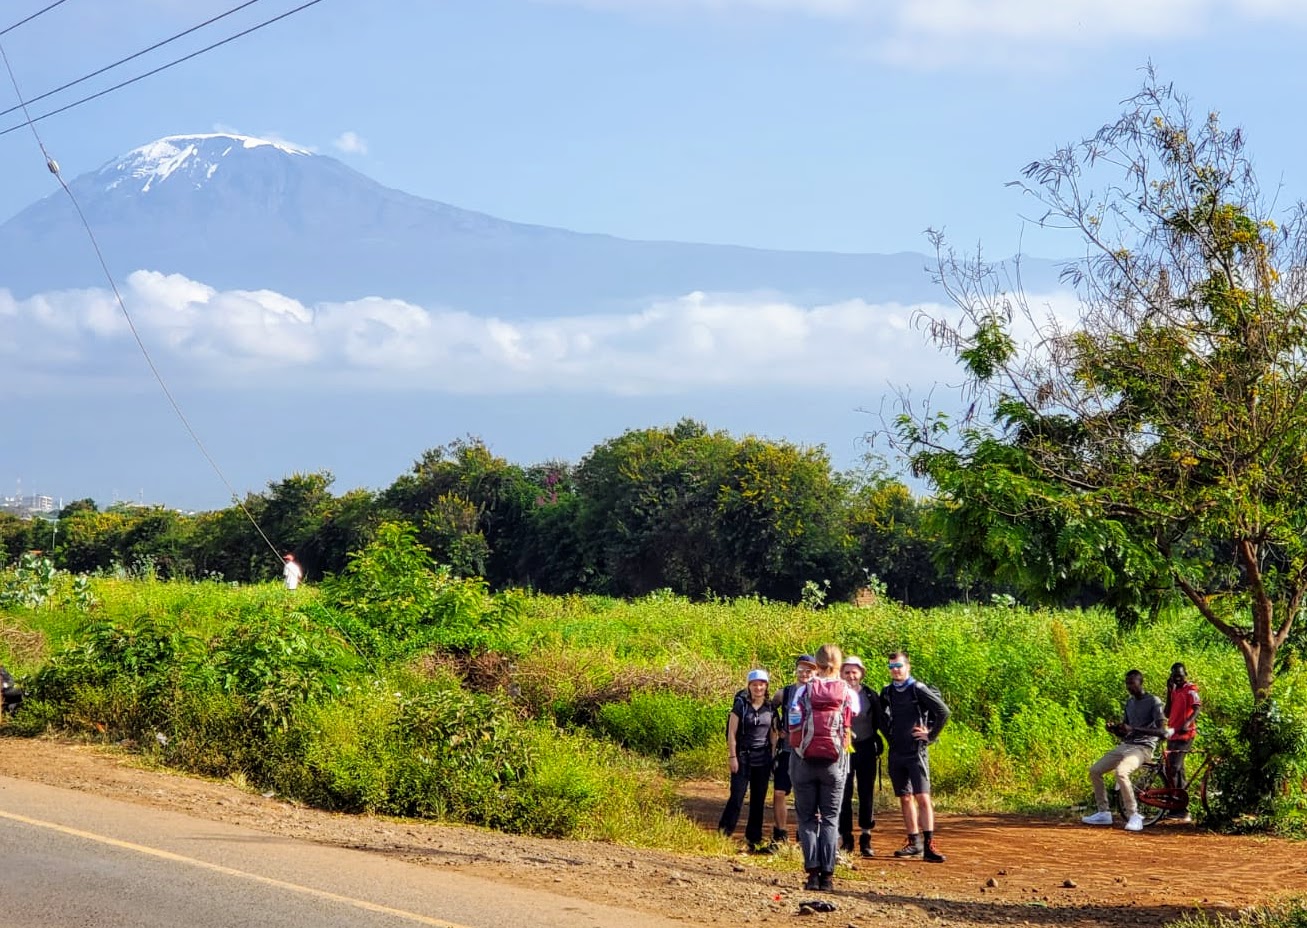
This morning our capable and friendly Zara Tours team weighed our main kit bags and helped us pack everything into the back of a minibus. The four of us piled in and drove just under three hours – with a couple of stops along the way – from Springlands Hotel to Rongai Gate. It took about 1 hour for entry formalities to be completed, while our team enjoyed some soft drinks and snacks in the roomy ‘tourist’ pavilion. The day one hike turned out to be an easy and fairly gentle walk of about 4 km – it took just about 3 hours – to Simba campsite.
It was down-right warm: shorts and t-shirt weather. At Simba Camp, we were shown to our tents where our kit bags were already in place. We did a bit of preparation for the evening, and then enjoyed some tea and popcorn. A little bit later, dinner was served: leek soup and grilled fish with several sides including potatoes, cabbage and yucca. The elevation was 2,642 meter, or 8,661 feet above sea level.
Day 2: Simba Camp to Second Cave
Today’s route ended up being a somewhat more difficult climb with long steady inclines, and a couple of rocky stretches. About two hours or so into the walk, we emerged from the forest zone into the moorland, with attractive proteas and other macchia-type vegetation. We walked from 08:30 a.m. to about 1:45 p.m., with several rest stops along the way. En route, we passed by First Cave and then reached our camp site at Second Cave.
After lunch and a short rest, we did another hike of about 1 hour up a ridge just above the cave. Back around 4:30 for popcorn and tea. Dinner was at 6:30 p.m. On the day, we experienced an elevation change from 8,661 feet to 11,450 feet.
That night, the temperatures dropped and it turned bitterly cold. My 20-degree rated sleeping bag – even with a liner – was just not up to the task and I was cold all night, to some extent. For Kilimanjaro, it is imperative to take a high quality sleeping bag which can protect you at sub-zero temperatures.

Just as importantly, you need several layers for sleeping comfortably, starting with a thermal base layer. The nights at Second Camp, at Kikilelwa and definitely at Mawenzi Tarn, were freezing to the point where we had to fill some of the Nalgene bottles with hot water to keep our feet warm. Even that was not sufficient.
Day 3: Second Cave to Kikilewa
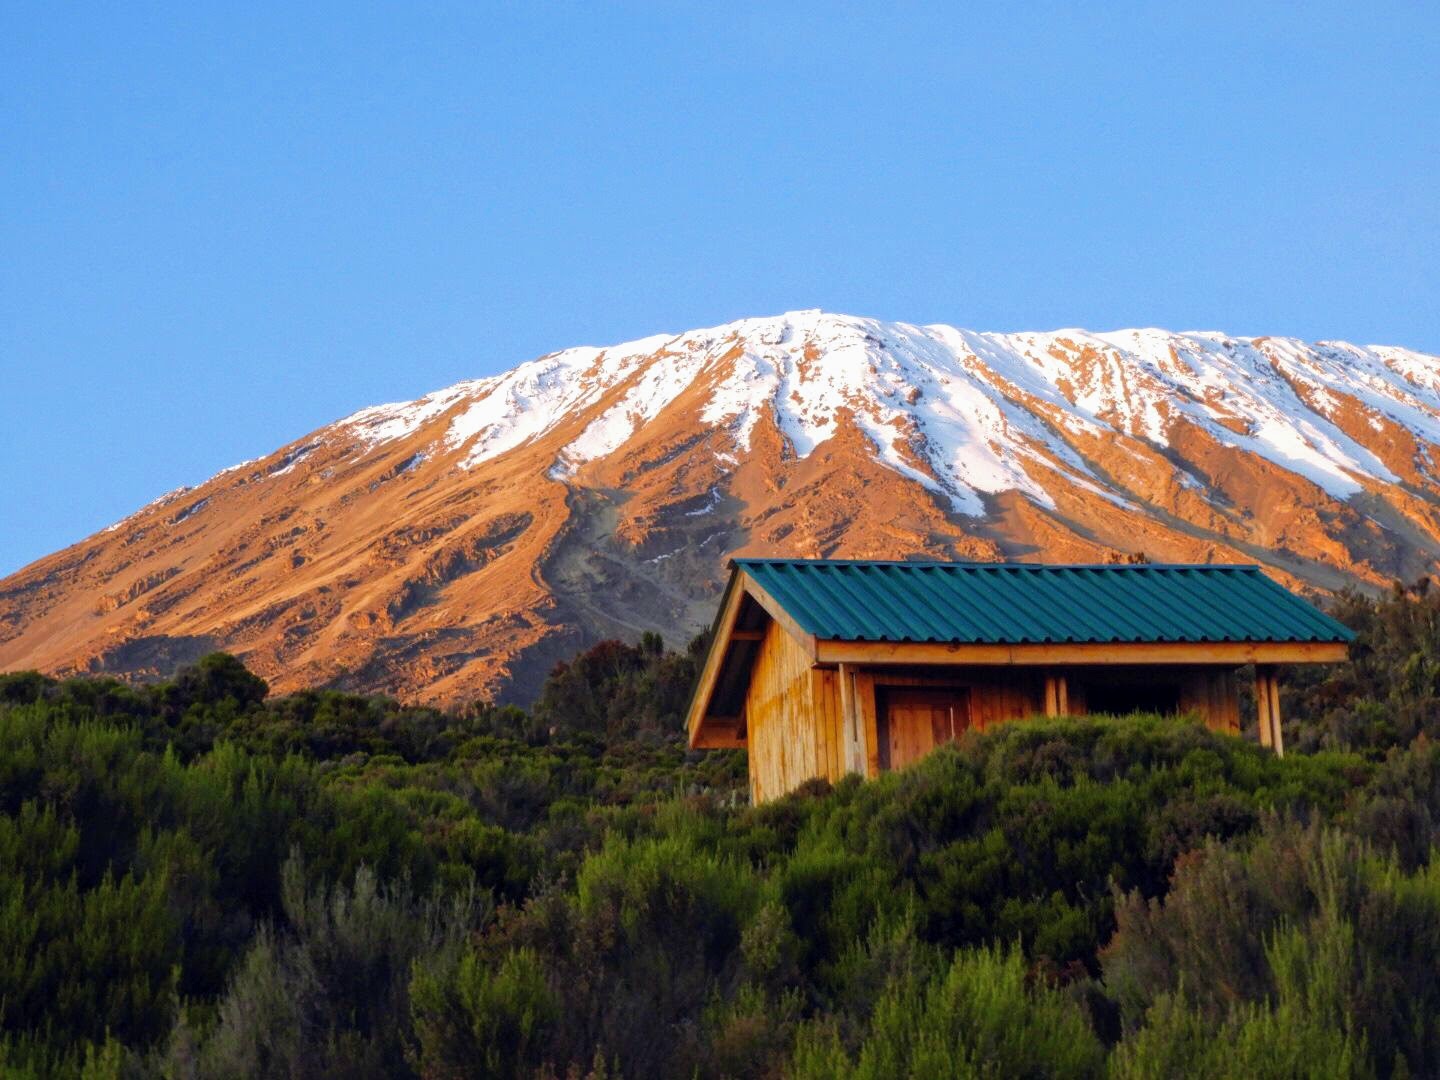
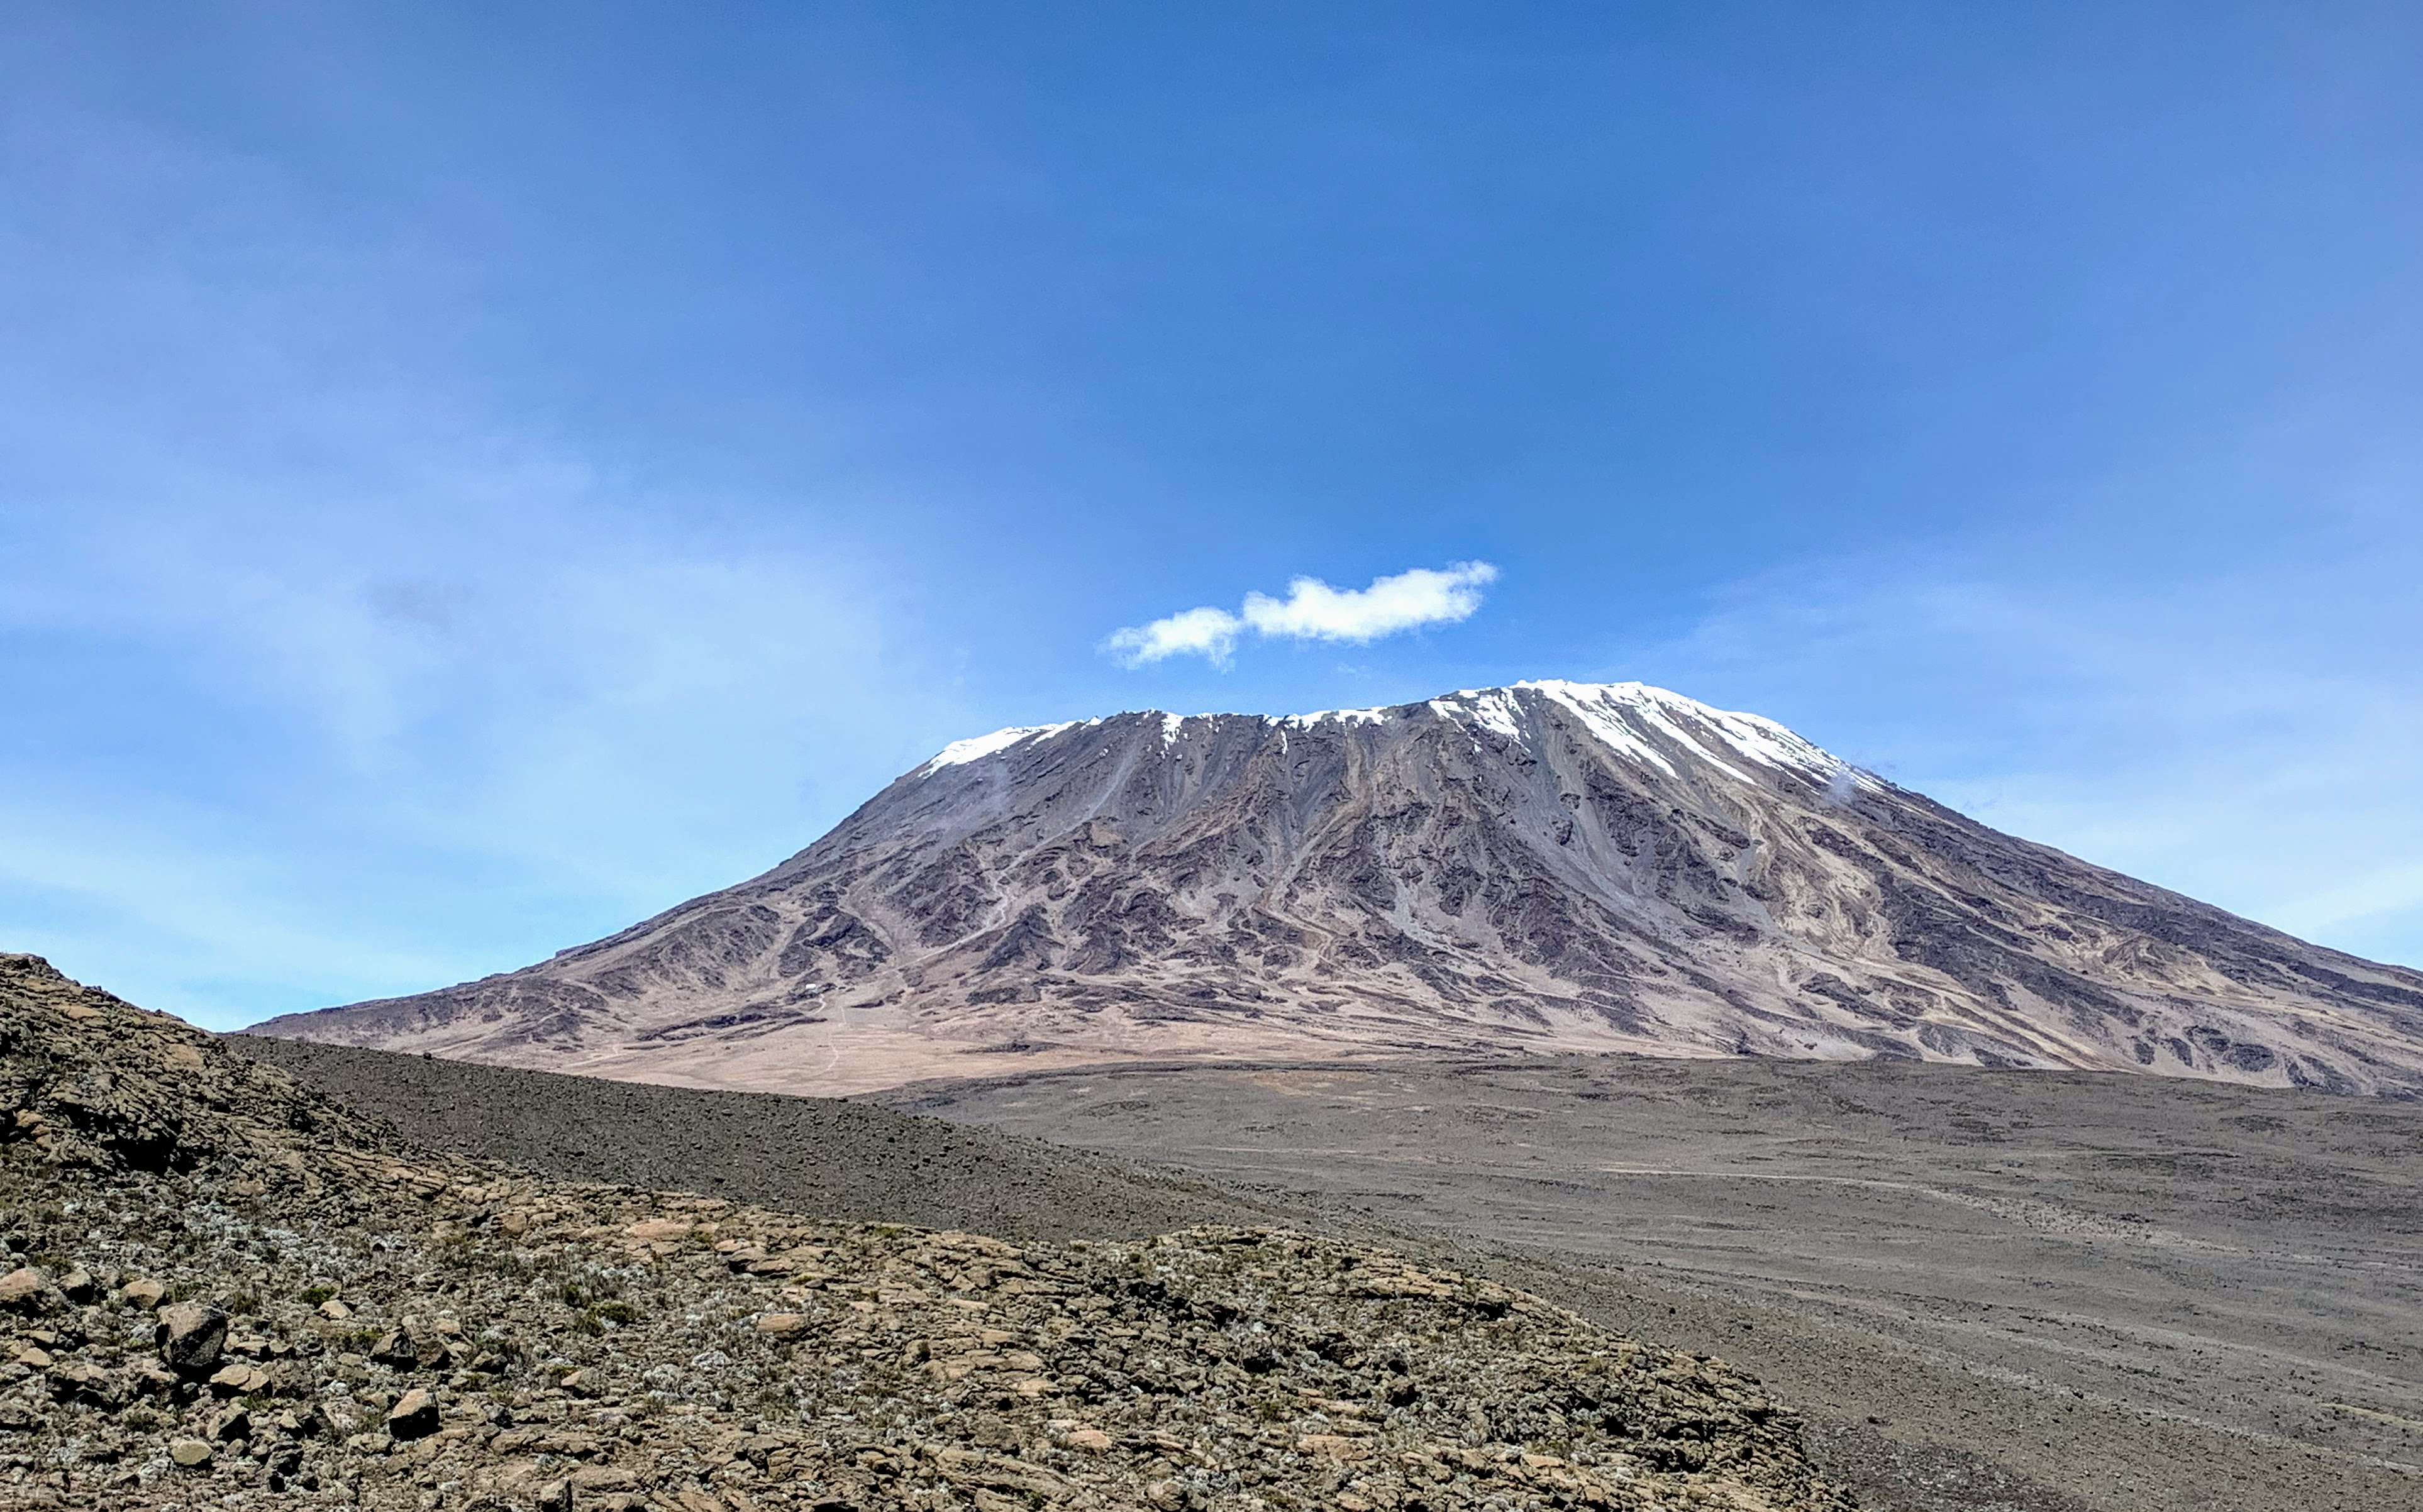
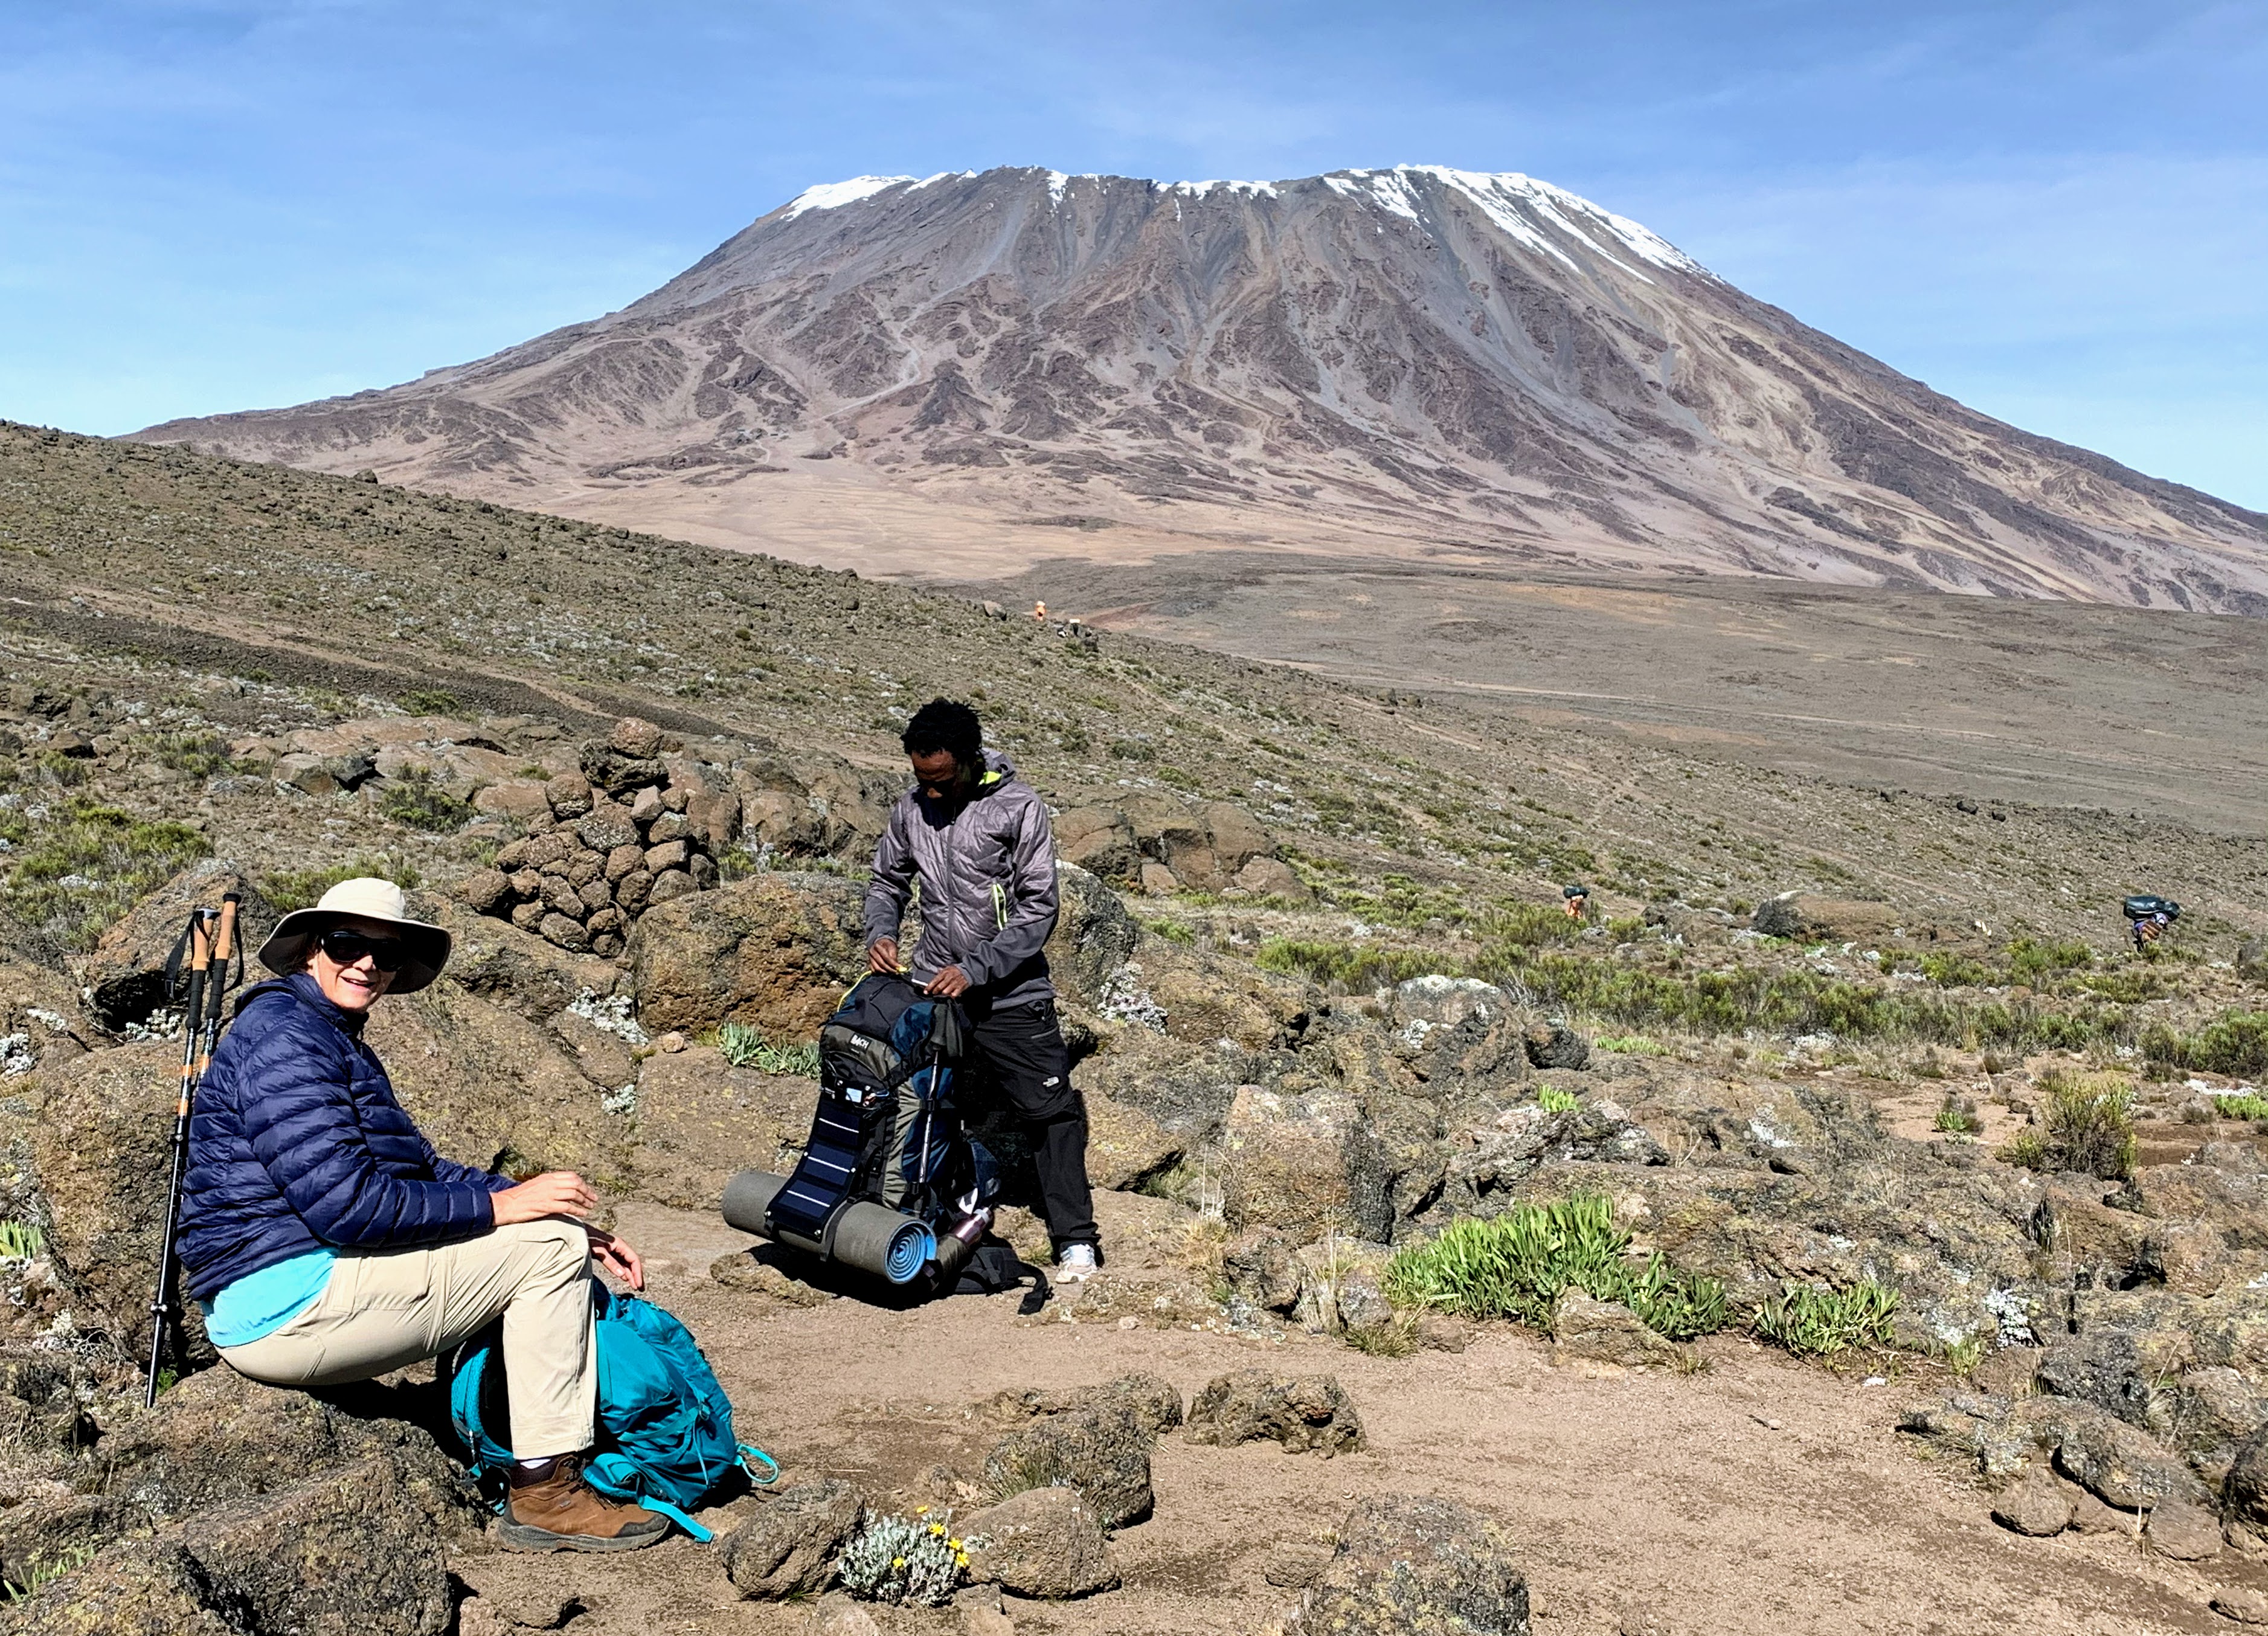
Today we spent 3 hours traversing a distance of about 8 kilometers (5 miles). It was pretty terrain filled with lots of hills, streams, and wildflowers and almost all the time, we could see the lower stretches of Kilimanjaro and its snow-covered peak on our right and Mawenzi to our left. Patches of fog occasionally shrouded Mawenzi, and bright sunlight lit up the snow on Kilimanjaro.
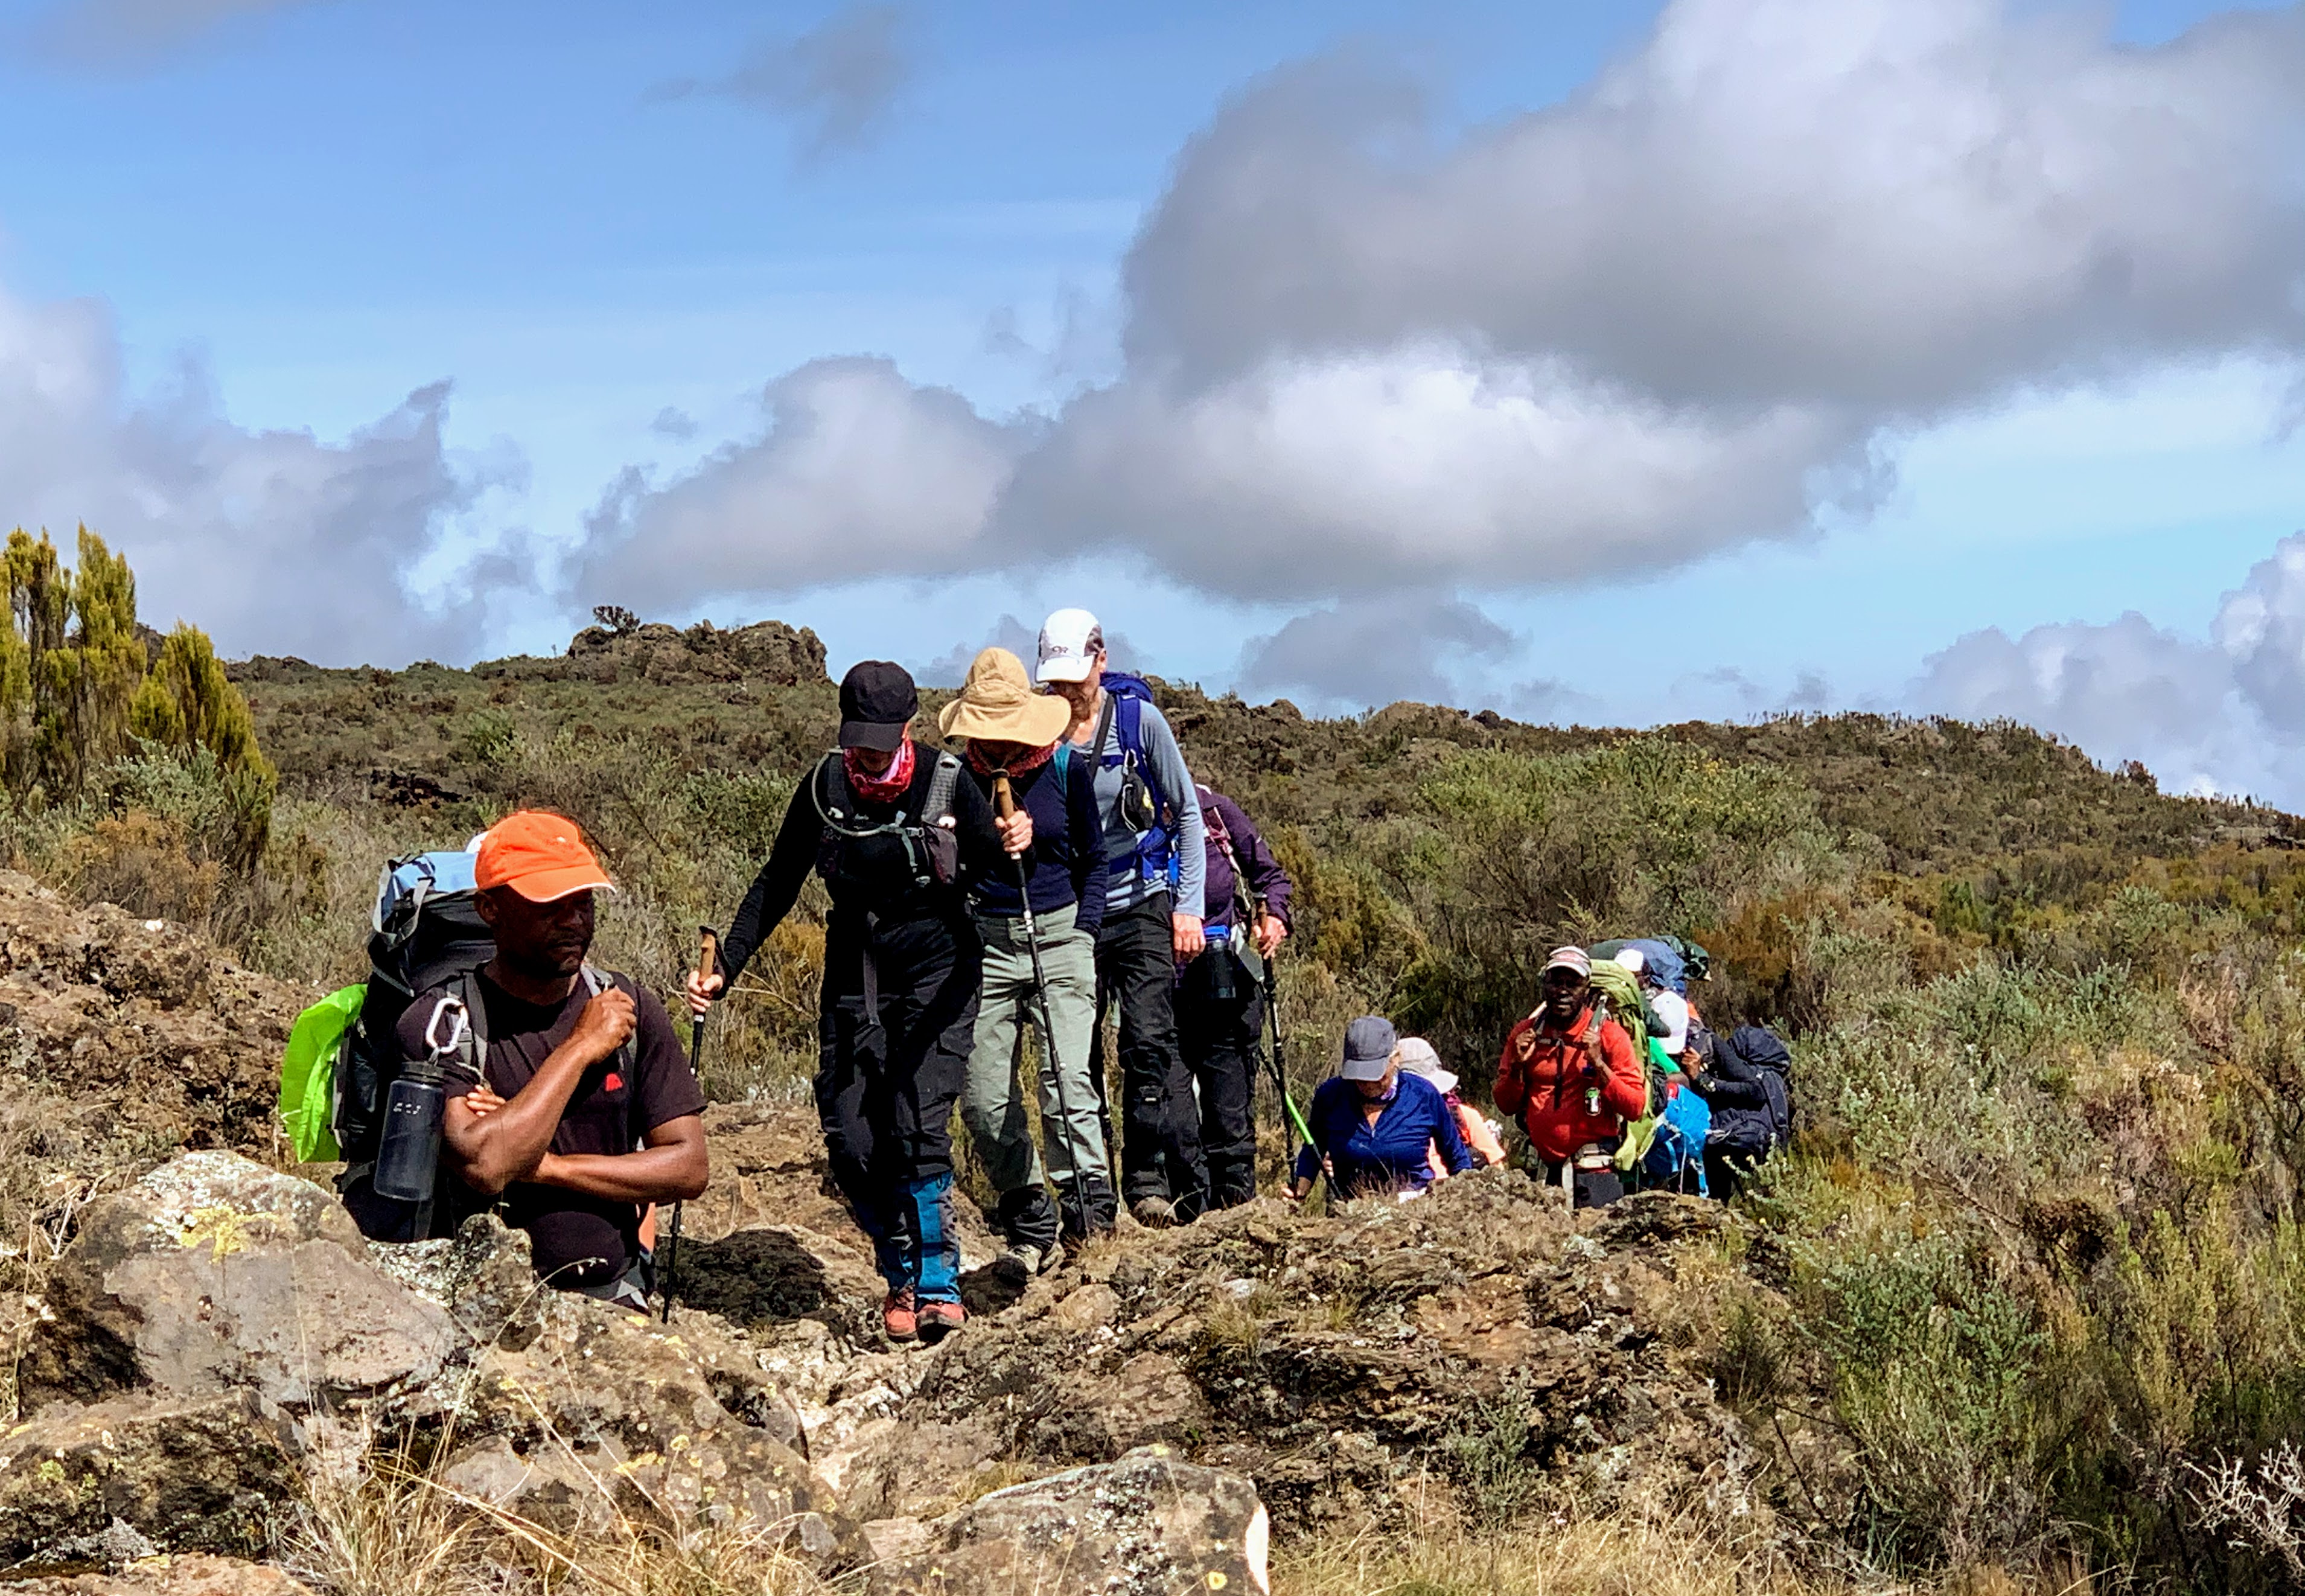
With the exception of a few rather steep and rocky uphill stretches, overall it was another easy day. We only gained about 600 feet on the day, climbing from 11,320 feet to 11,900 feet. Lunch on this day was a potato stew and dinner was rice and ugali (local version of polenta) with canned baked beans and chicken with gravy. We also enjoyed some small deep-fried ‘vetkoeks’ or fritters. All the hiking makes a person hungry!
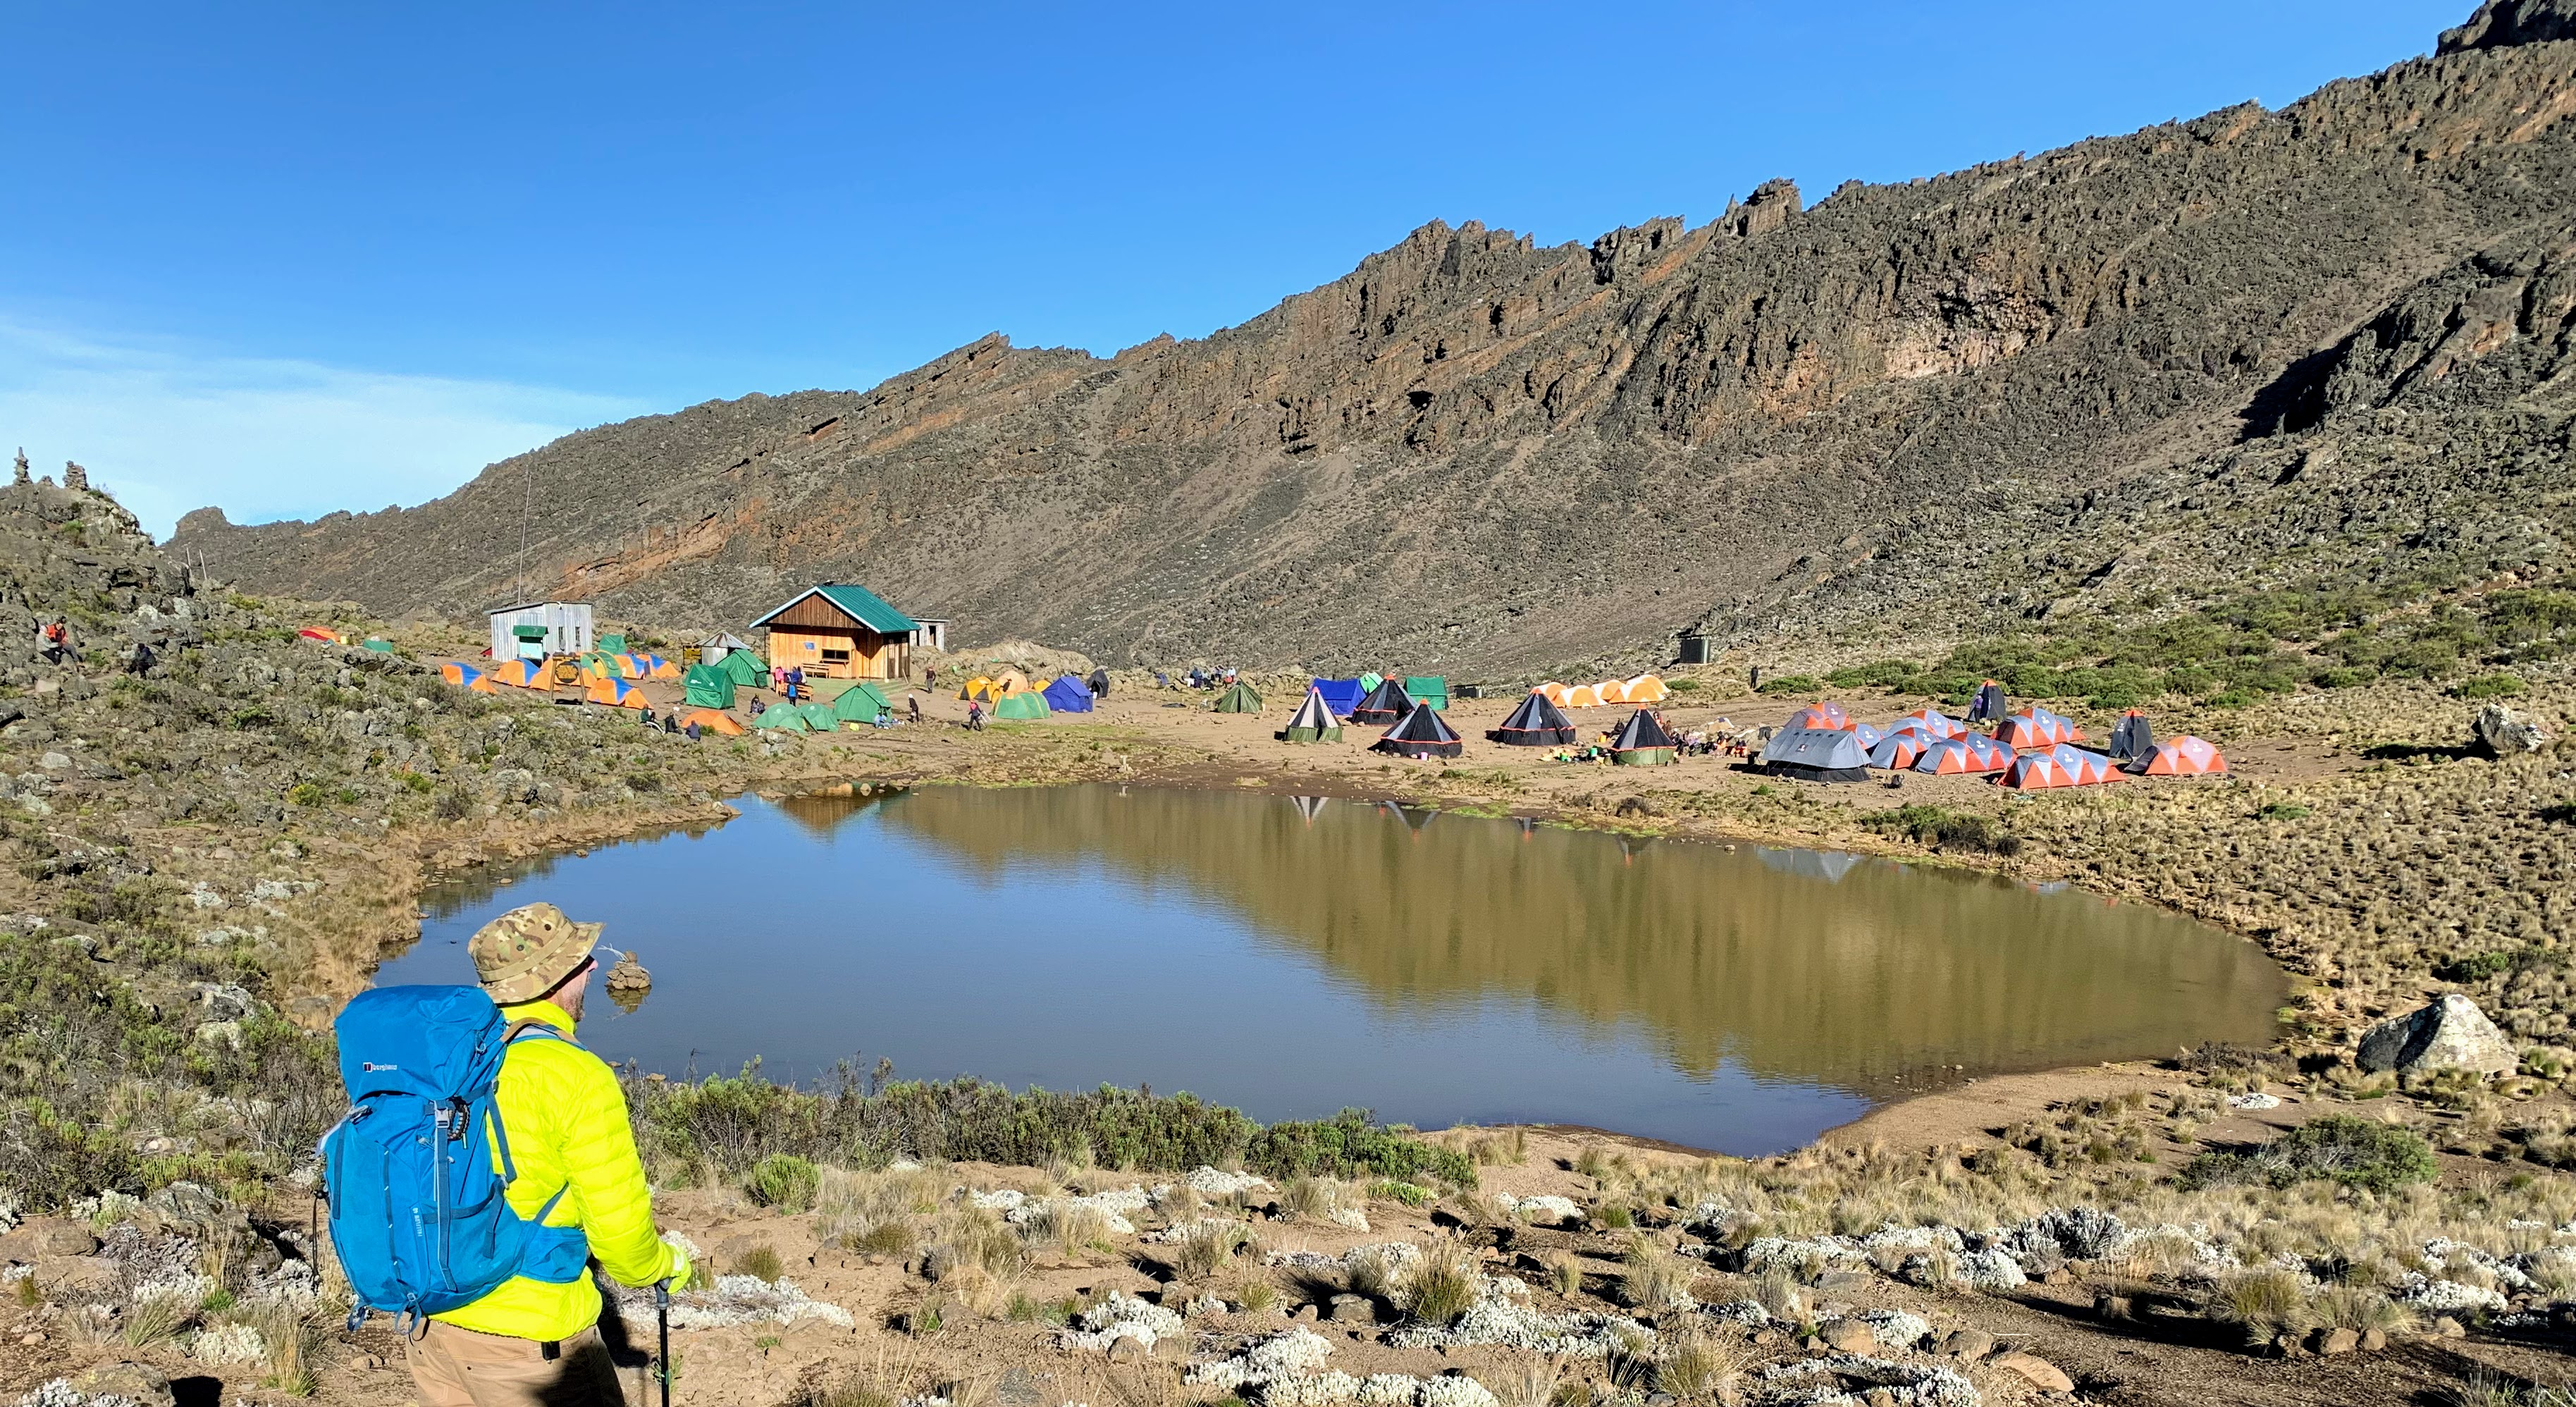
Day 4: Kikilewa to Mawenzi Tarn
At Kikilewa, it was not quite as cold as the previous night due to some cloud cover. After somewhat intermittent yet sufficient sleep (around 6 hours total), I was up at 6:00 am., with some water for washing and hot water for tea, delivered right to the tent opening, by our ever-efficient and friendly waiter. Breakfast was at 7:30 a.m.
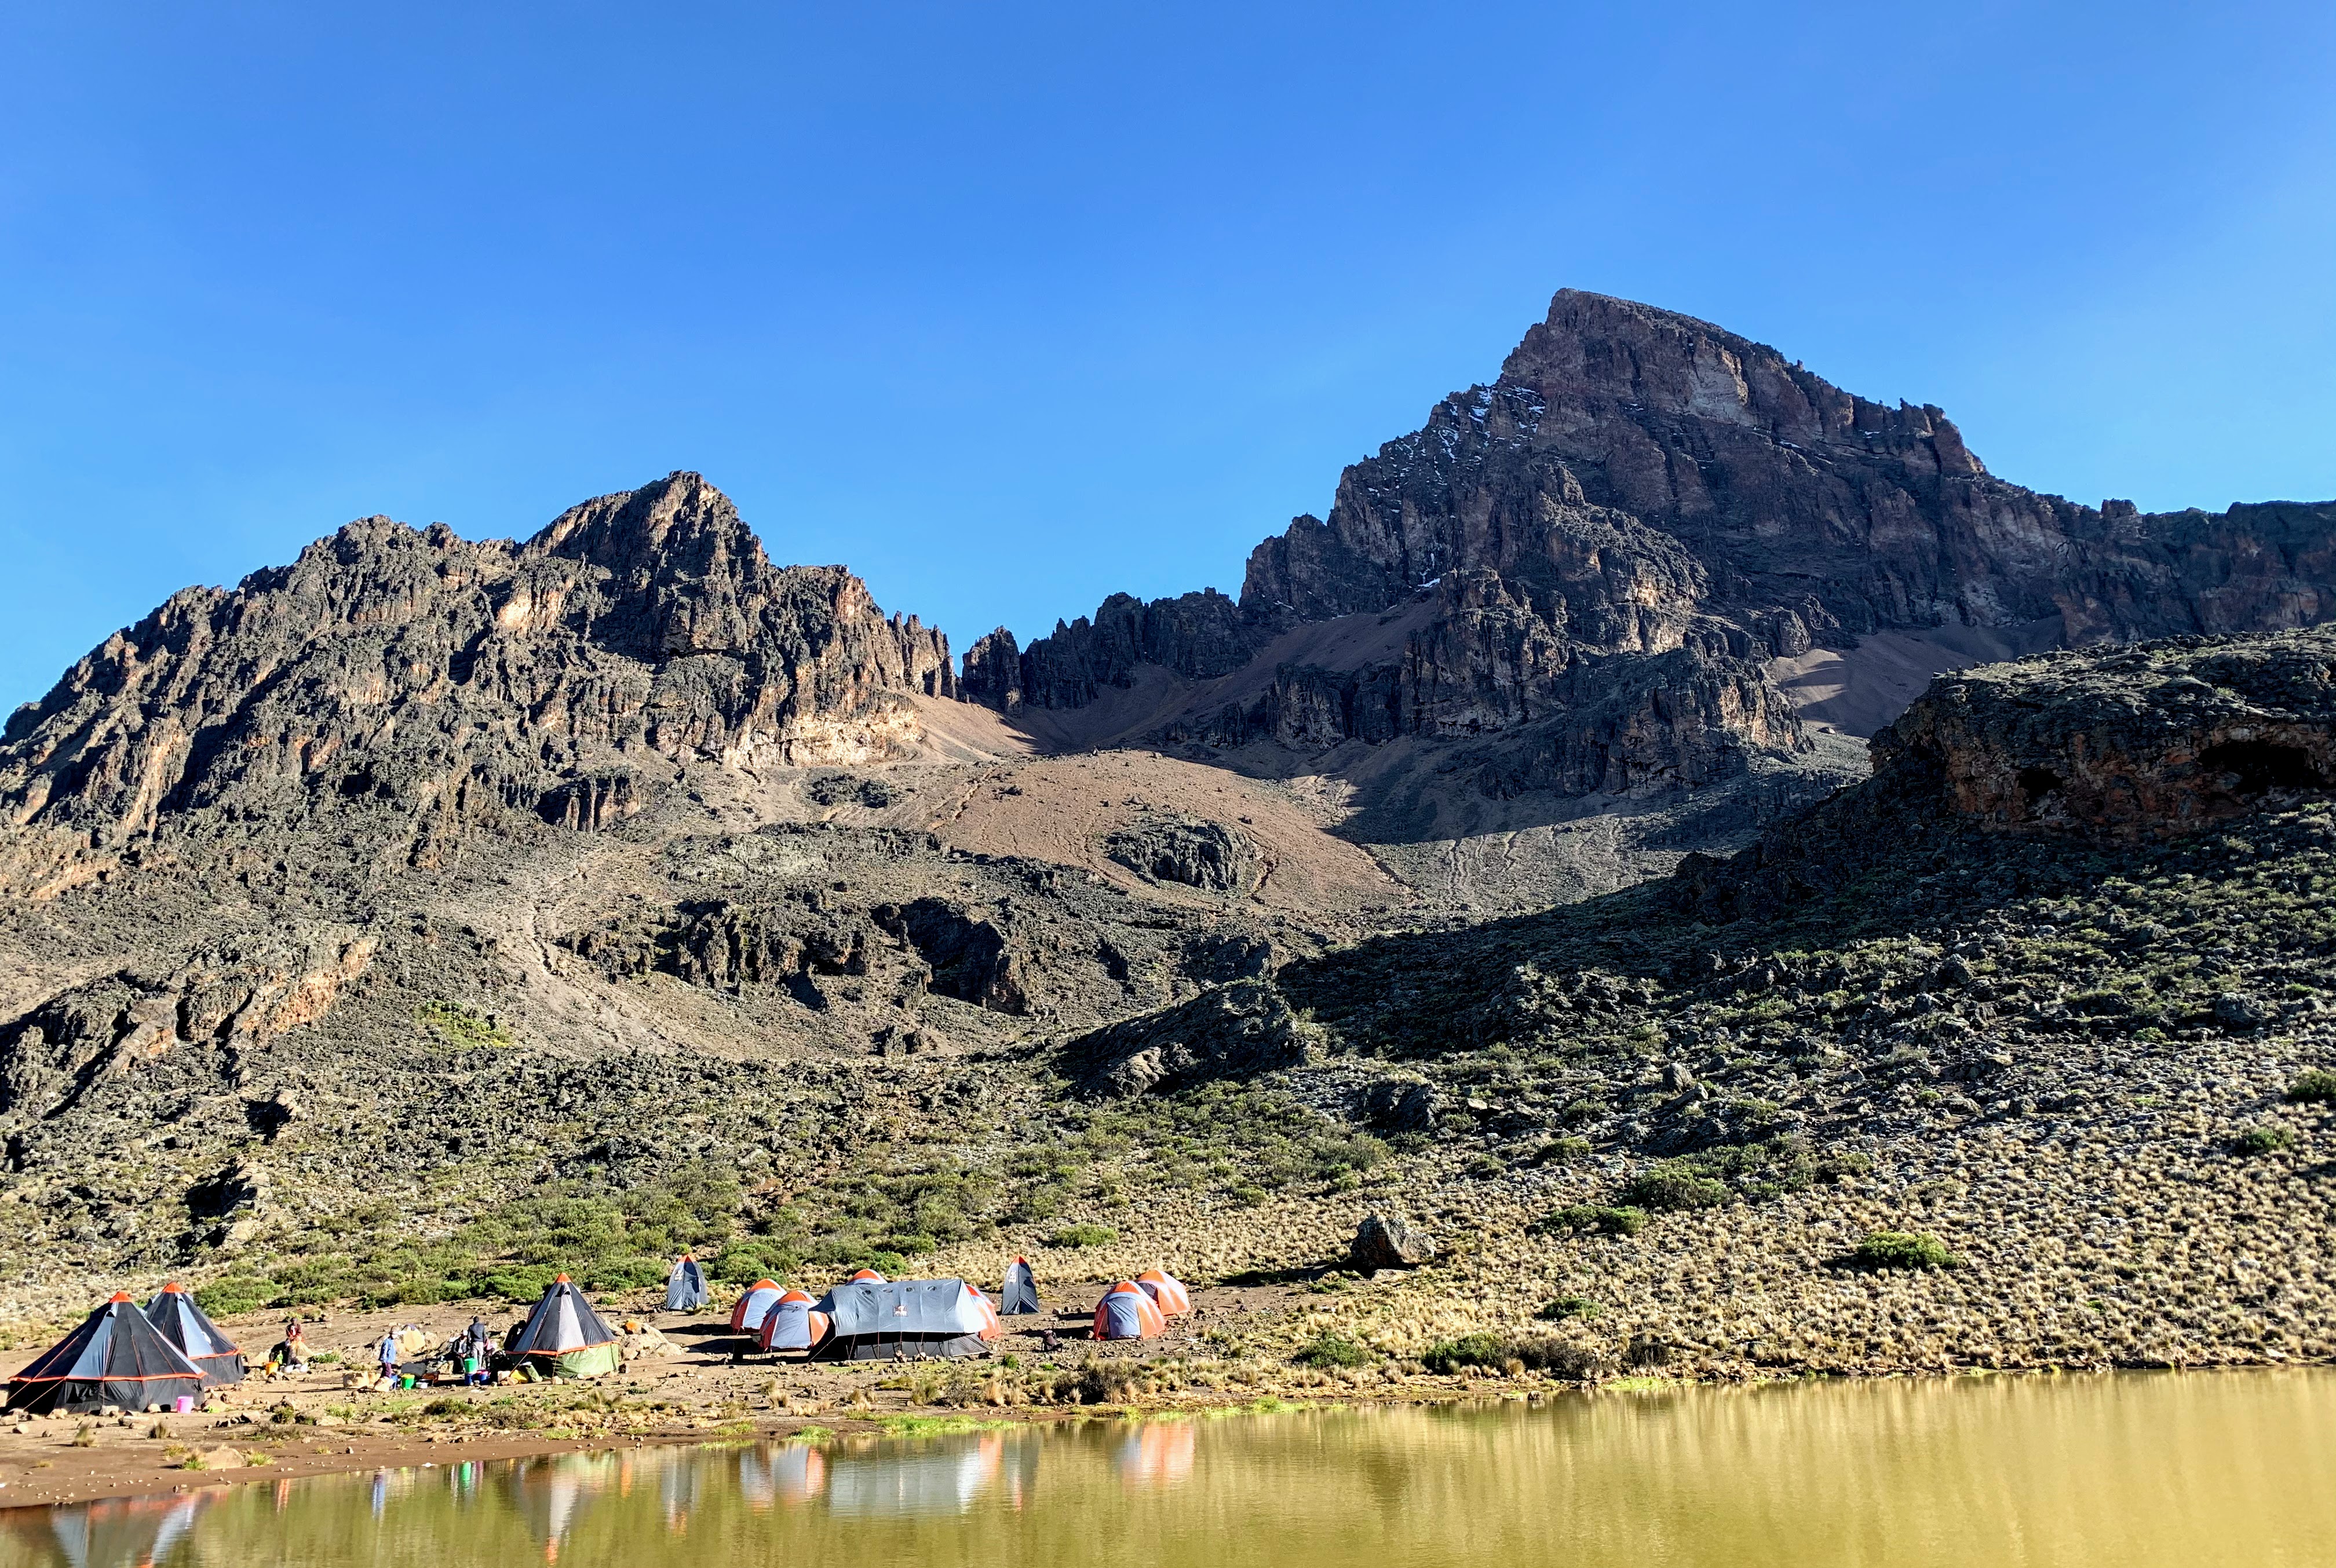
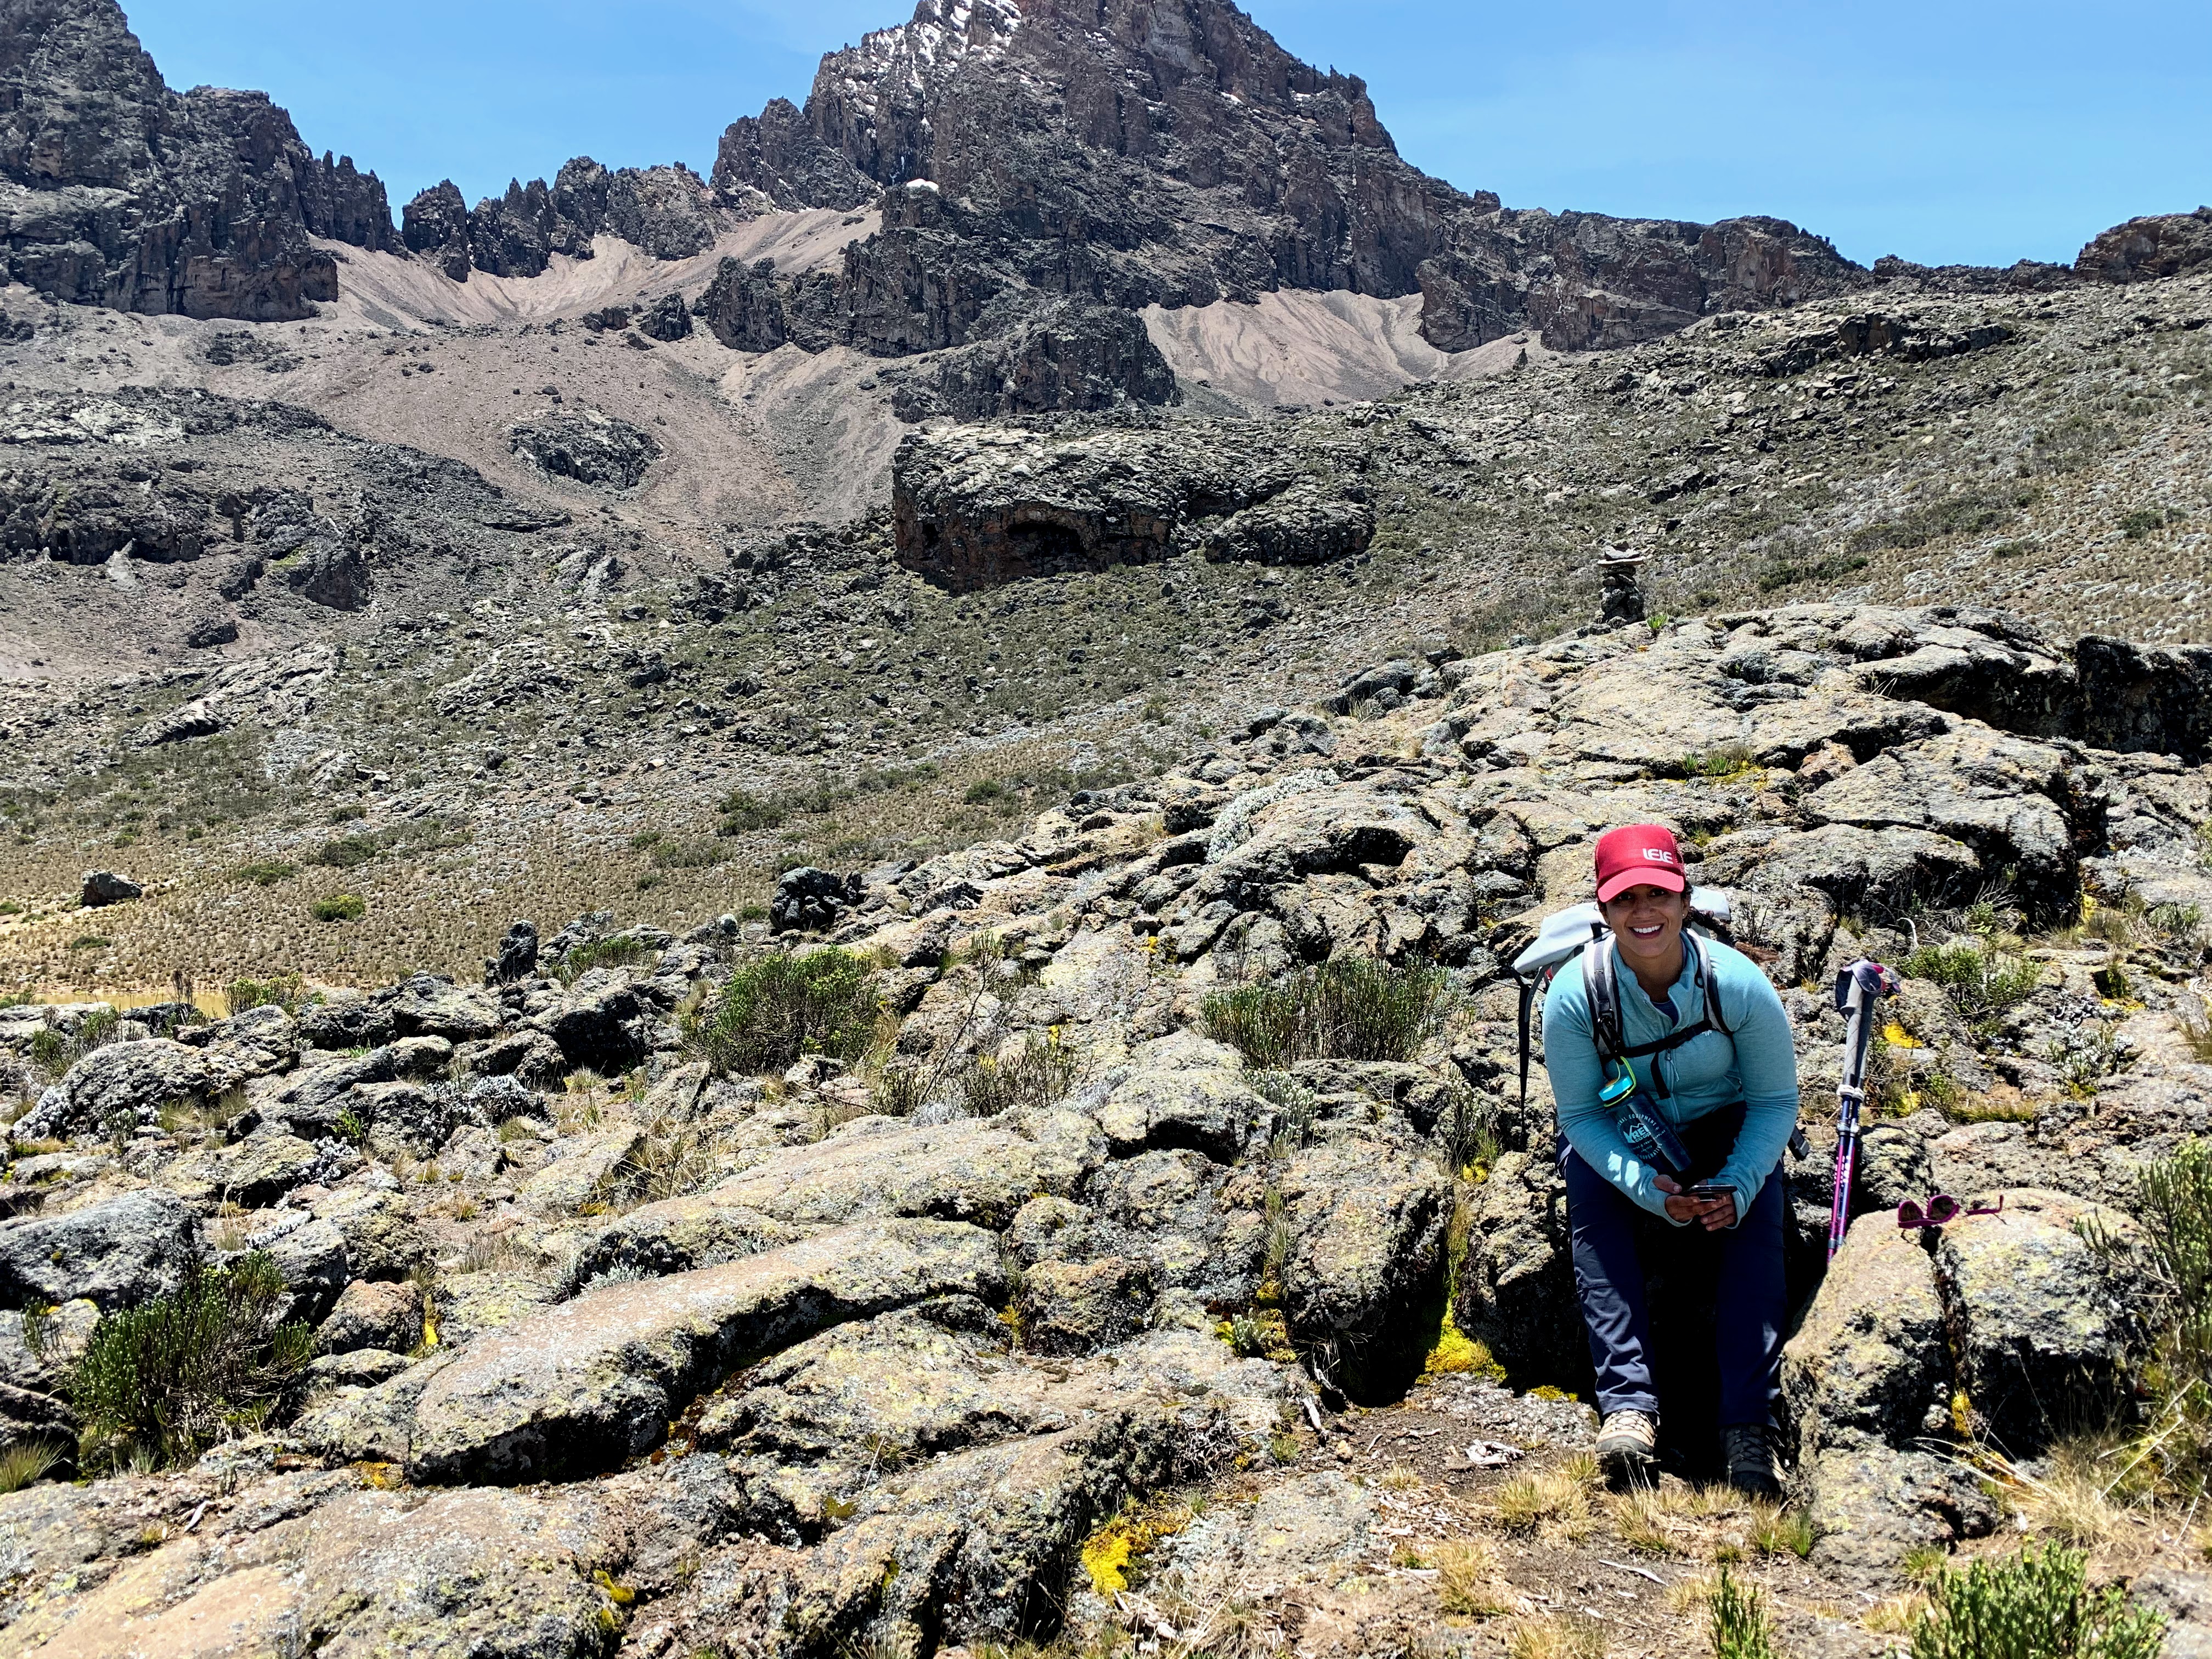
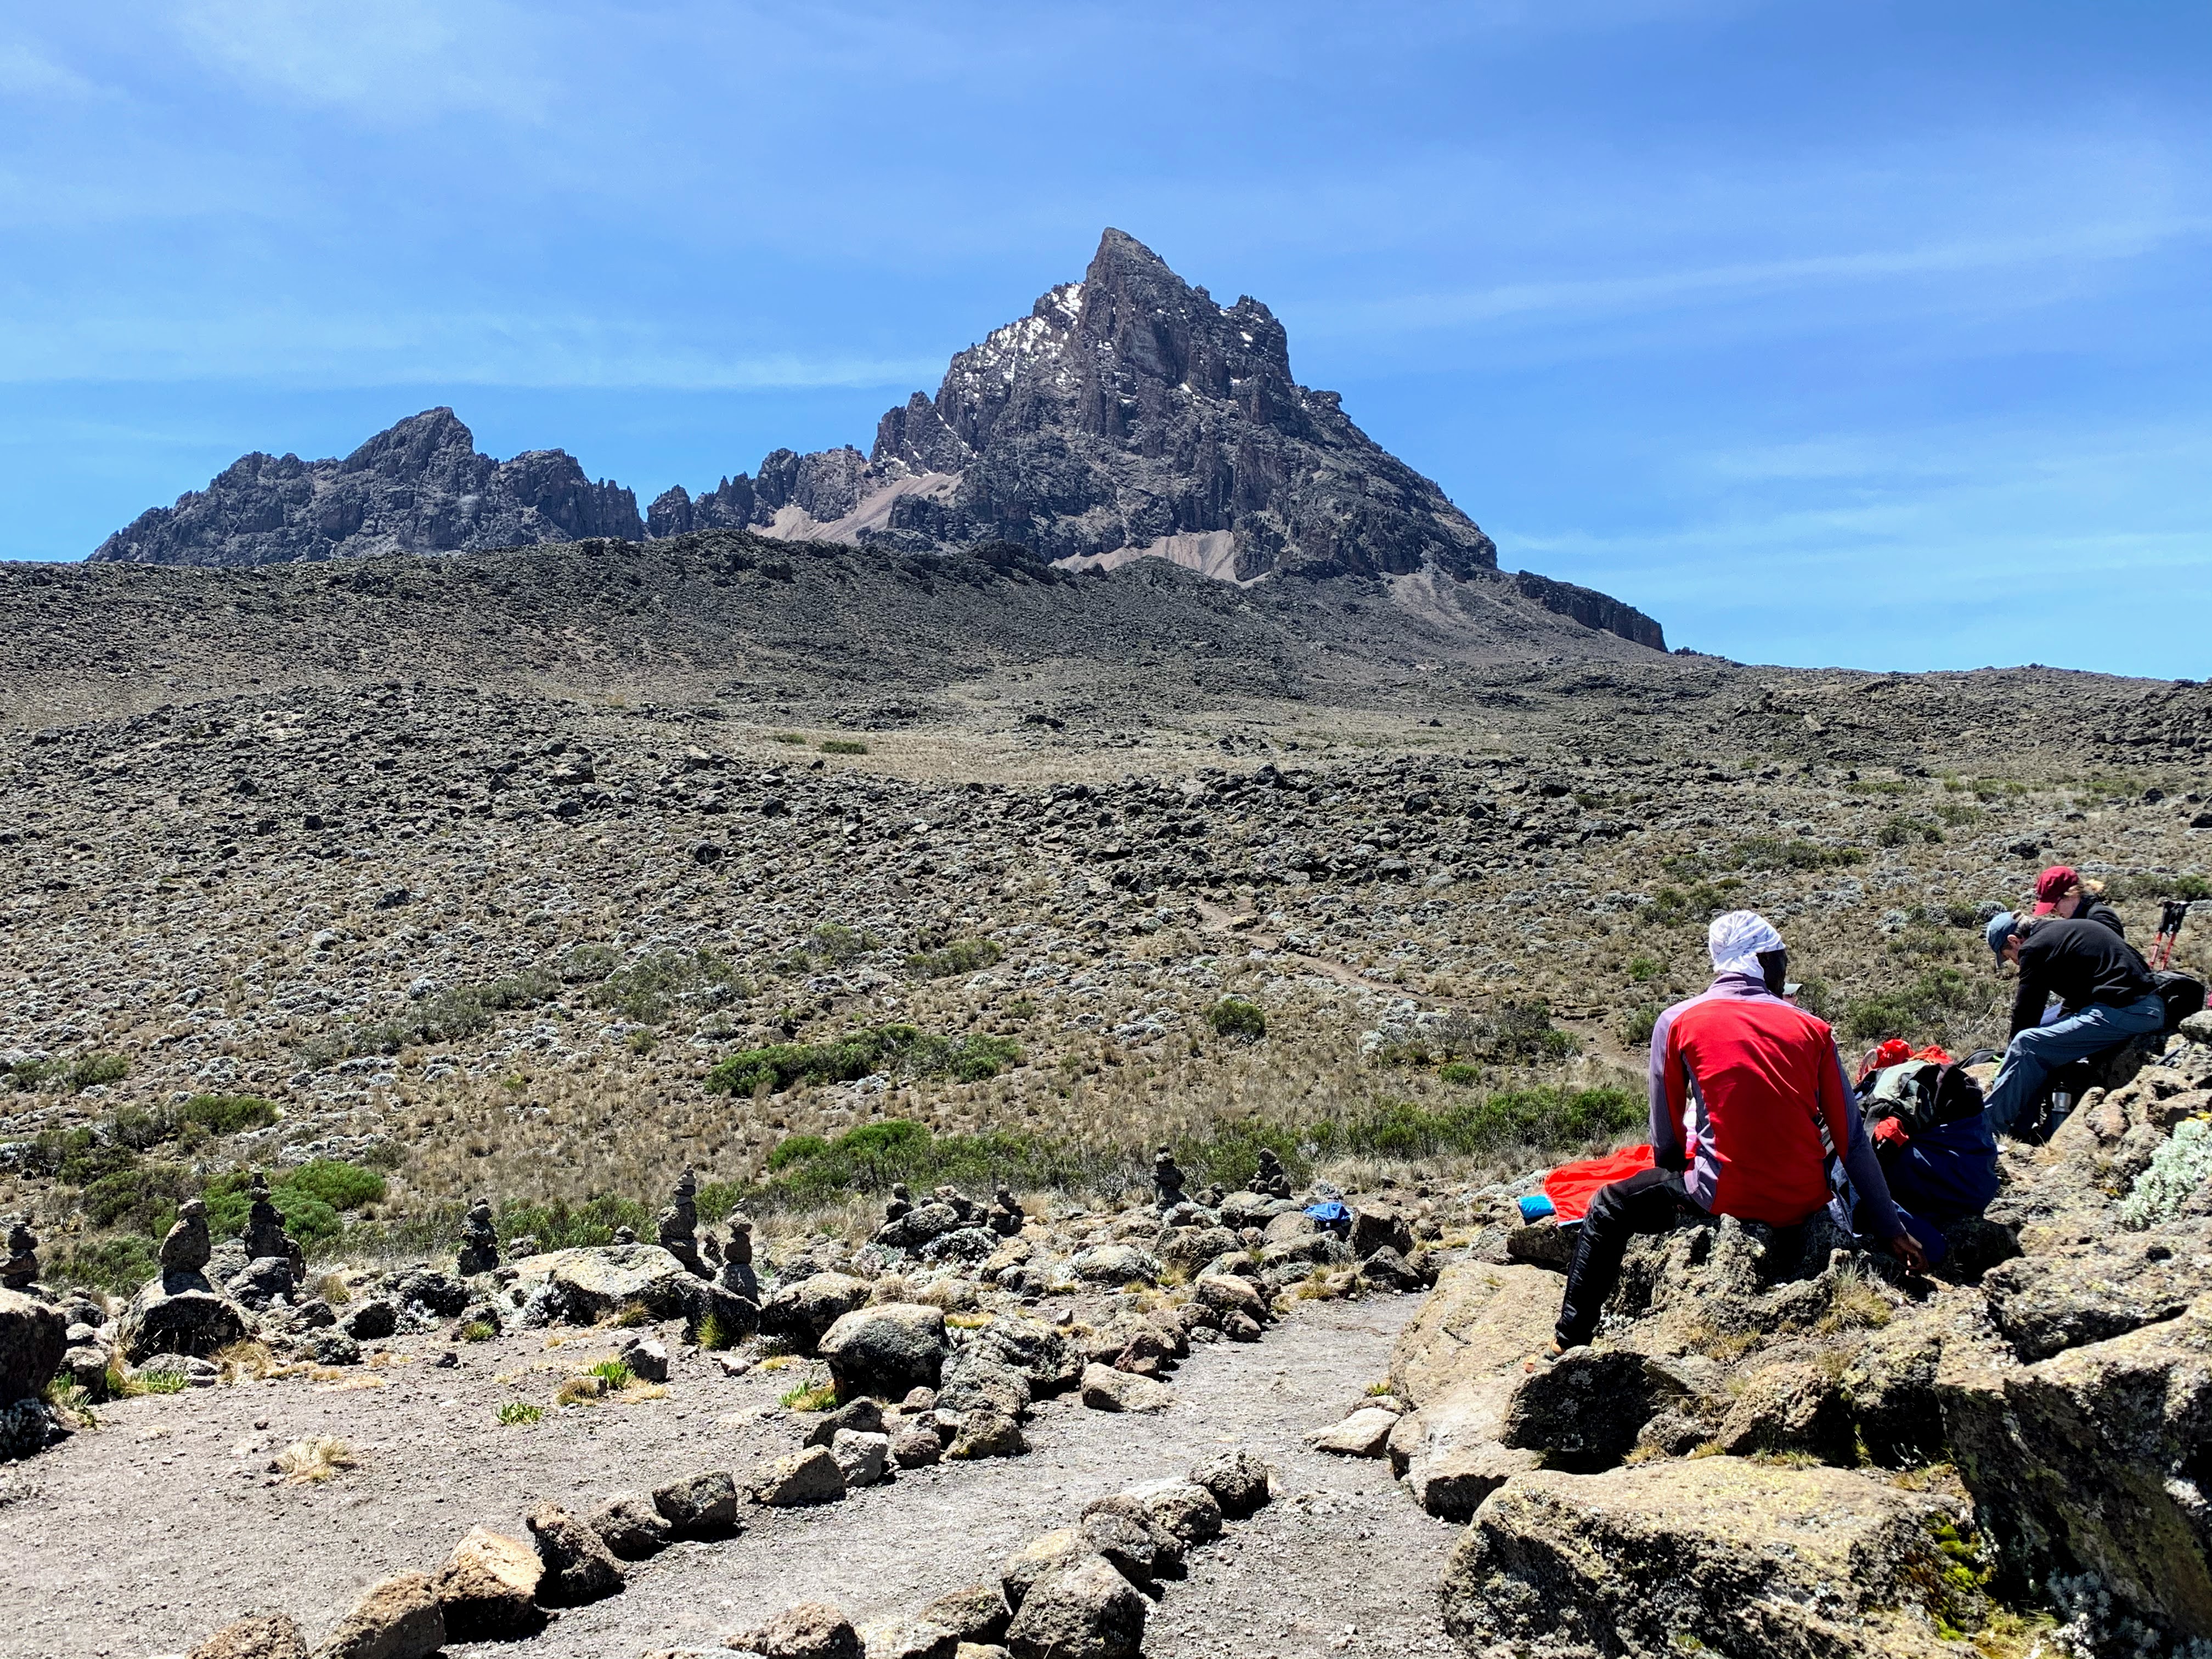
Shortly after, we left the camp behind, with the trail going up steeply in the direction of Mawenzi. The scenery was simply spectacular with Kilimanjaro to the right, Mawenzi straight ahead and the valley towards the left. It was a steady climb all the way from 11,800 feet, finishing up at 14,100 ft. The hike, which was the most challenging of the trek up to that point, took about 4 hours total.
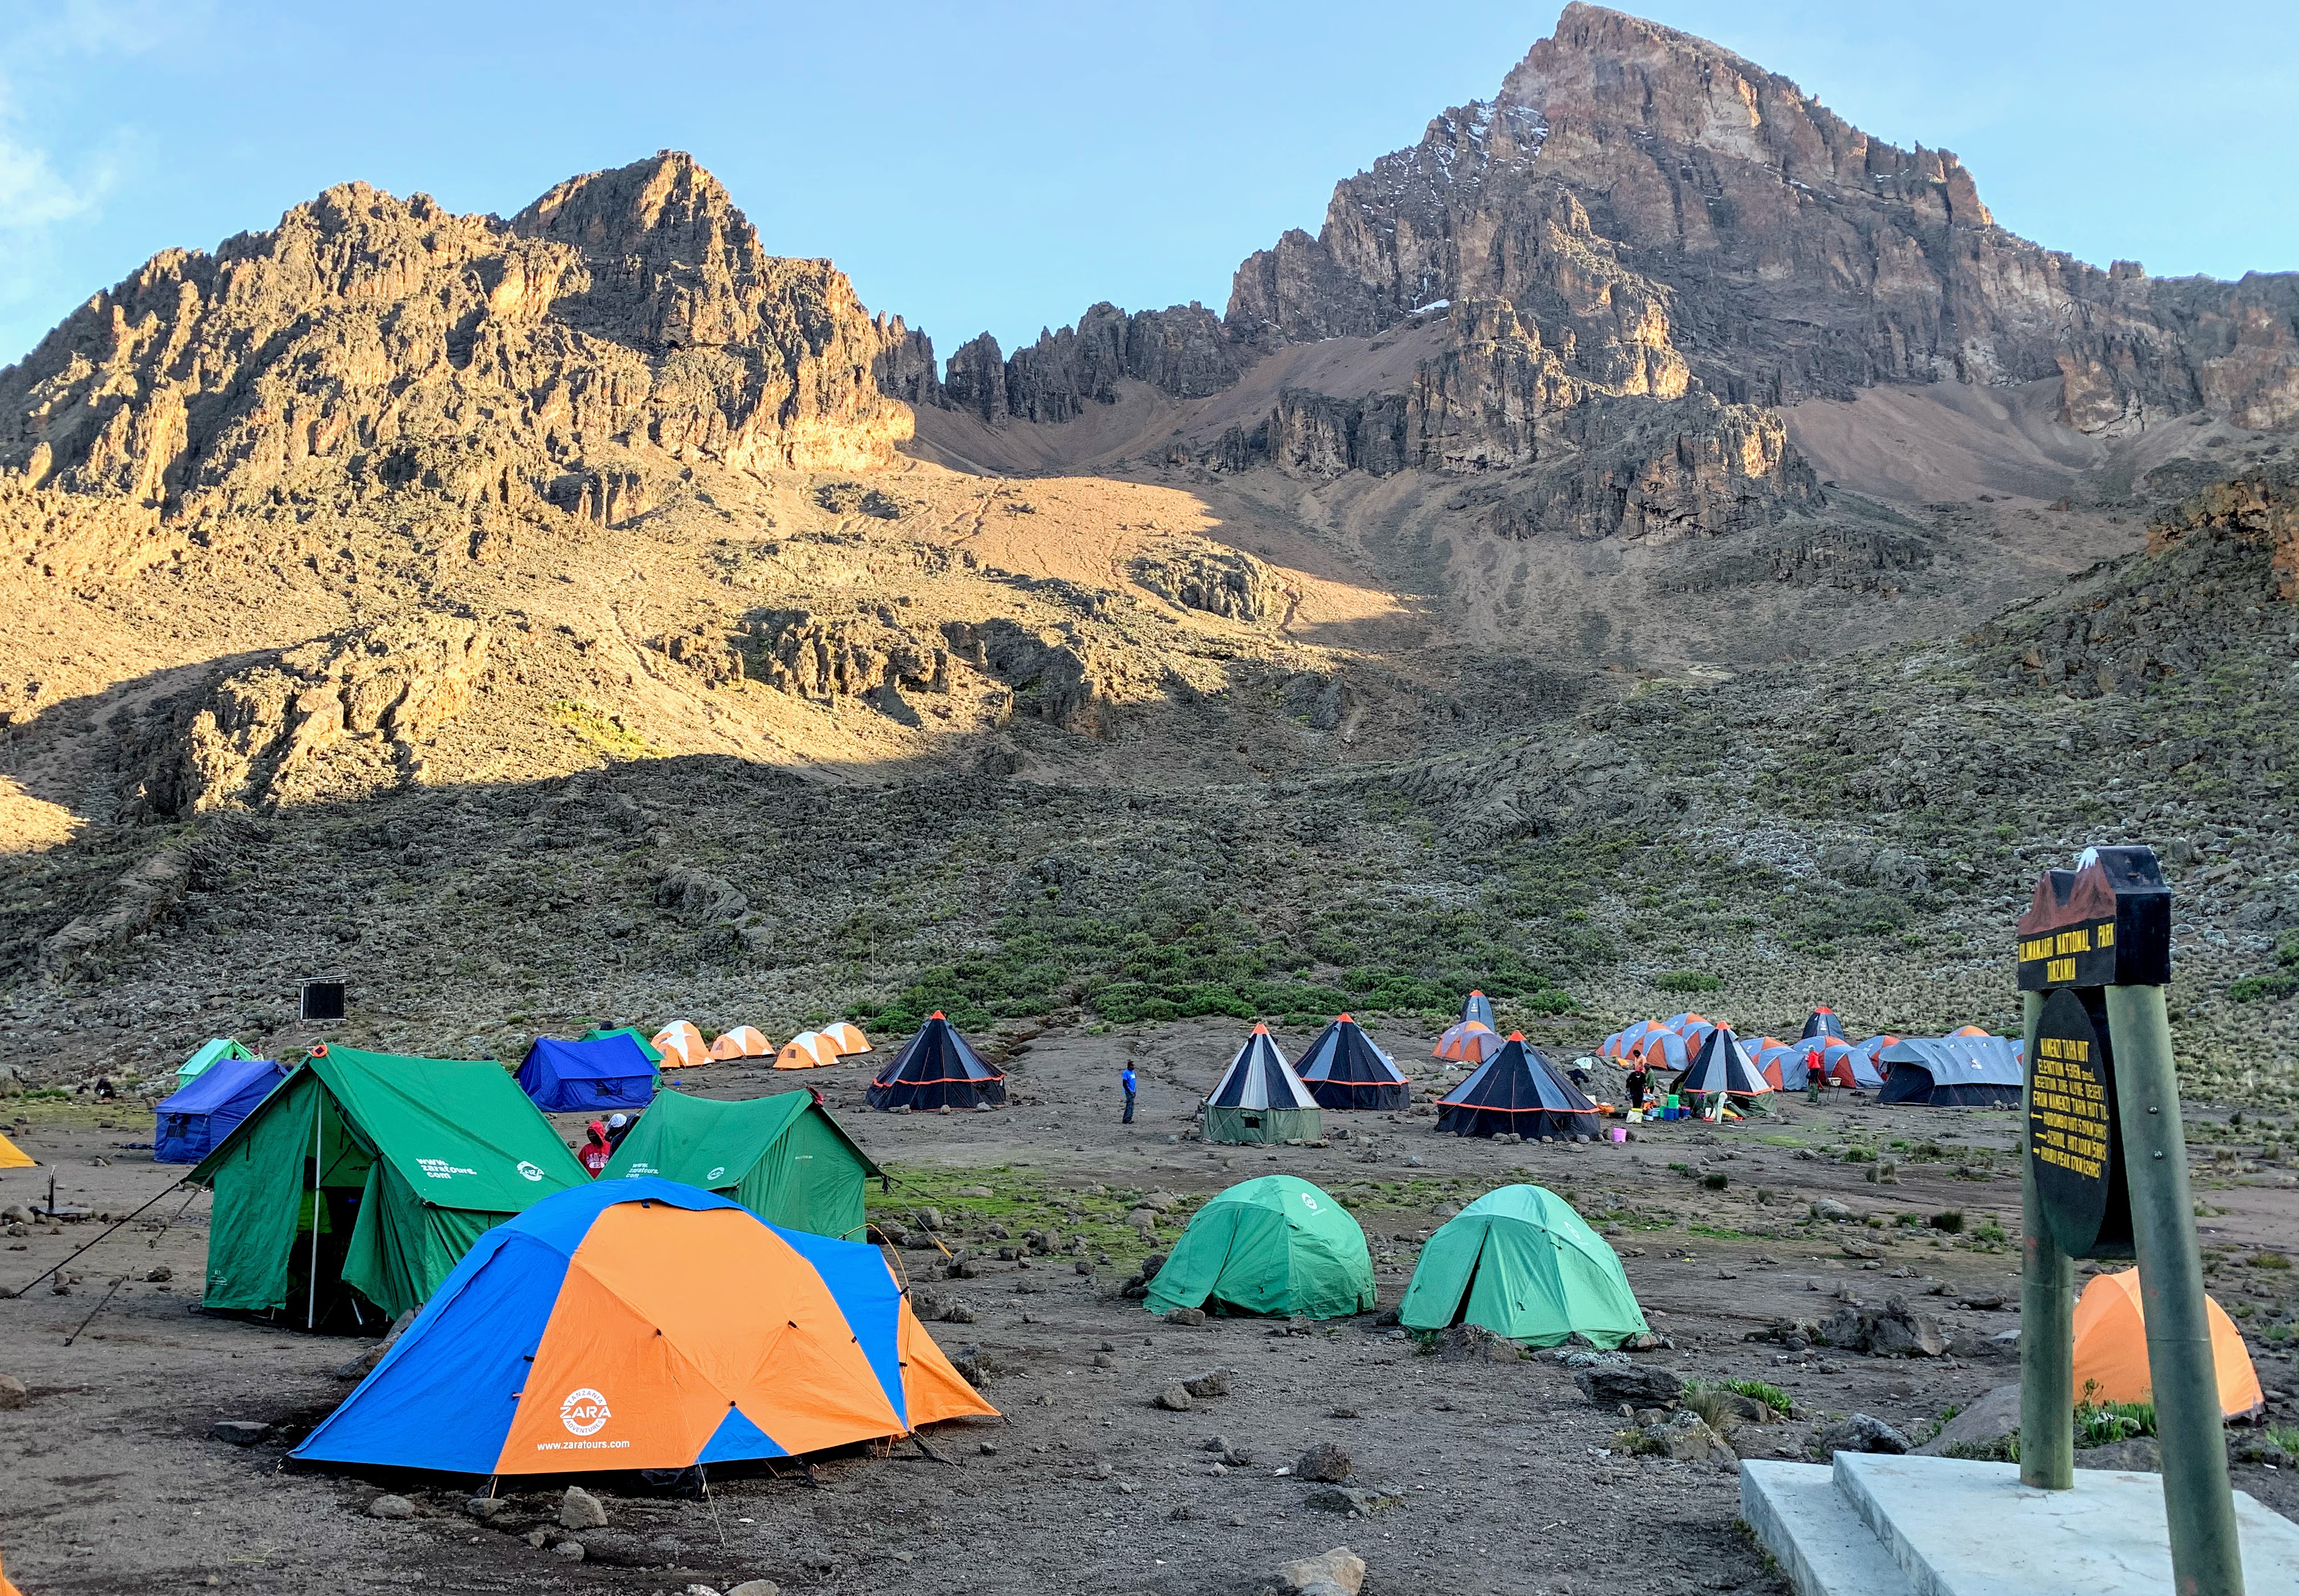
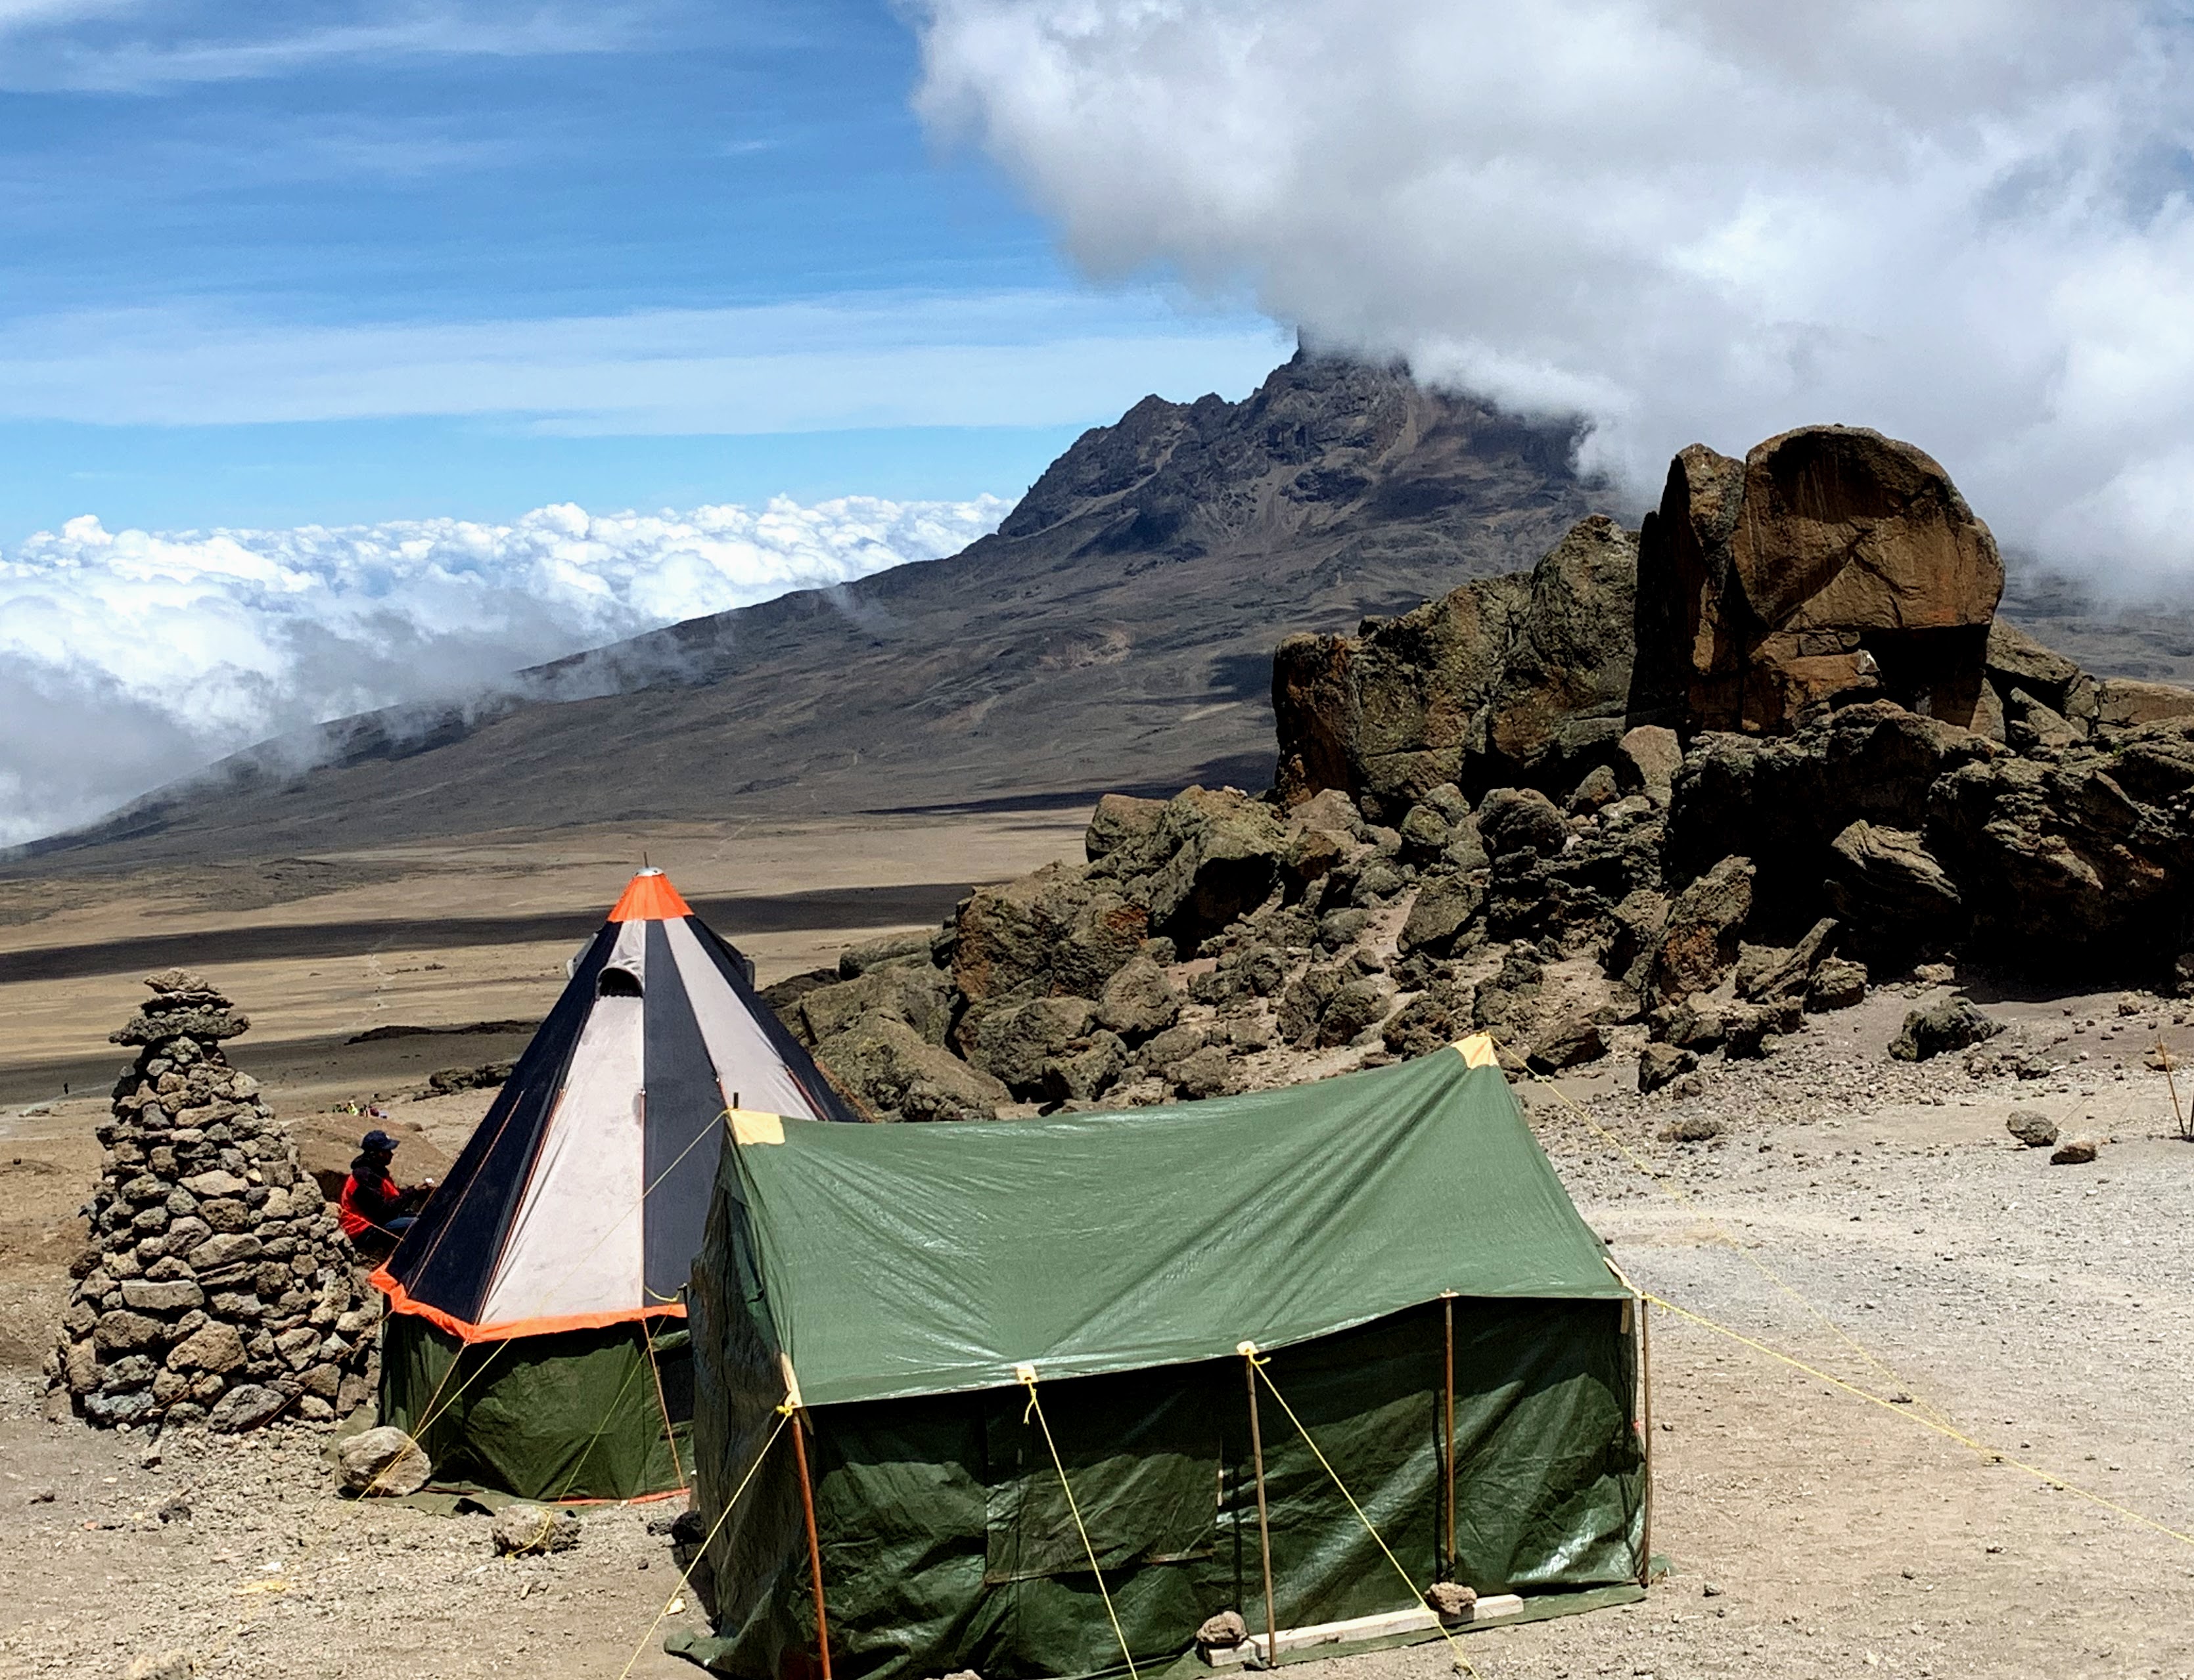
Mawenzi Tarn Camp is located beside a small lake at the base of Mawenzi Peak. The seasonal lake – which had quite a bit of water in it at the time – attracts buffalo in the dry season. At 4:00 p.m. we took a one hour hike to a viewpoint from where we could see both Mawenzi and Kibo. The view was fantastic in any direction.
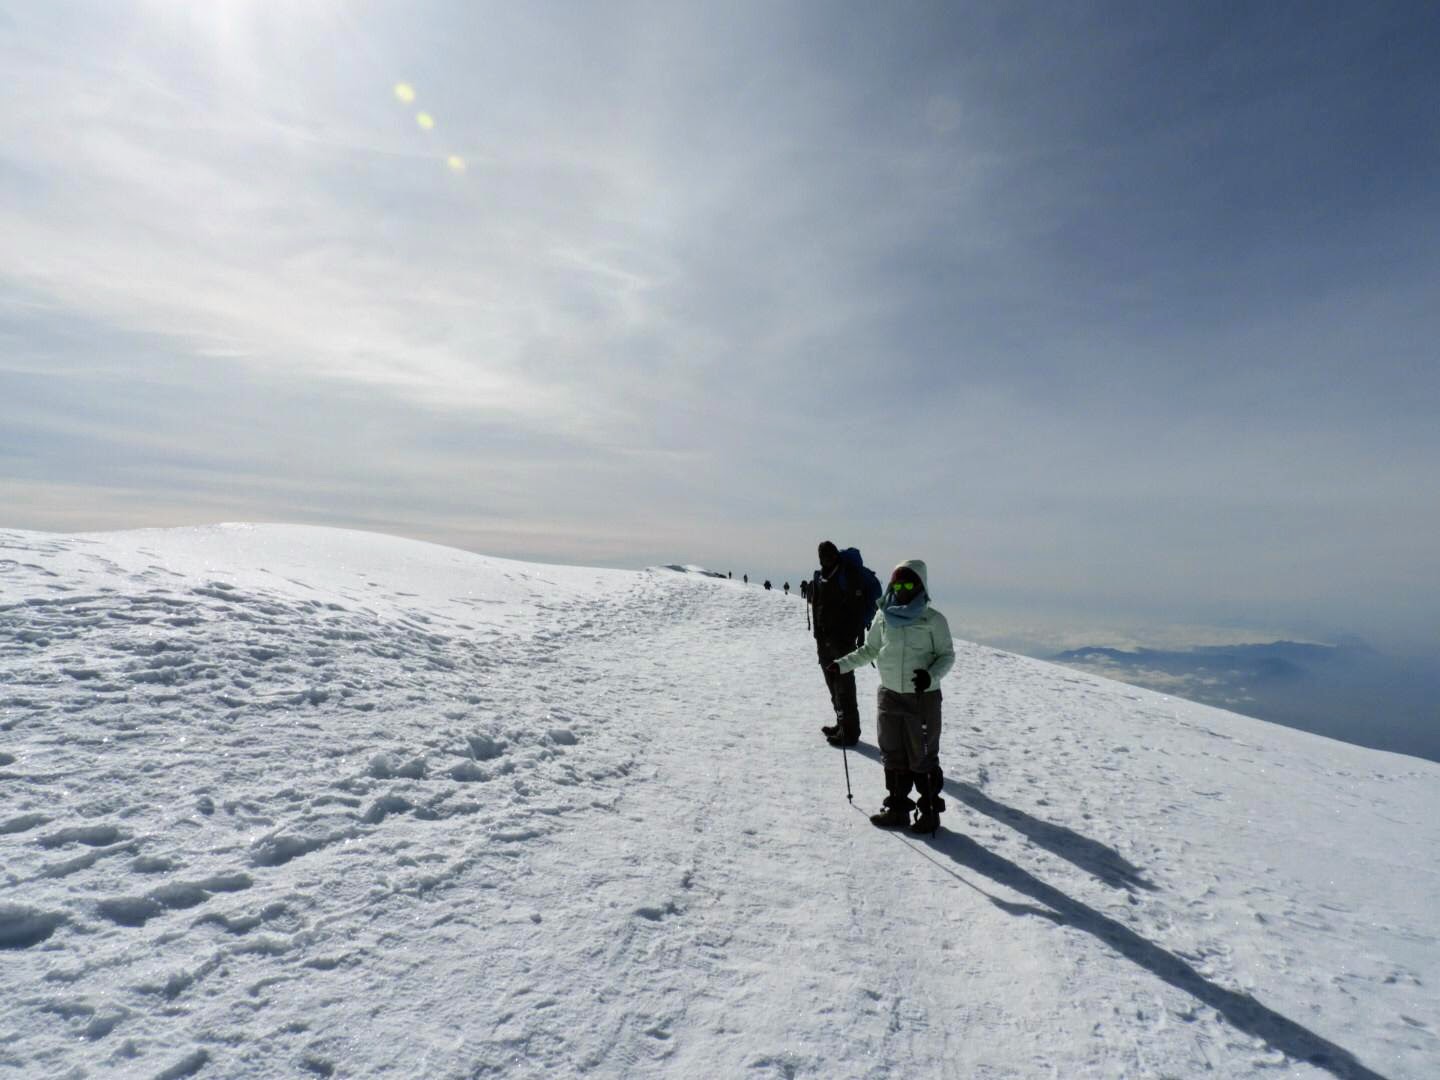
Day 5: Mawenzi Tarn to Kibo
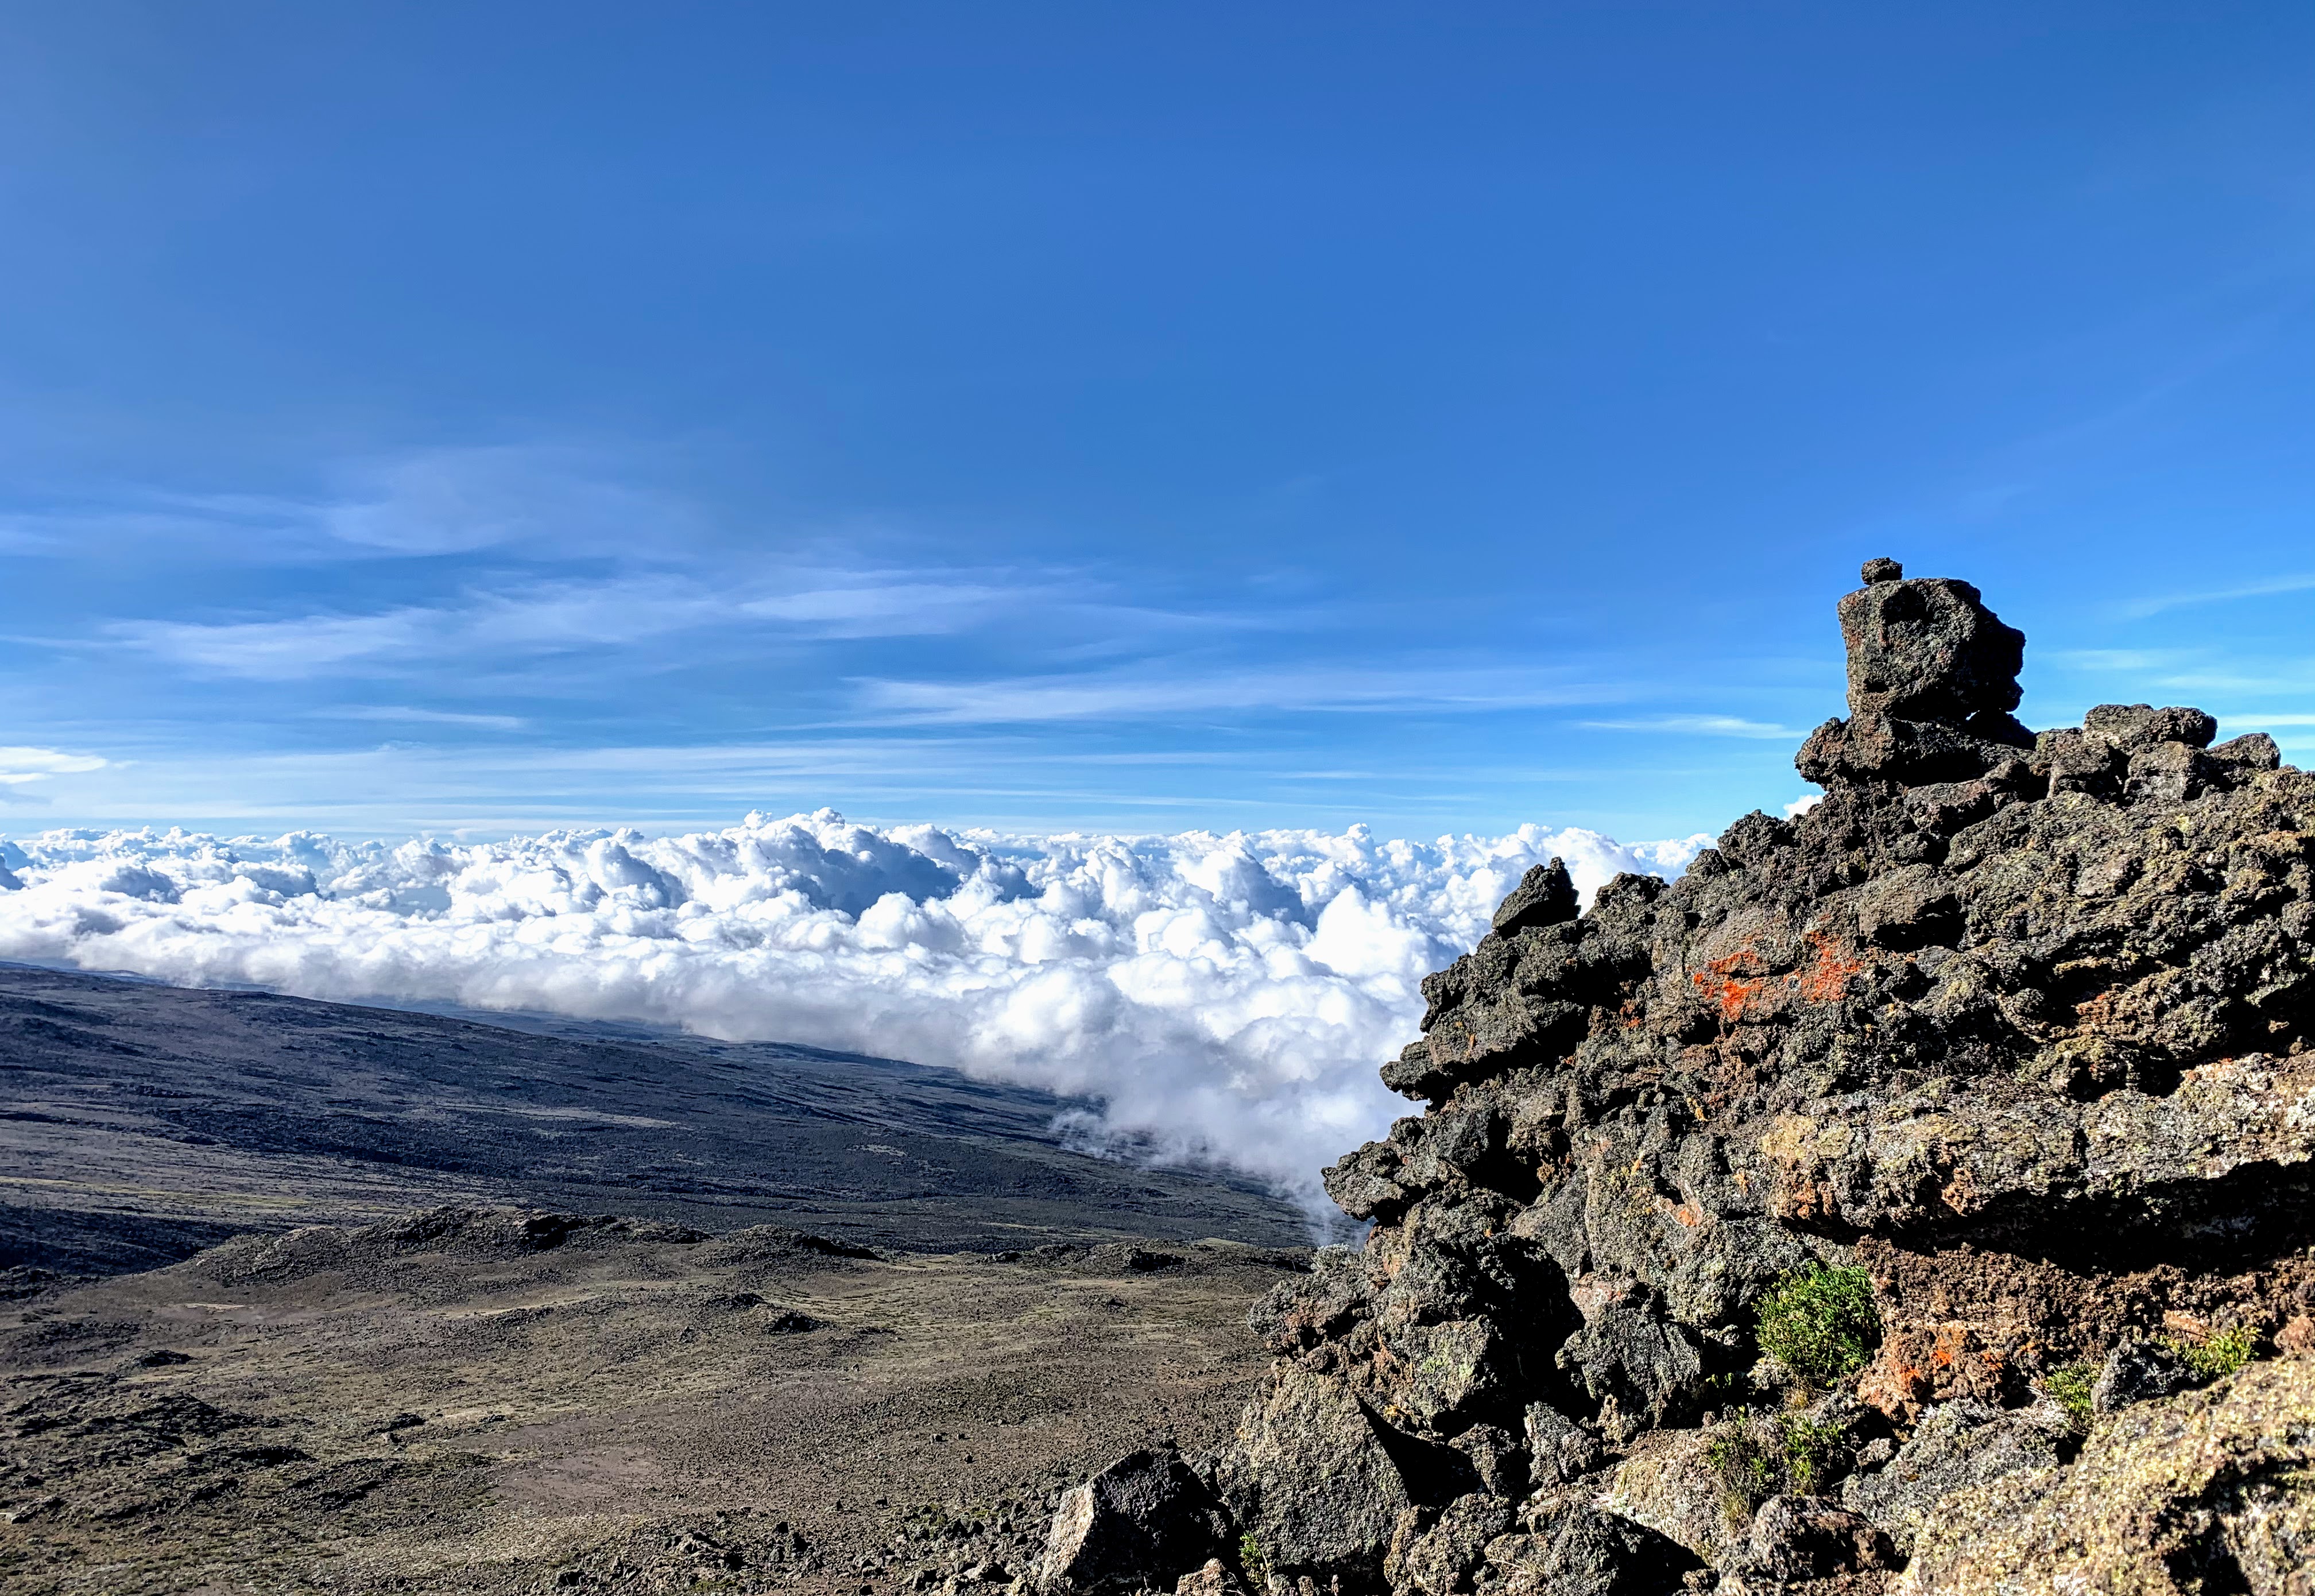
It was a long hike today, taking nearly 5 hours from Mawenzi Tarn to reach Kibo Huts. It was not so much the 4,720 feet elevation increase which took a toll on our legs on this day, as it was the duration of the walk. A real slog. We negotiated a couple of hills early on and then walked across the saddle, with views of the clouds – by now we were looking down on them – to the right (north). In total, we hiked about 8 km. As a group, our oxygen saturation levels were still holding up well. Two of us were over 80% and the other two were in the 70’s and none of us had any of the typical symptoms of altitude sickness. Nonetheless, we were quite tired by the time we made it to Kibo Camp at 2:00 p.m. that day.
Day 6: Kibo to Uhuru Summit to Horombo
Kibo to Hans Meyer Cave
After dinner, we were sent back to our tents with instructions to sleep or at least rest until we’d be woken up around 11:00 p.m., for the final assault on Kilimanjaro. Also, we had to set aside the clothing and gear needed for what might turn out to be below zero temperatures at high elevation. Most of us didn’t sleep much, maybe a couple of hours at best. There was simply too much excitement, anticipation and apprehension in the air.
At just after 11:00 p.m. we got together in the mess tent for a last bite, with some tea, coffee, toast and cookies. Nothing heavy. After a bit of a ‘gaiter delay’ – they can be tricky to put on and we needed Joseph’s assistance – we were on our way at around 00:30 a.m. on 25 February.
The Rongai Route is relatively easy, until it isn’t. The ‘not easy’ part starts almost immediately out of Kibo Camp with a steep, steady climb up to Hans Meyer Cave. We were told that it was going to be cold around 03:00 a.m. and so it was, but not unbearably, protected as we were under multiple layers of clothing. Beyond the cold, the challenge is to control one’s breathing. I had previously been advised to breathe low down, pushing out the diaphragm, slowly and controlled. At sea level breathing like that may lead to hyperventilation, but above 15,000 feet elevation it turned out to be extremely helpful. That, plus small, measured steps, following the guide’s slow slow pace. Pole Pole. Which means ‘slowly slowly’ in Swahili; pronounced ‘PO/lay PO/lay’.
Soon enough, you find your rhythm as you proceed up and relentlessly higher. The clock ticks by. 1:30 a.m. 2:00 a.m. 2:30 a.m. For as garrulous a bunch as we had been earlier, it got awfully quiet there for a while. Joseph had prescheduled short breaks (for water and snacks) on the half hour. I don’t believe we could have made it without those breaks. For once I did not need to make any Diamox-induced pee stops. Under the seven-plus layers of clothing we were sweating heavily despite the near-freezing temperatures.
Hans Meyer Cave to Gilman’s Point
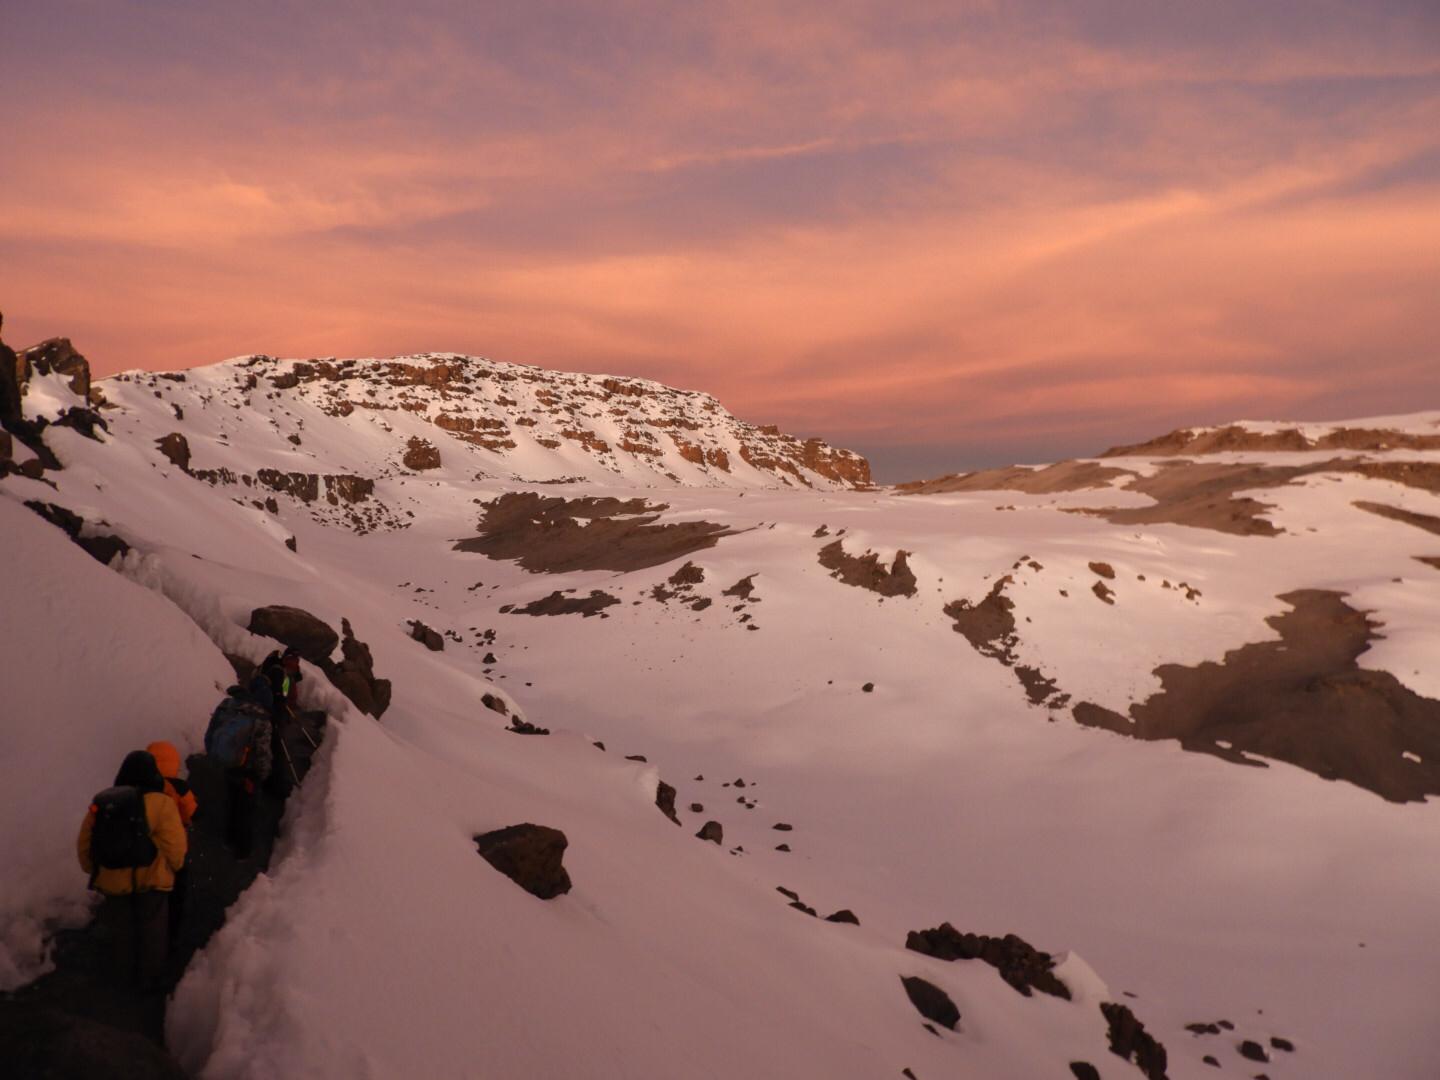
Once we reached Hans Meyer Cave – about halfway up the hike to Gilman’s Point – the path got steeper and we started to negotiate what seemed to be an endless series of switchbacks. One after another, turn by turn by turn. The loose, gravel-like scree underfoot made for extremely heavy going. One meter forward, half a meter back. On and on and on. The hours rolled by and we saw several people being escorted down the mountain, their grand ambition coming to a grinding halt, their hopes unceremoniously dashed. None of us commented on the stragglers or the climbers headed down. Neither did we speculate as to the cause. It didn’t feel like the done thing and it would have stirred up too much negativity. Rather concentrate on the job at hand. One foot in front of the other. Up, up, up.
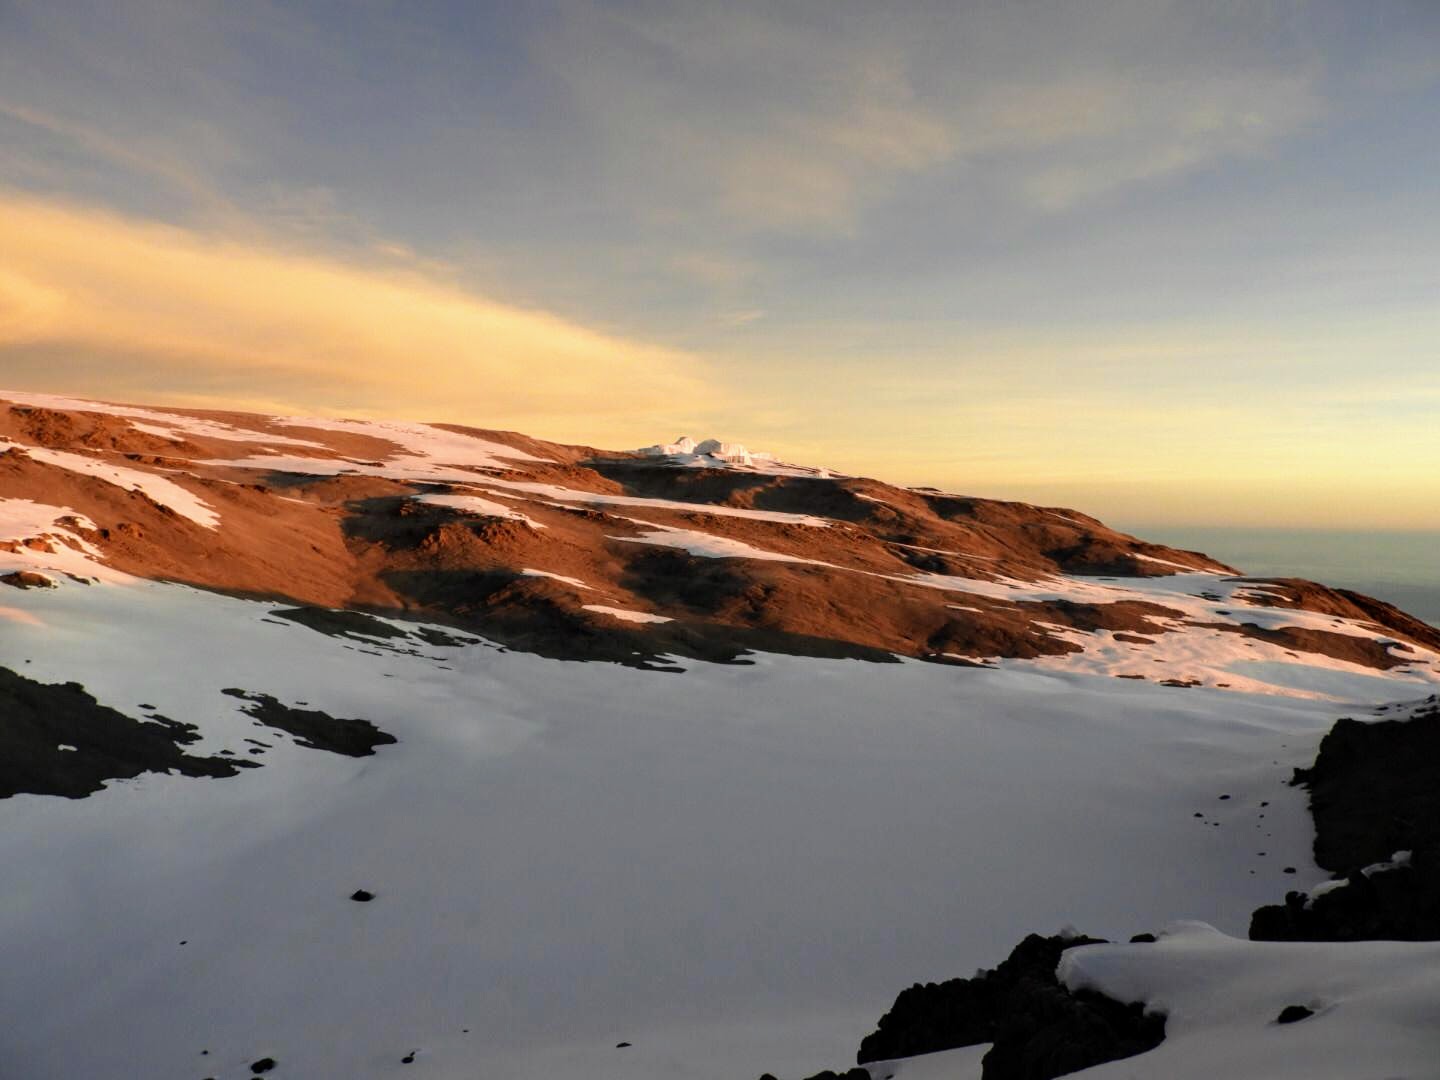
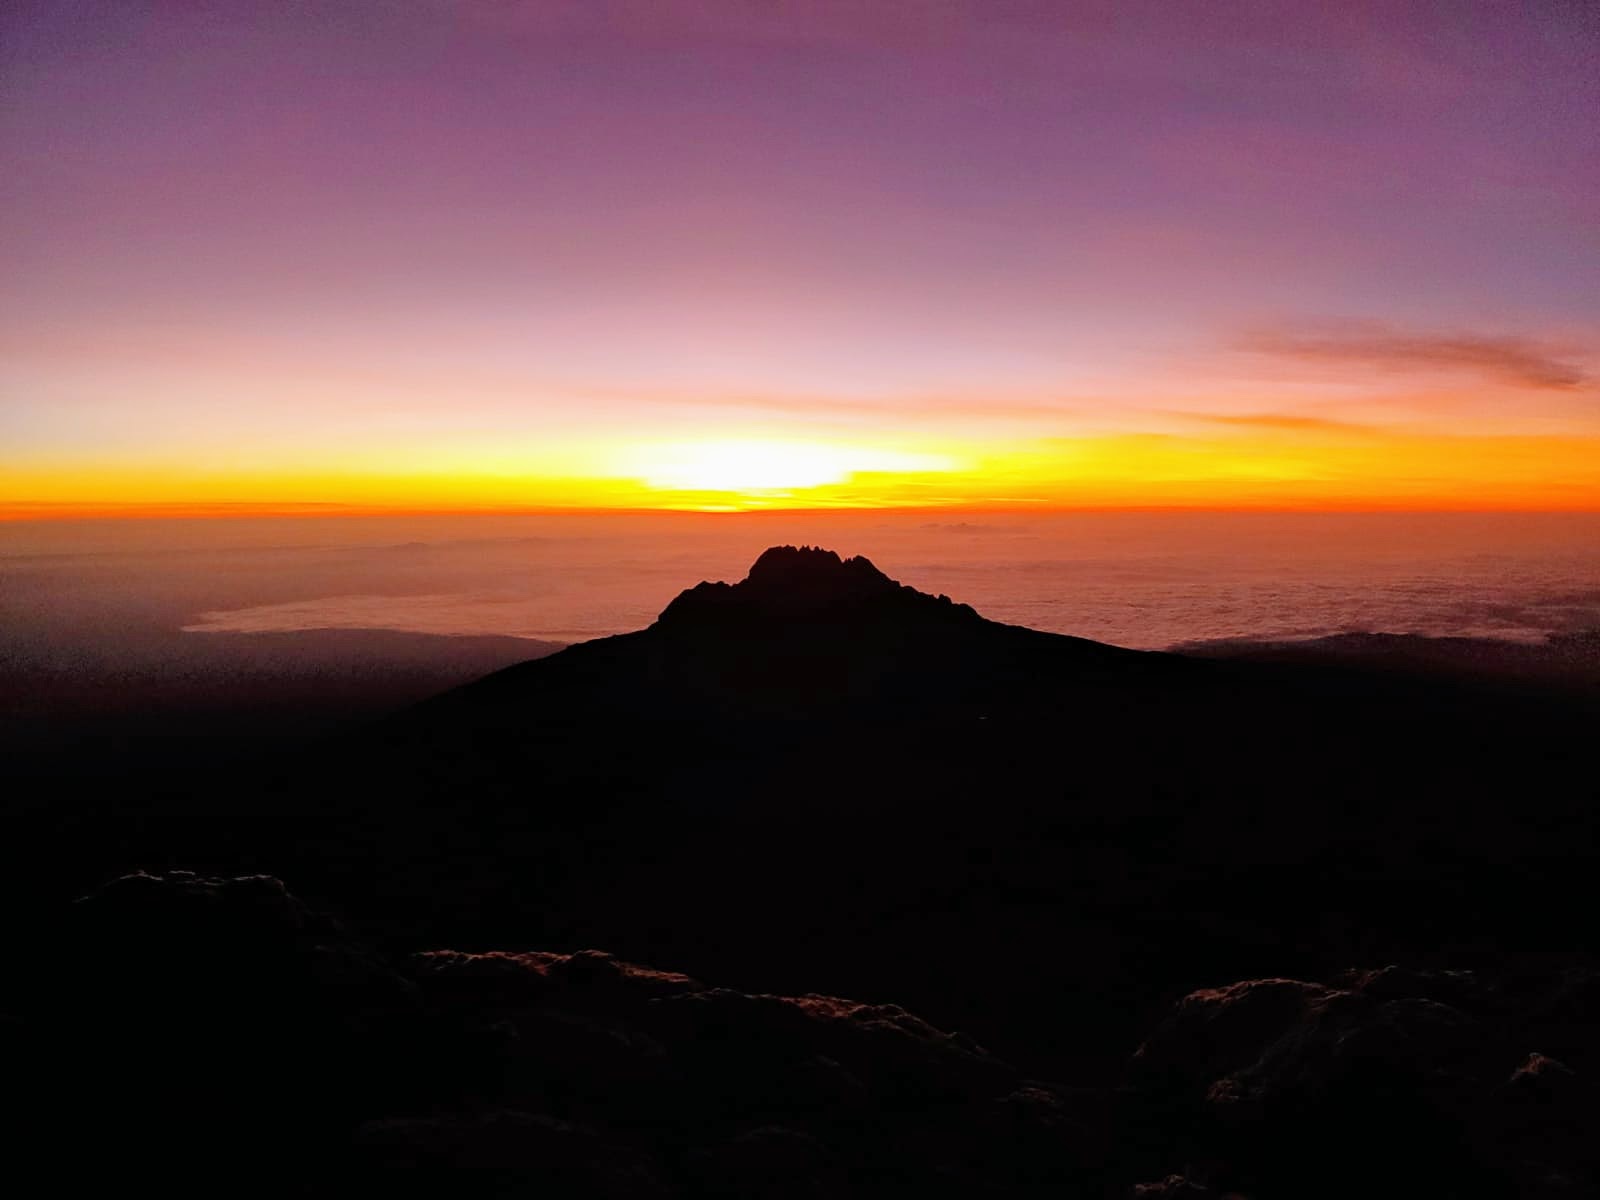
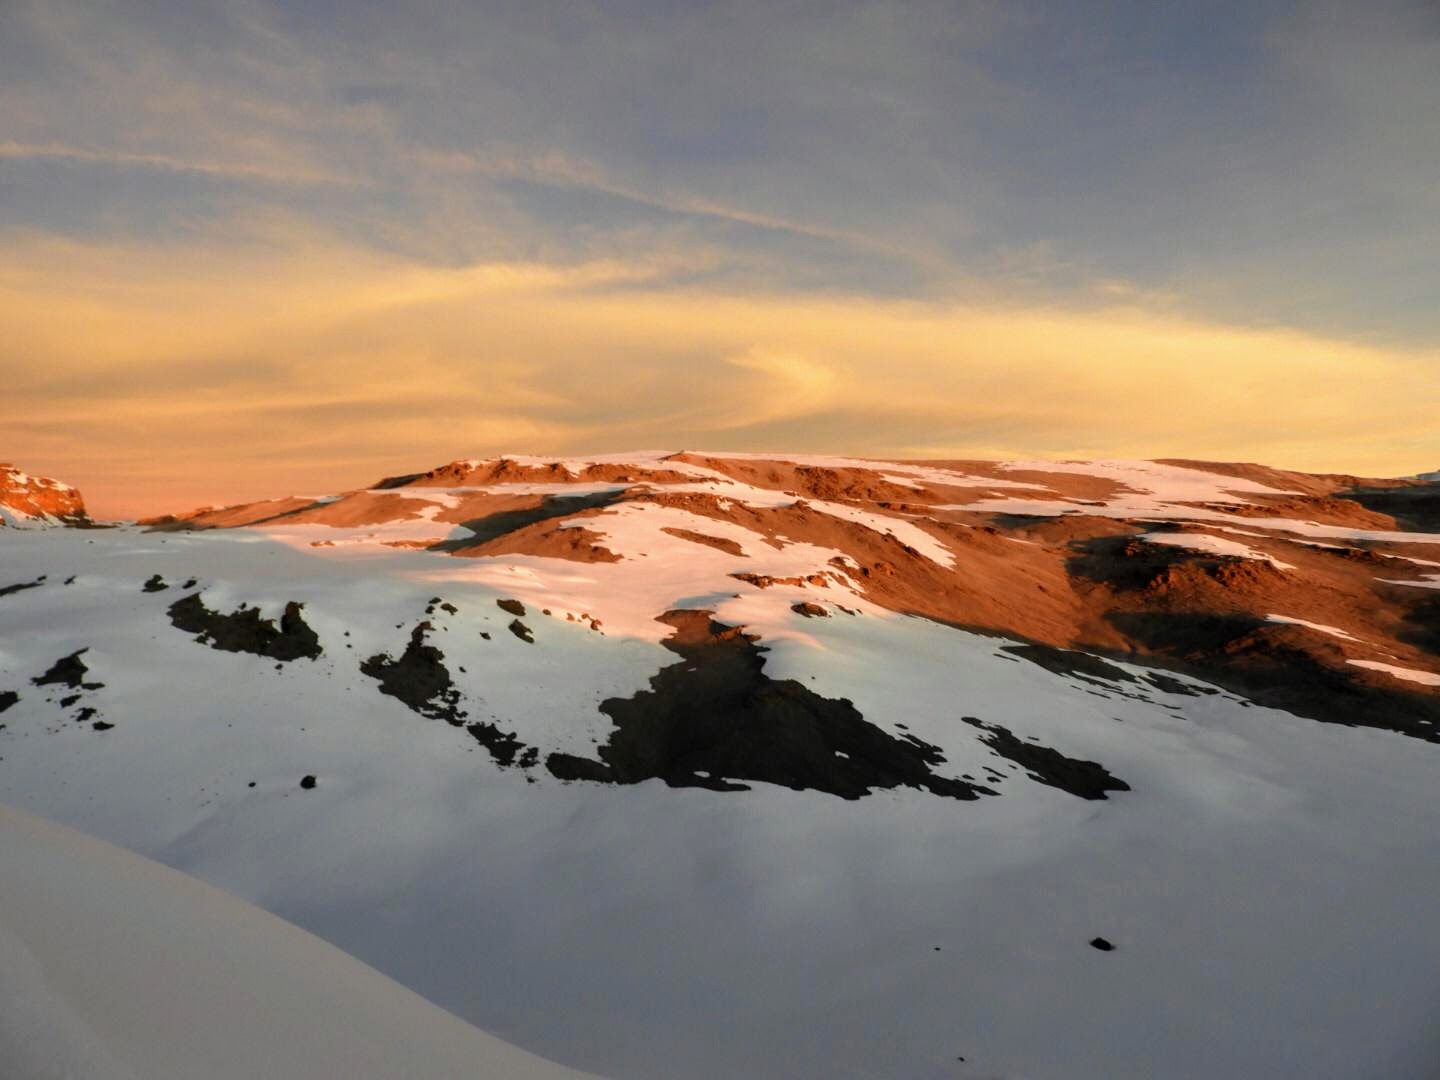
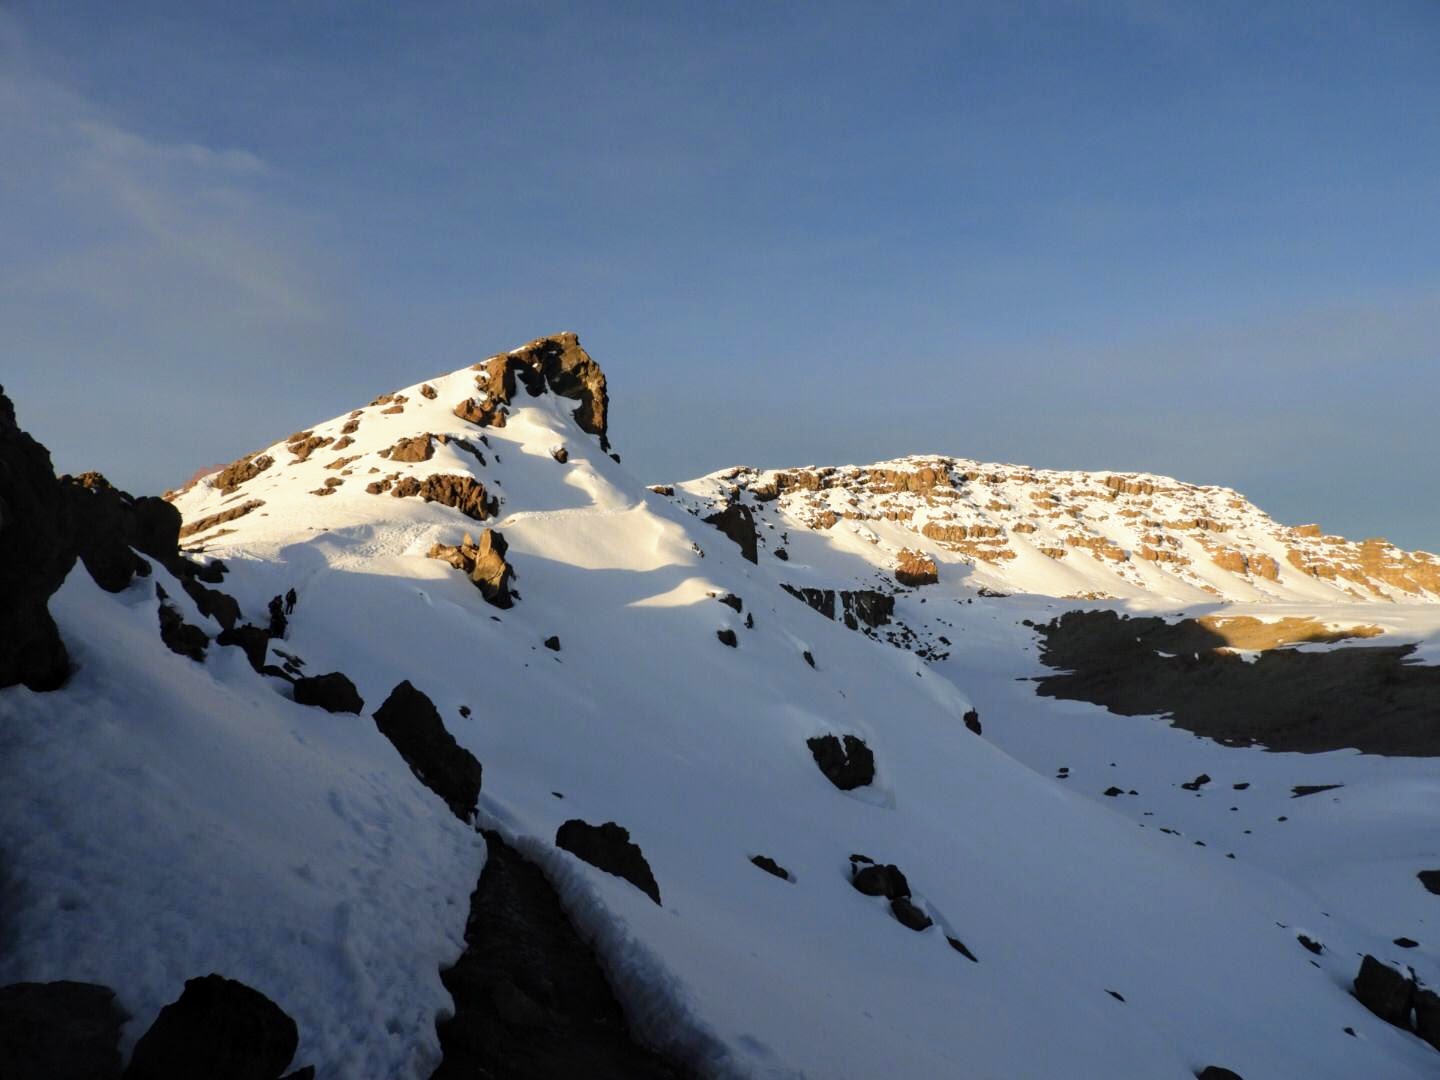
By the time the sun started to rise in the east in the most spectacular fashion, I think we all knew we would make it. Even so, the gathering dawn started to light up what was still ahead of us, the single most difficult final stretch to the crater’s edge, through a jumble of giant rocks thrown around and pushed on top of each other during a cataclysmic event which took place some 200,000 years ago.
With what little remained of our strength, we tackled the rocks, the occasional grunt and clatter of our walking sticks the only sounds to pierce the tomb-like quiet of the high mountain. At around 6:30 a.m. we saw it – the first milestone of three: Gilman’s Point. Other than a sign announcing the spot, there was not much there. Even so, we were all mightily relieved and pleased to have reached the crater rim. Even if we were to turn around at this point, it would have been an achievement worthy of a certificate. Our elation was short-lived when we remembered that still ahead of us was a solid 2 hours of hiking, before we could claim to have summited Kilimanjaro.

Gilman’s Point to Uhuru Peak
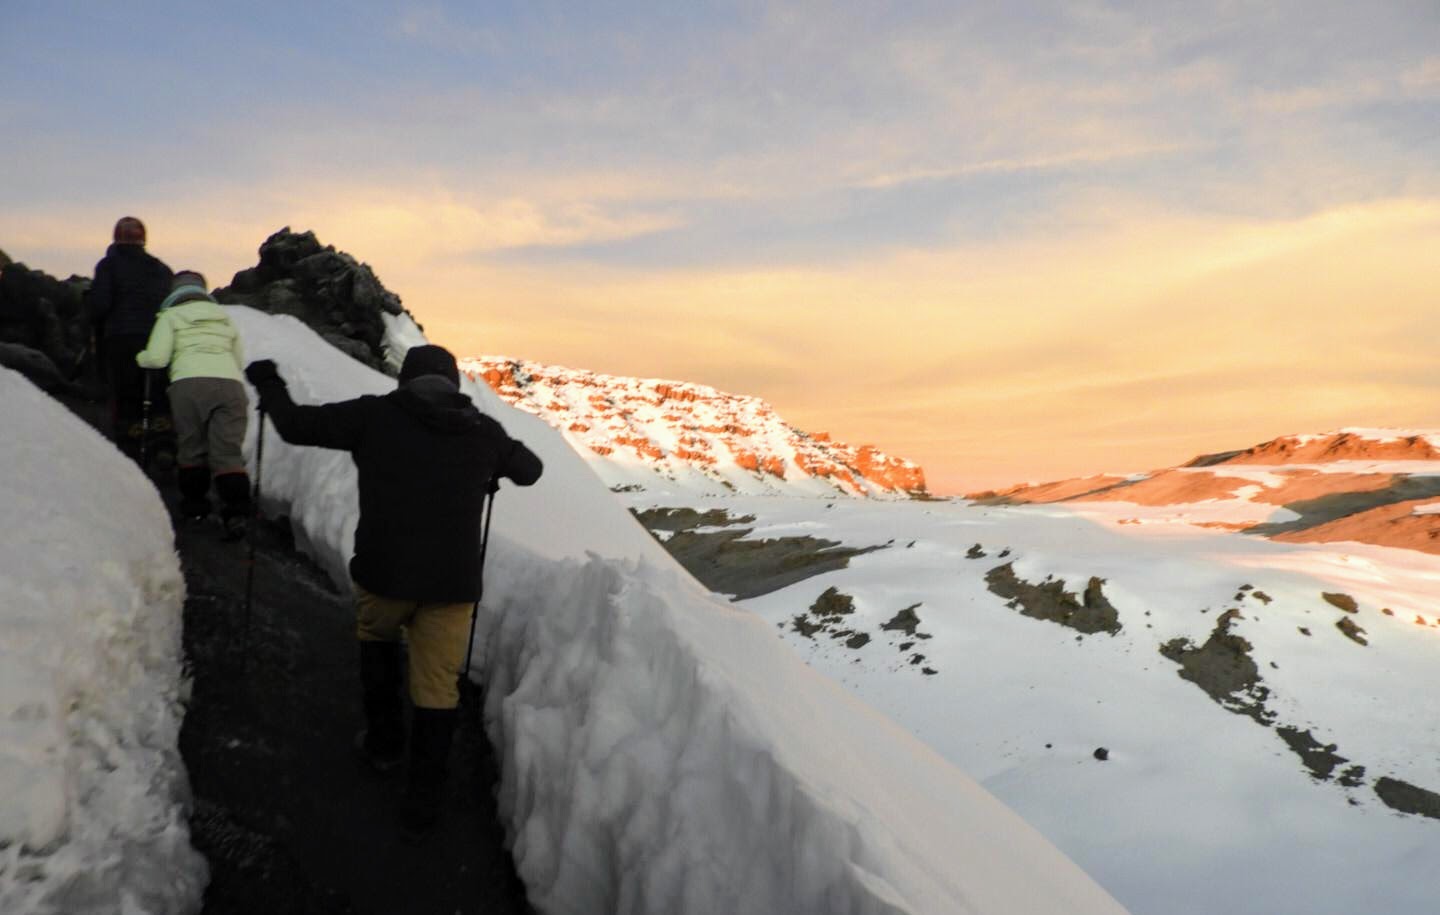
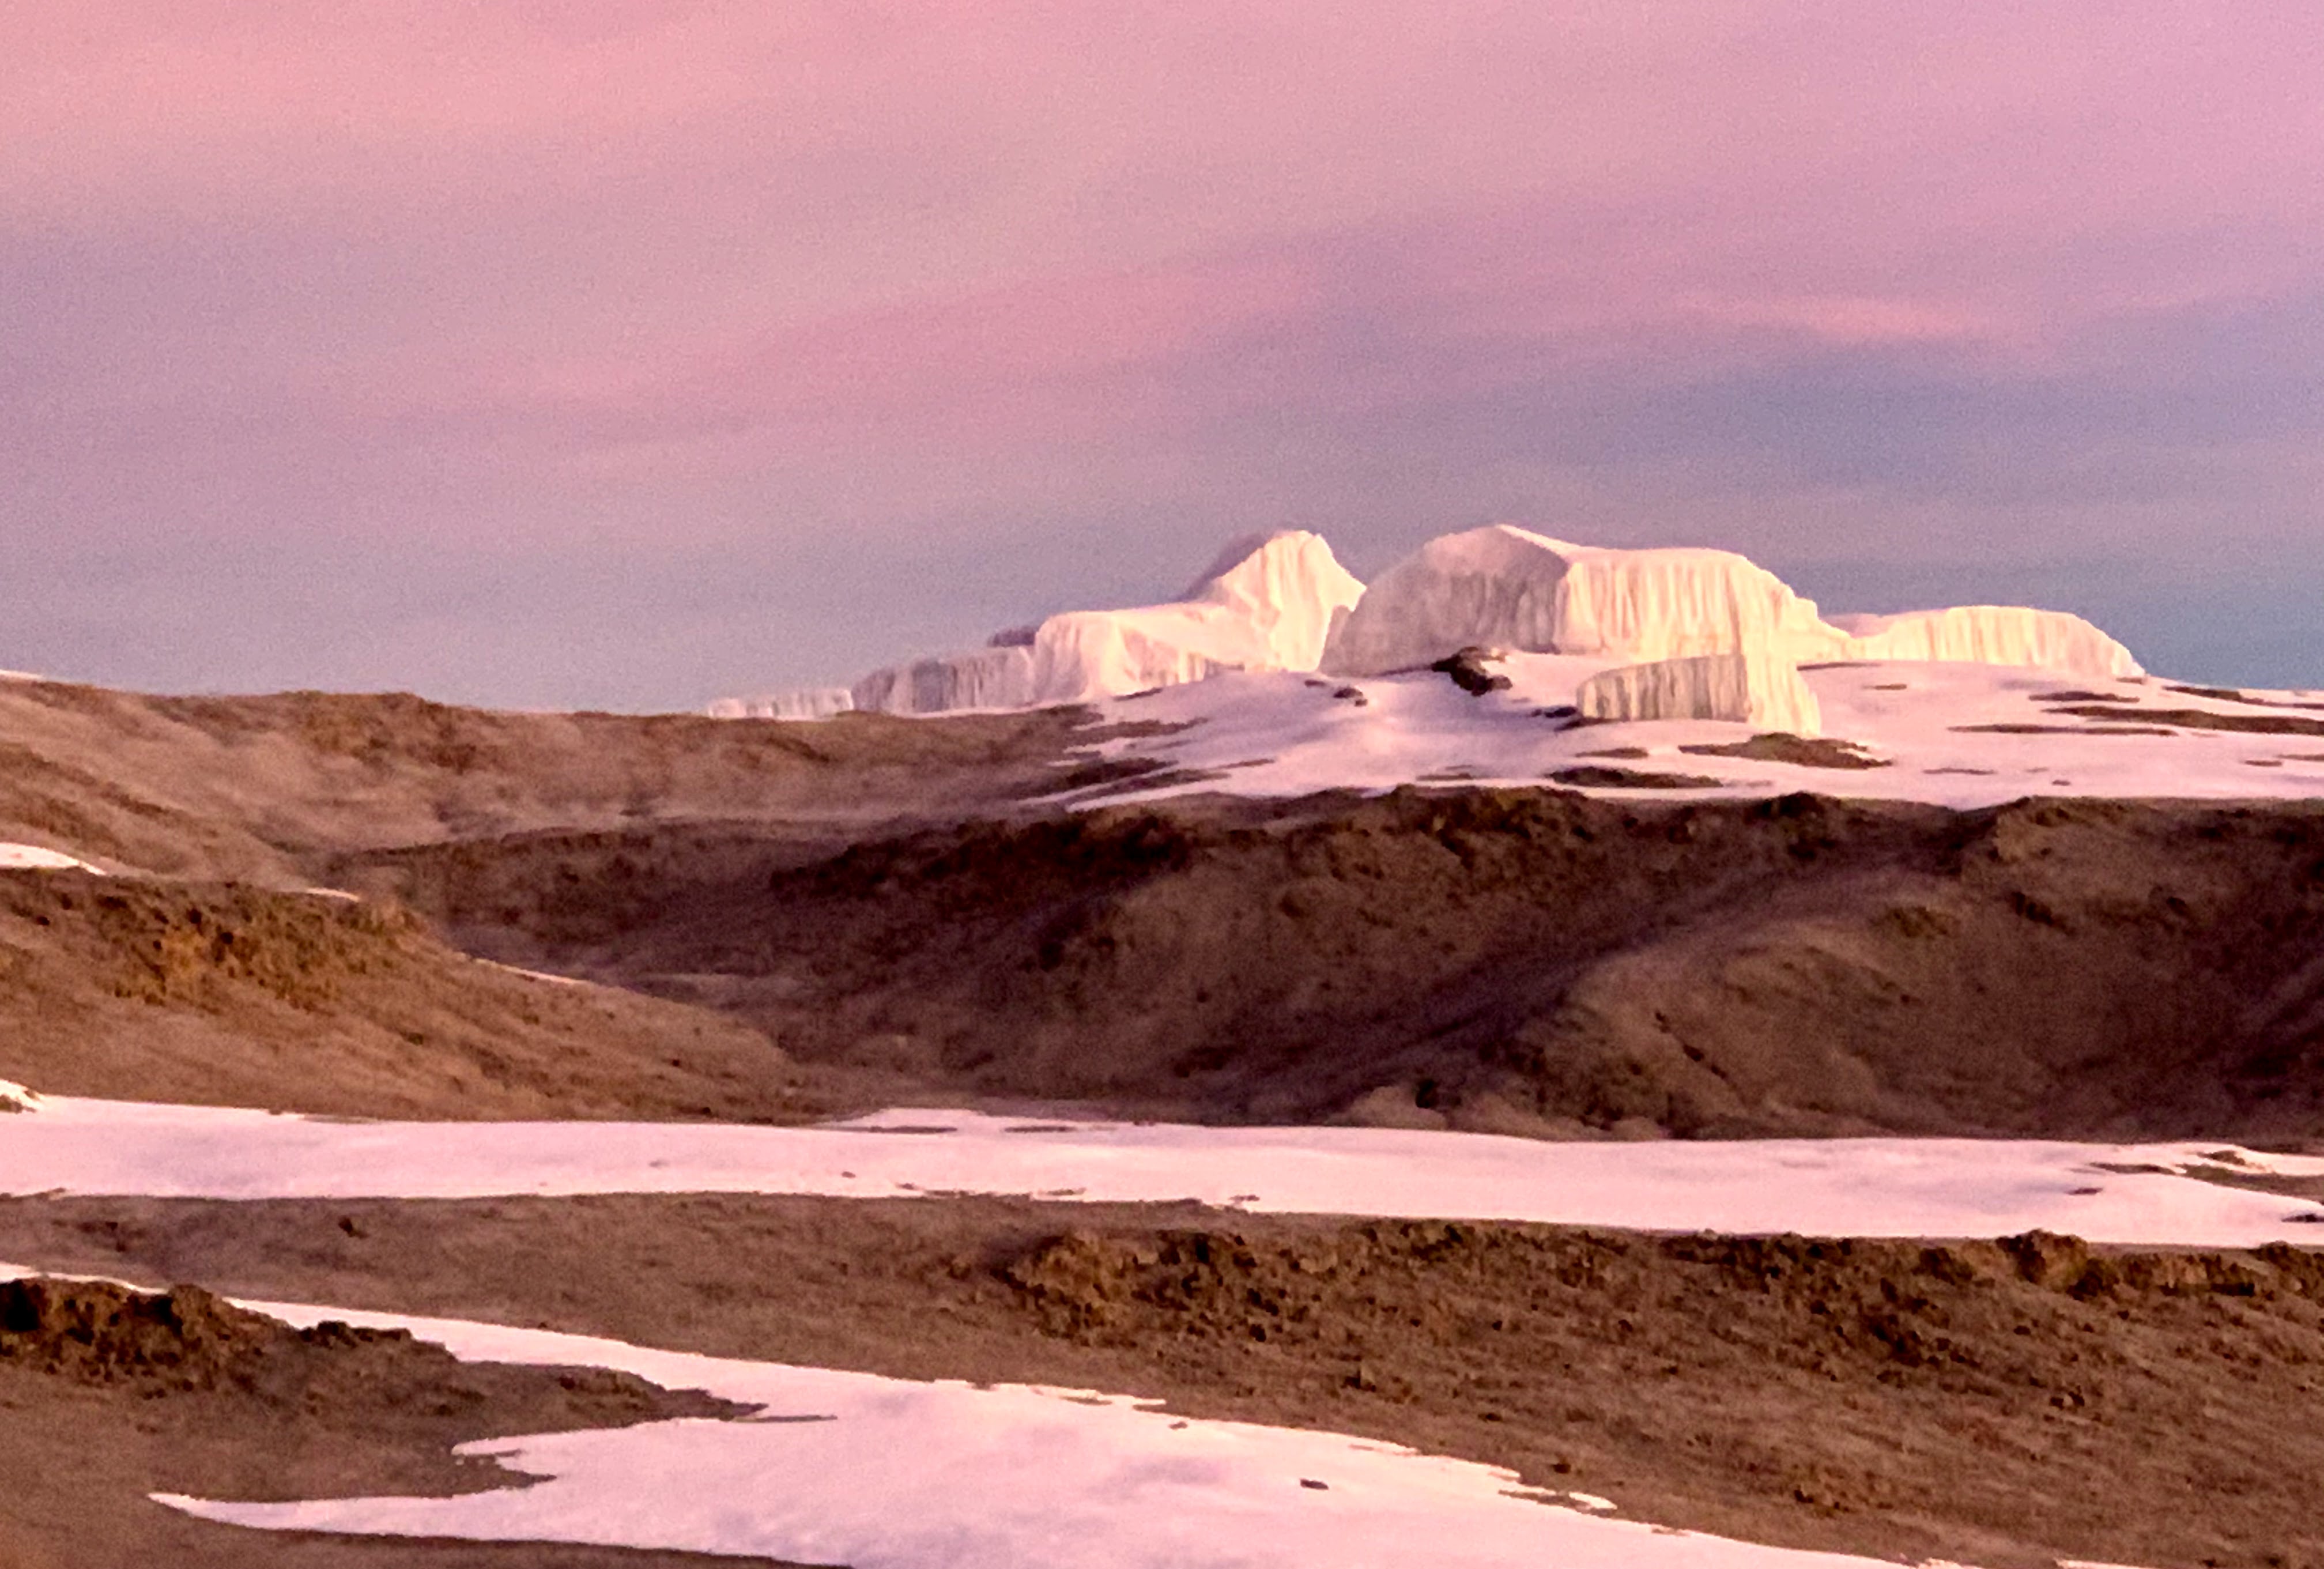
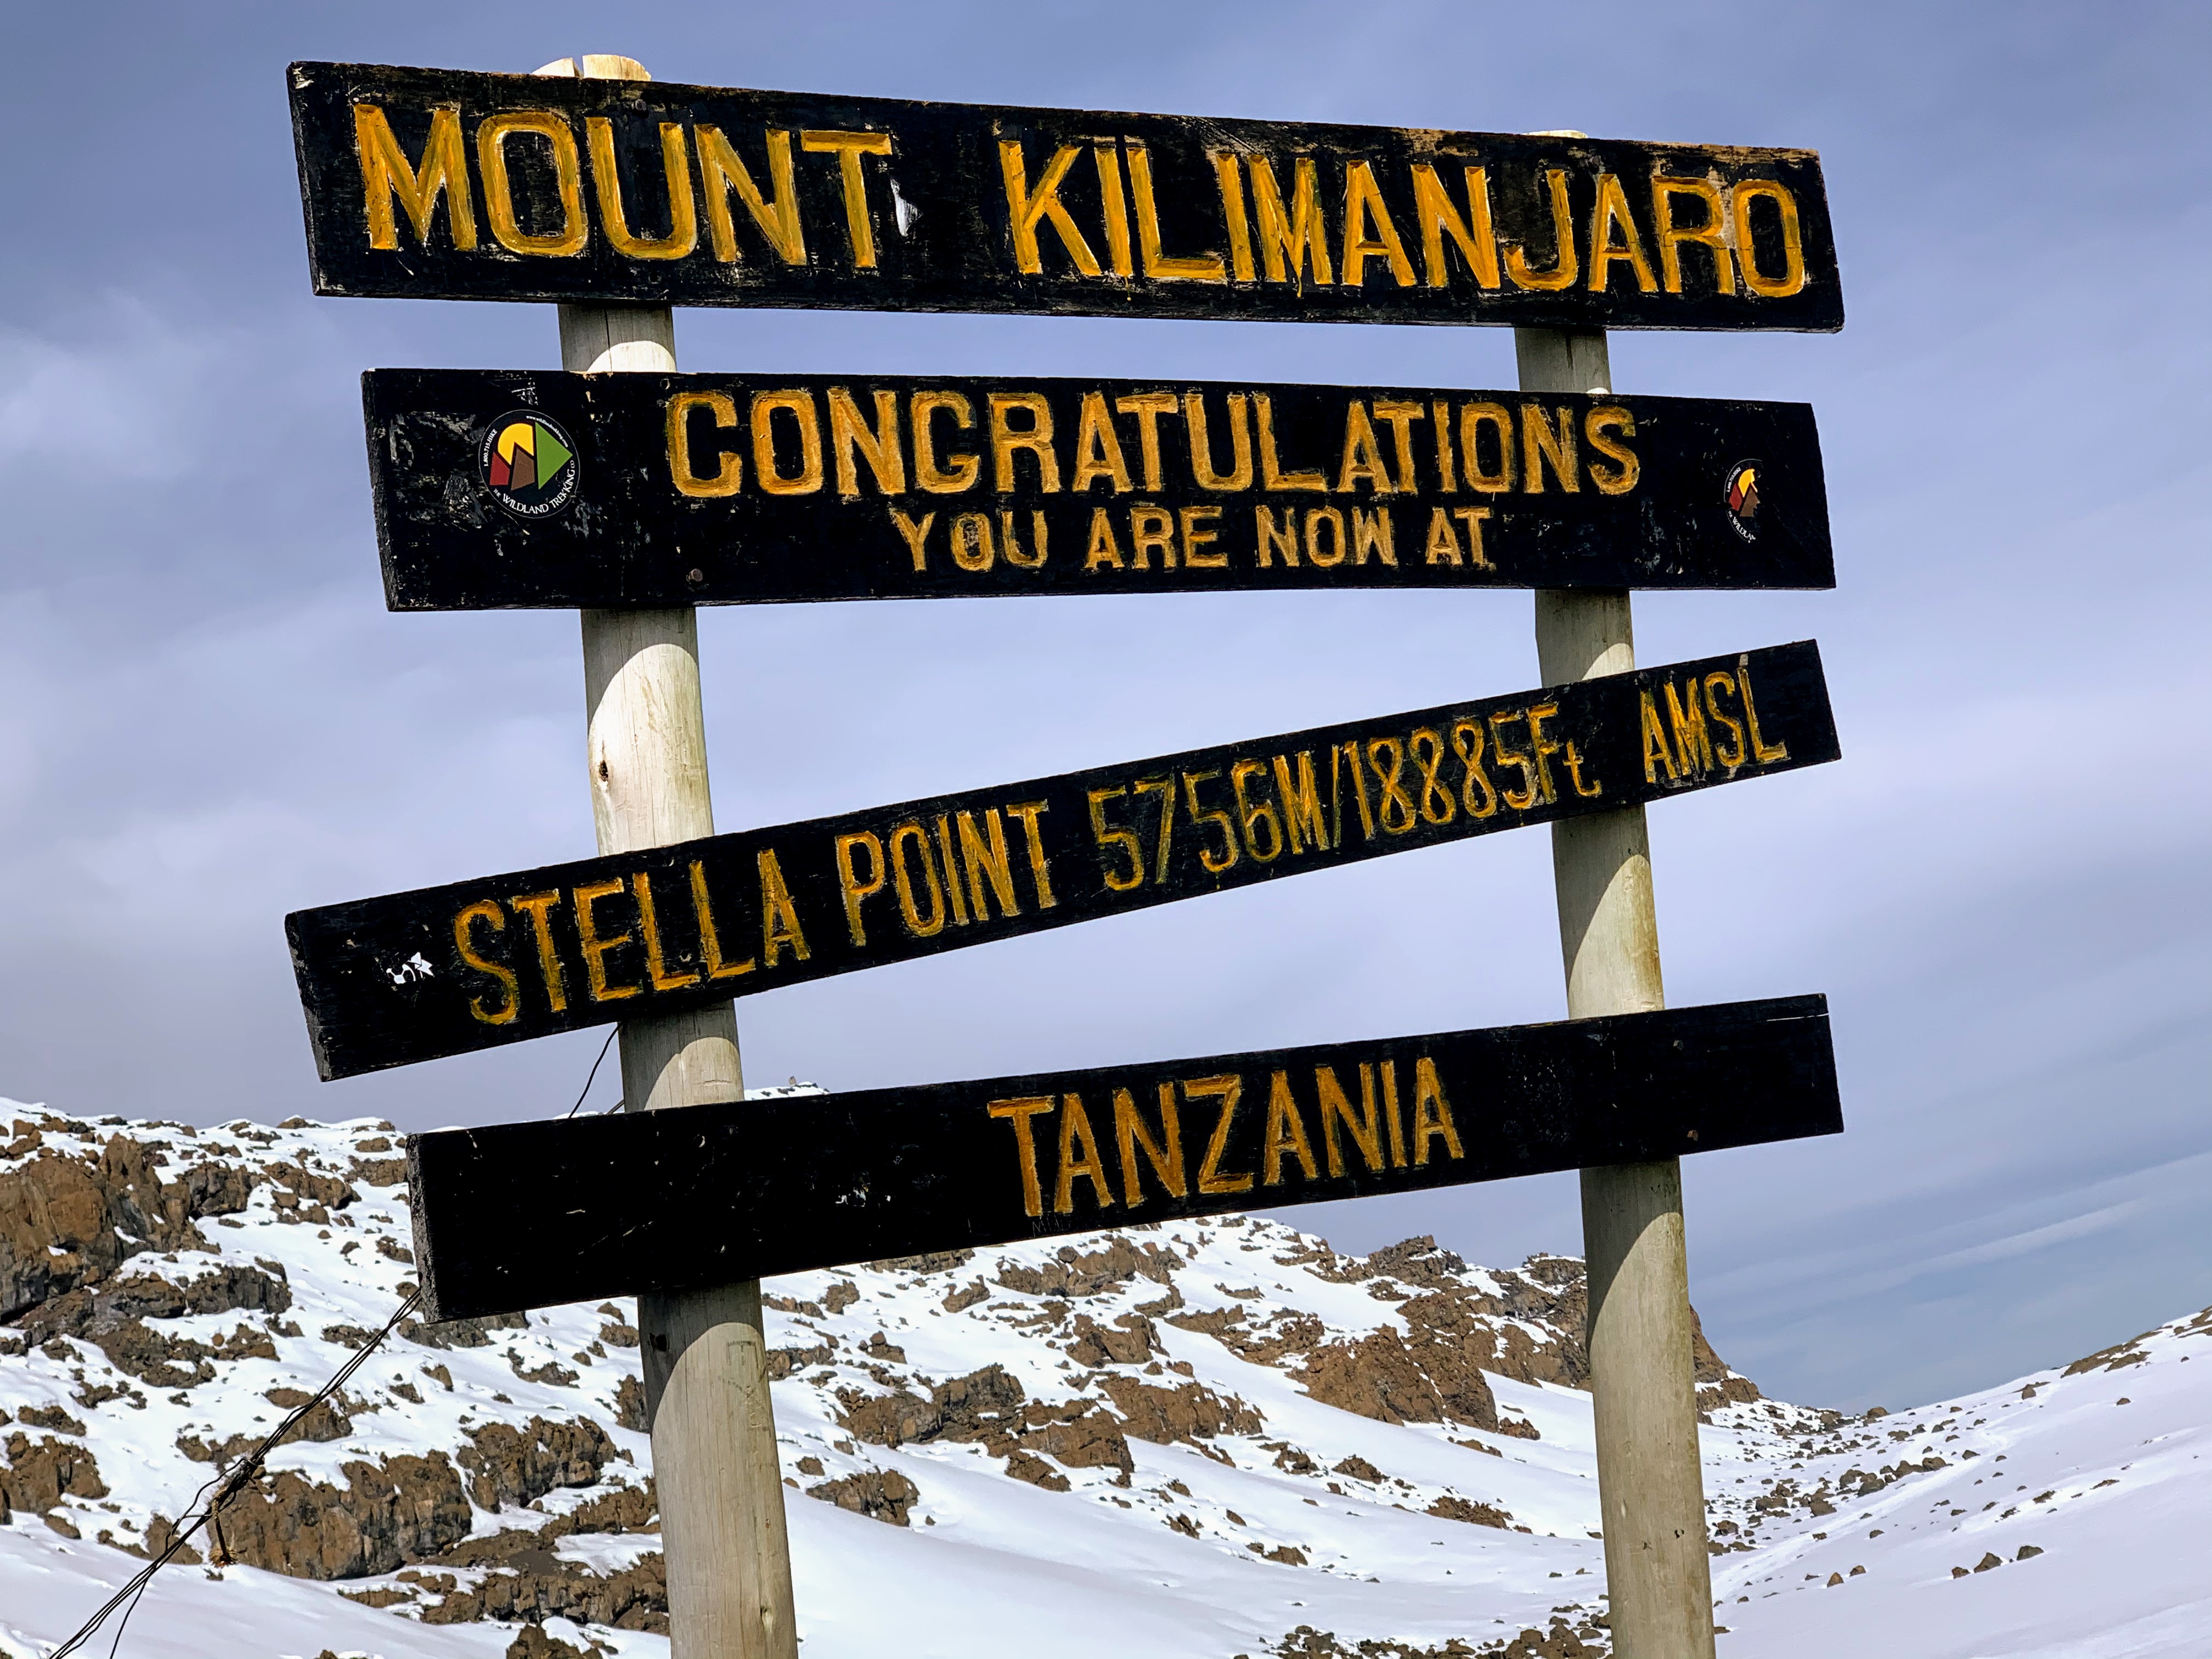
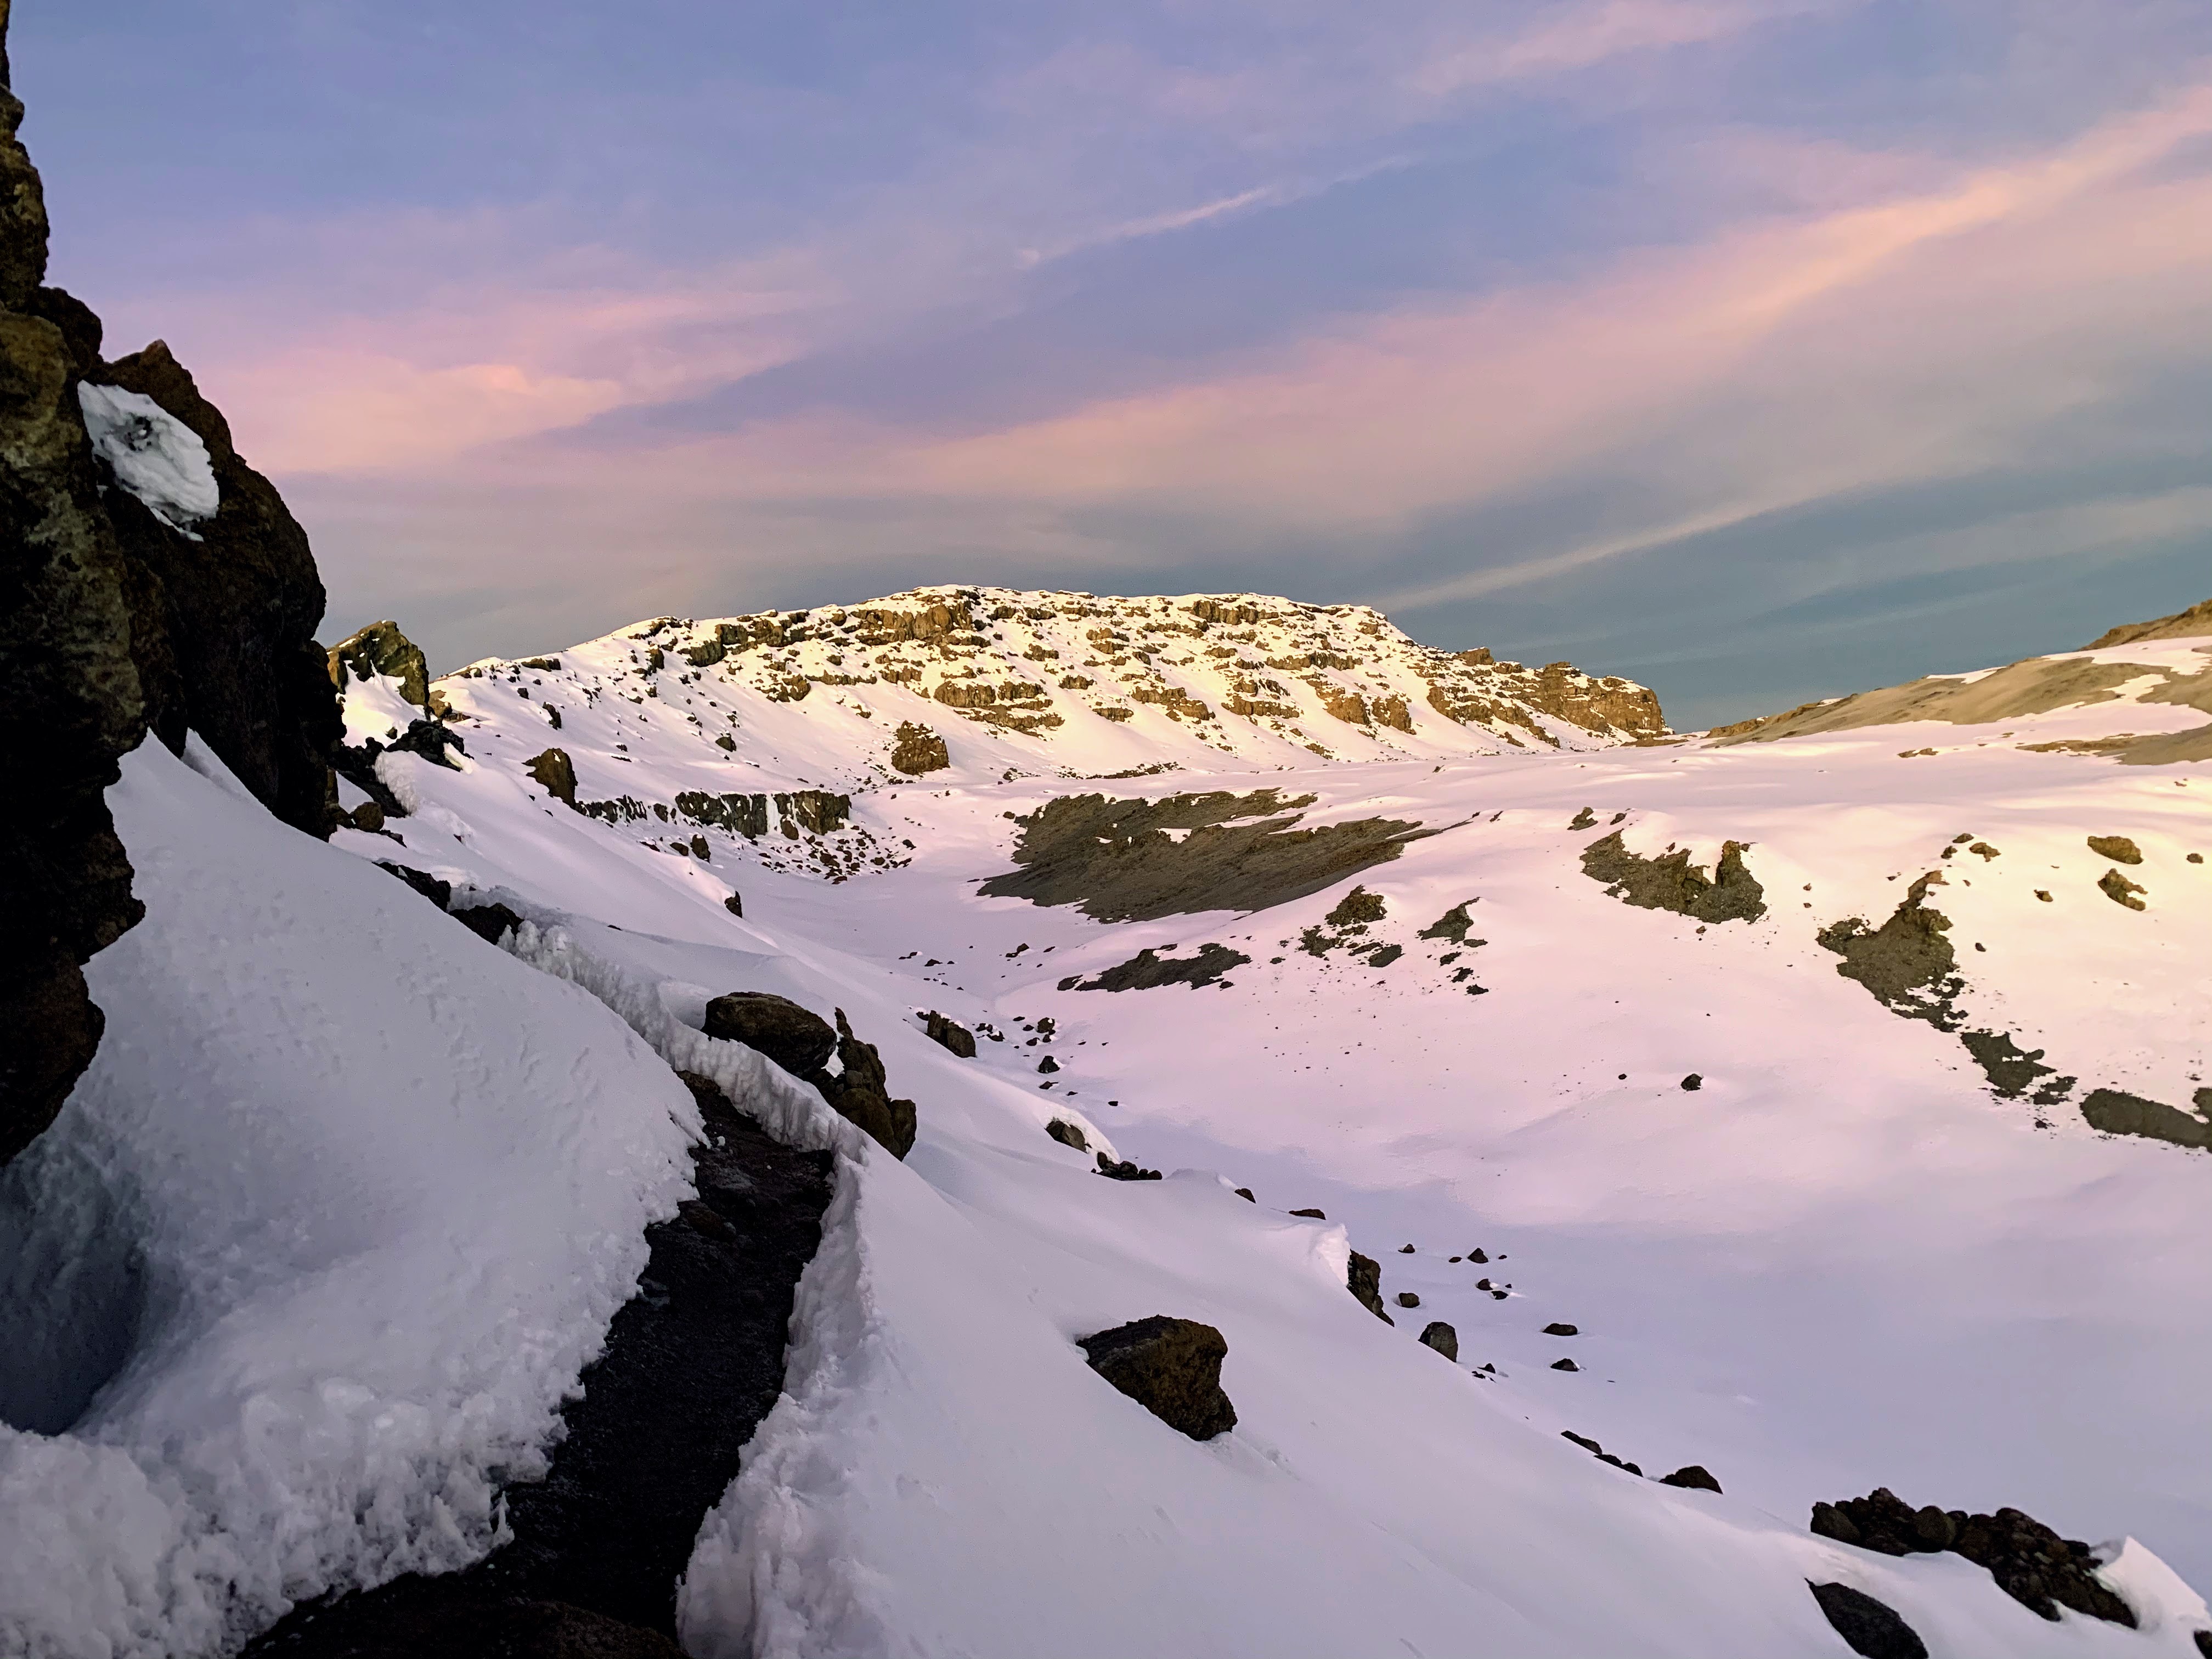
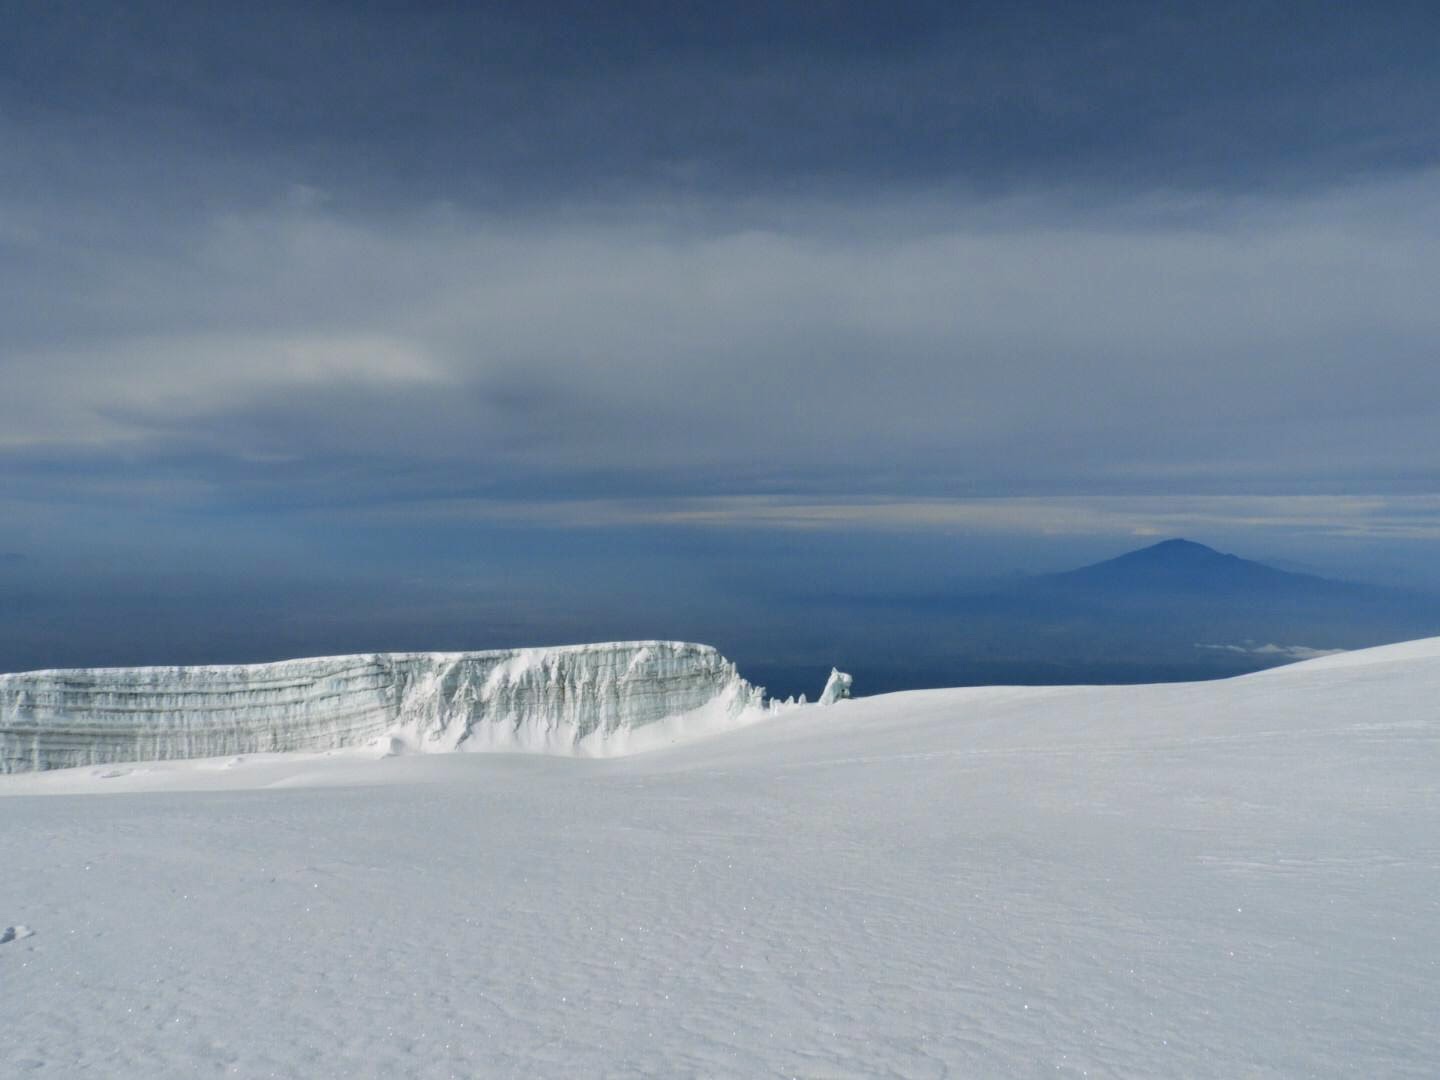
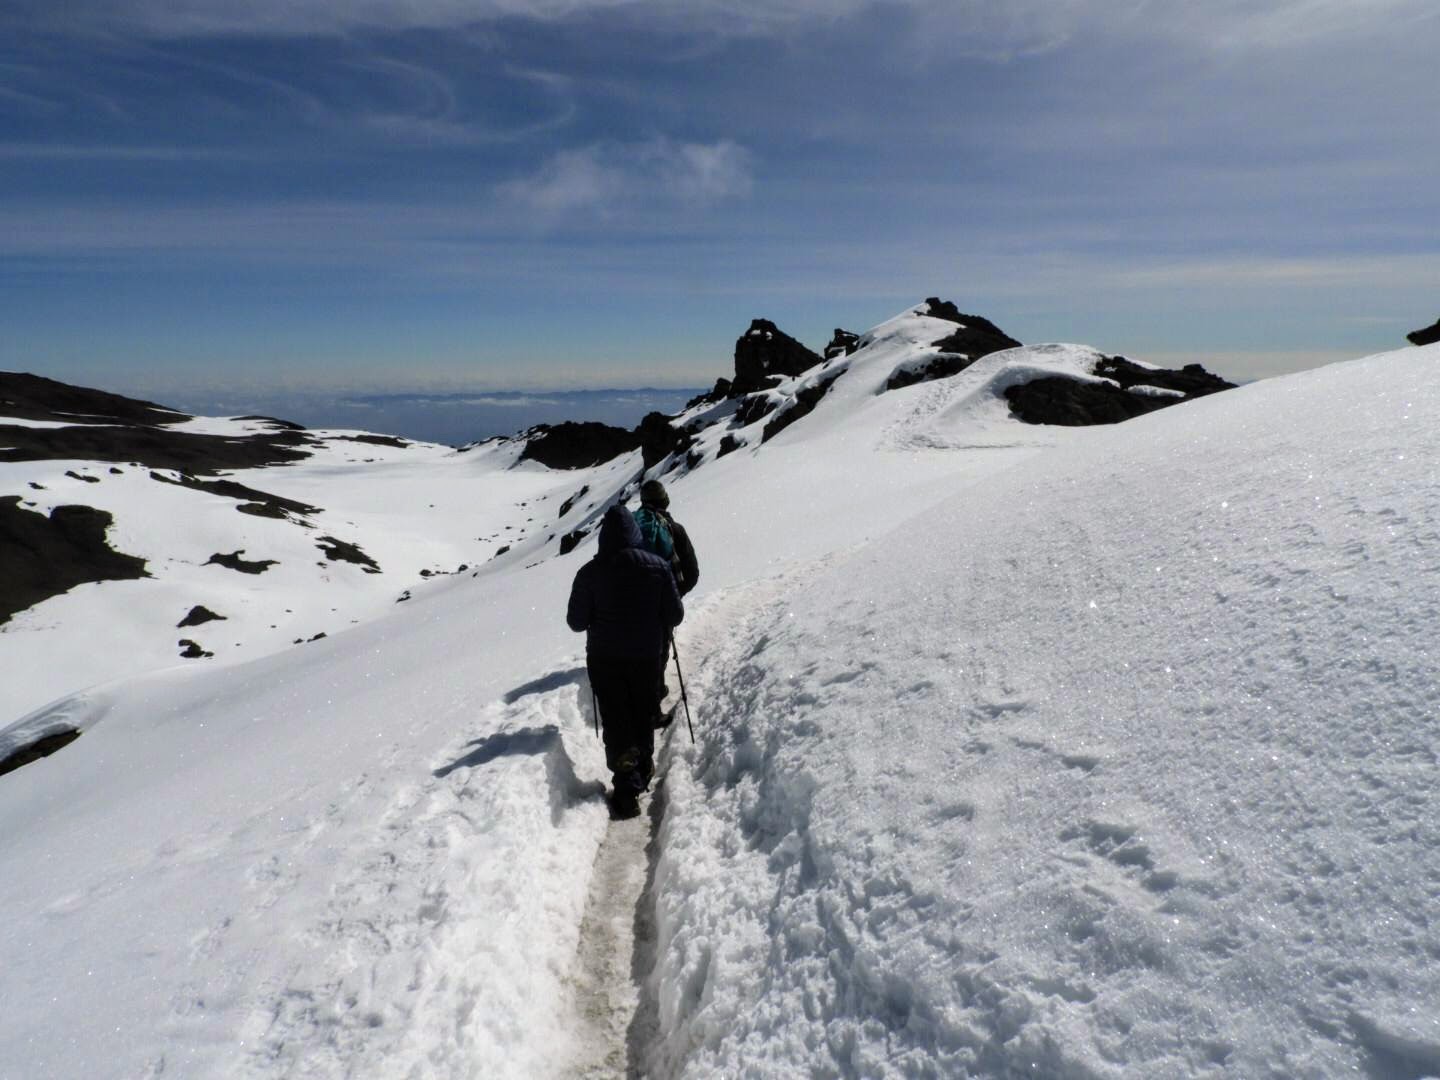
From Gilman’s Point it was another hour to Stella Point and another hour from there to Uhuru Peak. What complicated matters tremendously, was the exceedingly thick layer of ice and snow covering the crater rim.
For much of the way to Stella Point we were struggling along inside the narrow confines of a snow/ice ditch, our walking sticks occasionally disappearing halfway down the shaft, into the deep snow banks on either side of the ditch. Quite a few times, we had to hop or struggle onto the snow layer right at the edge of the crater. Just one inadvertent stumble or mistake away from disaster. Anybody sliding down the thick snow into the crater would likely suffer grievous injury from the fall, or worse. Joseph admonished us several times to be careful and to proceed extra slowly. We did. From Stella Point, where dozens of climbers from the Machame, Umbwe and Lemosho routes join the main trail to the crater rim, there was a steady stream of climbers coming and going.
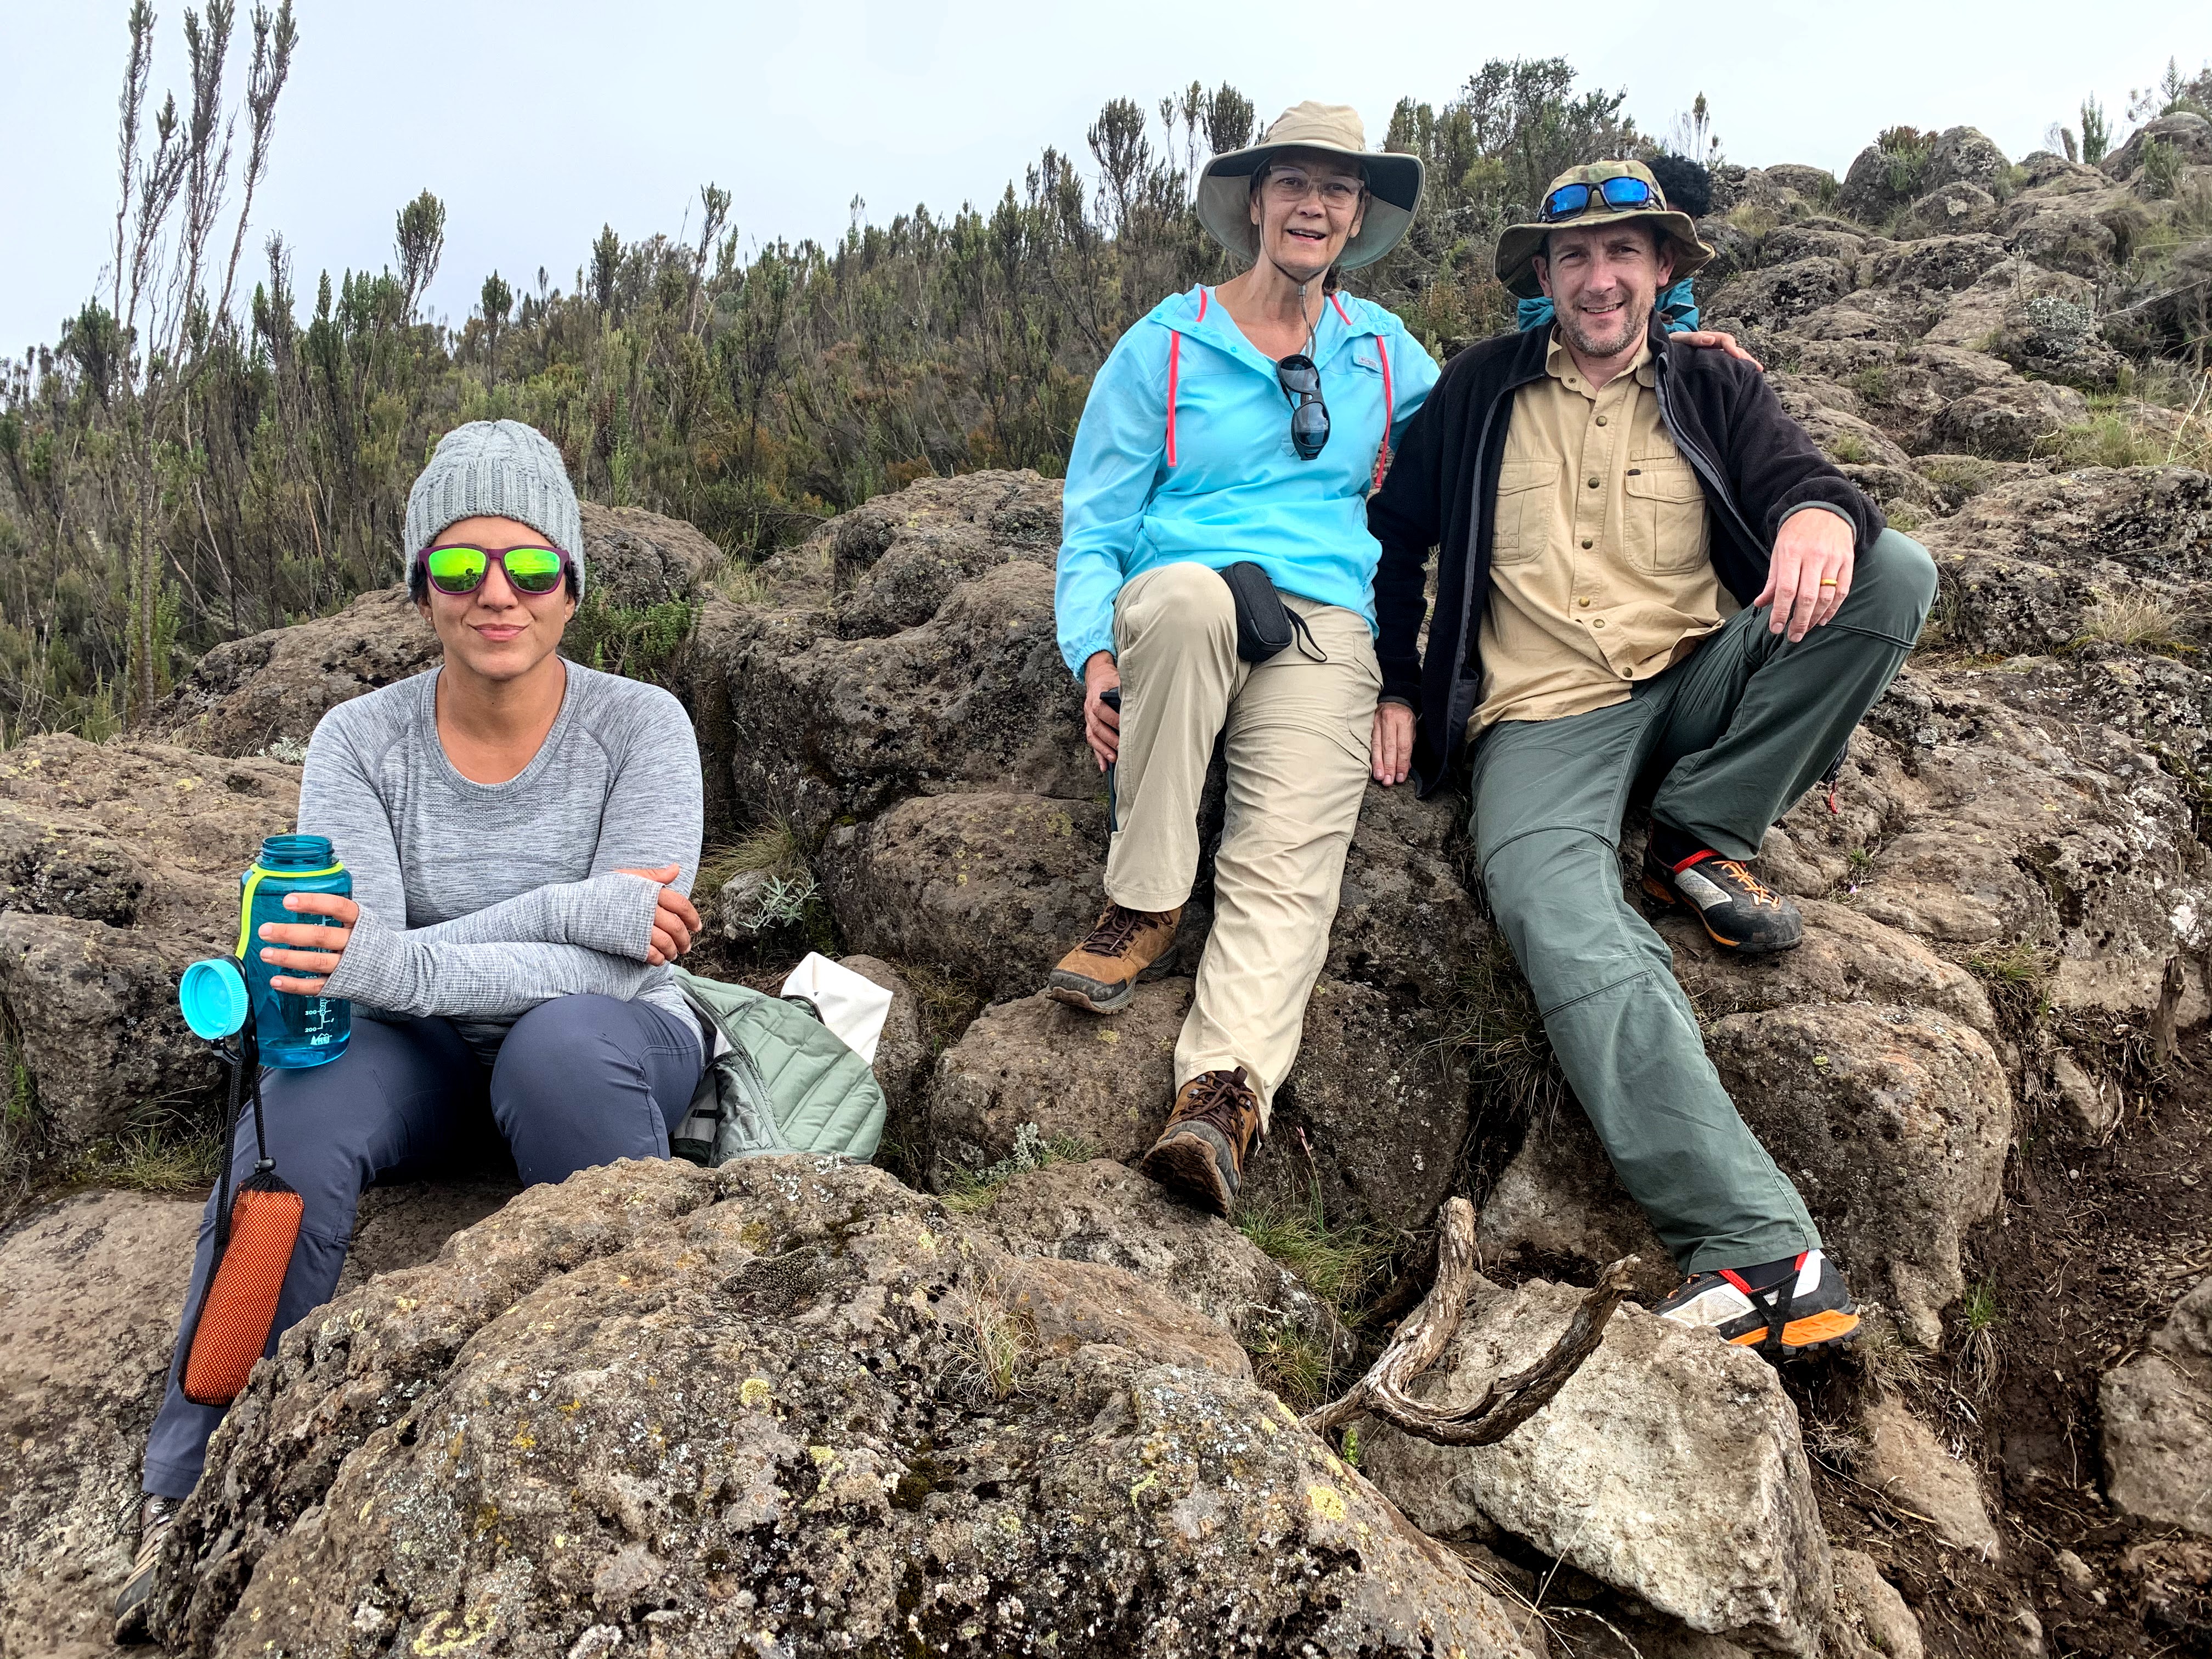
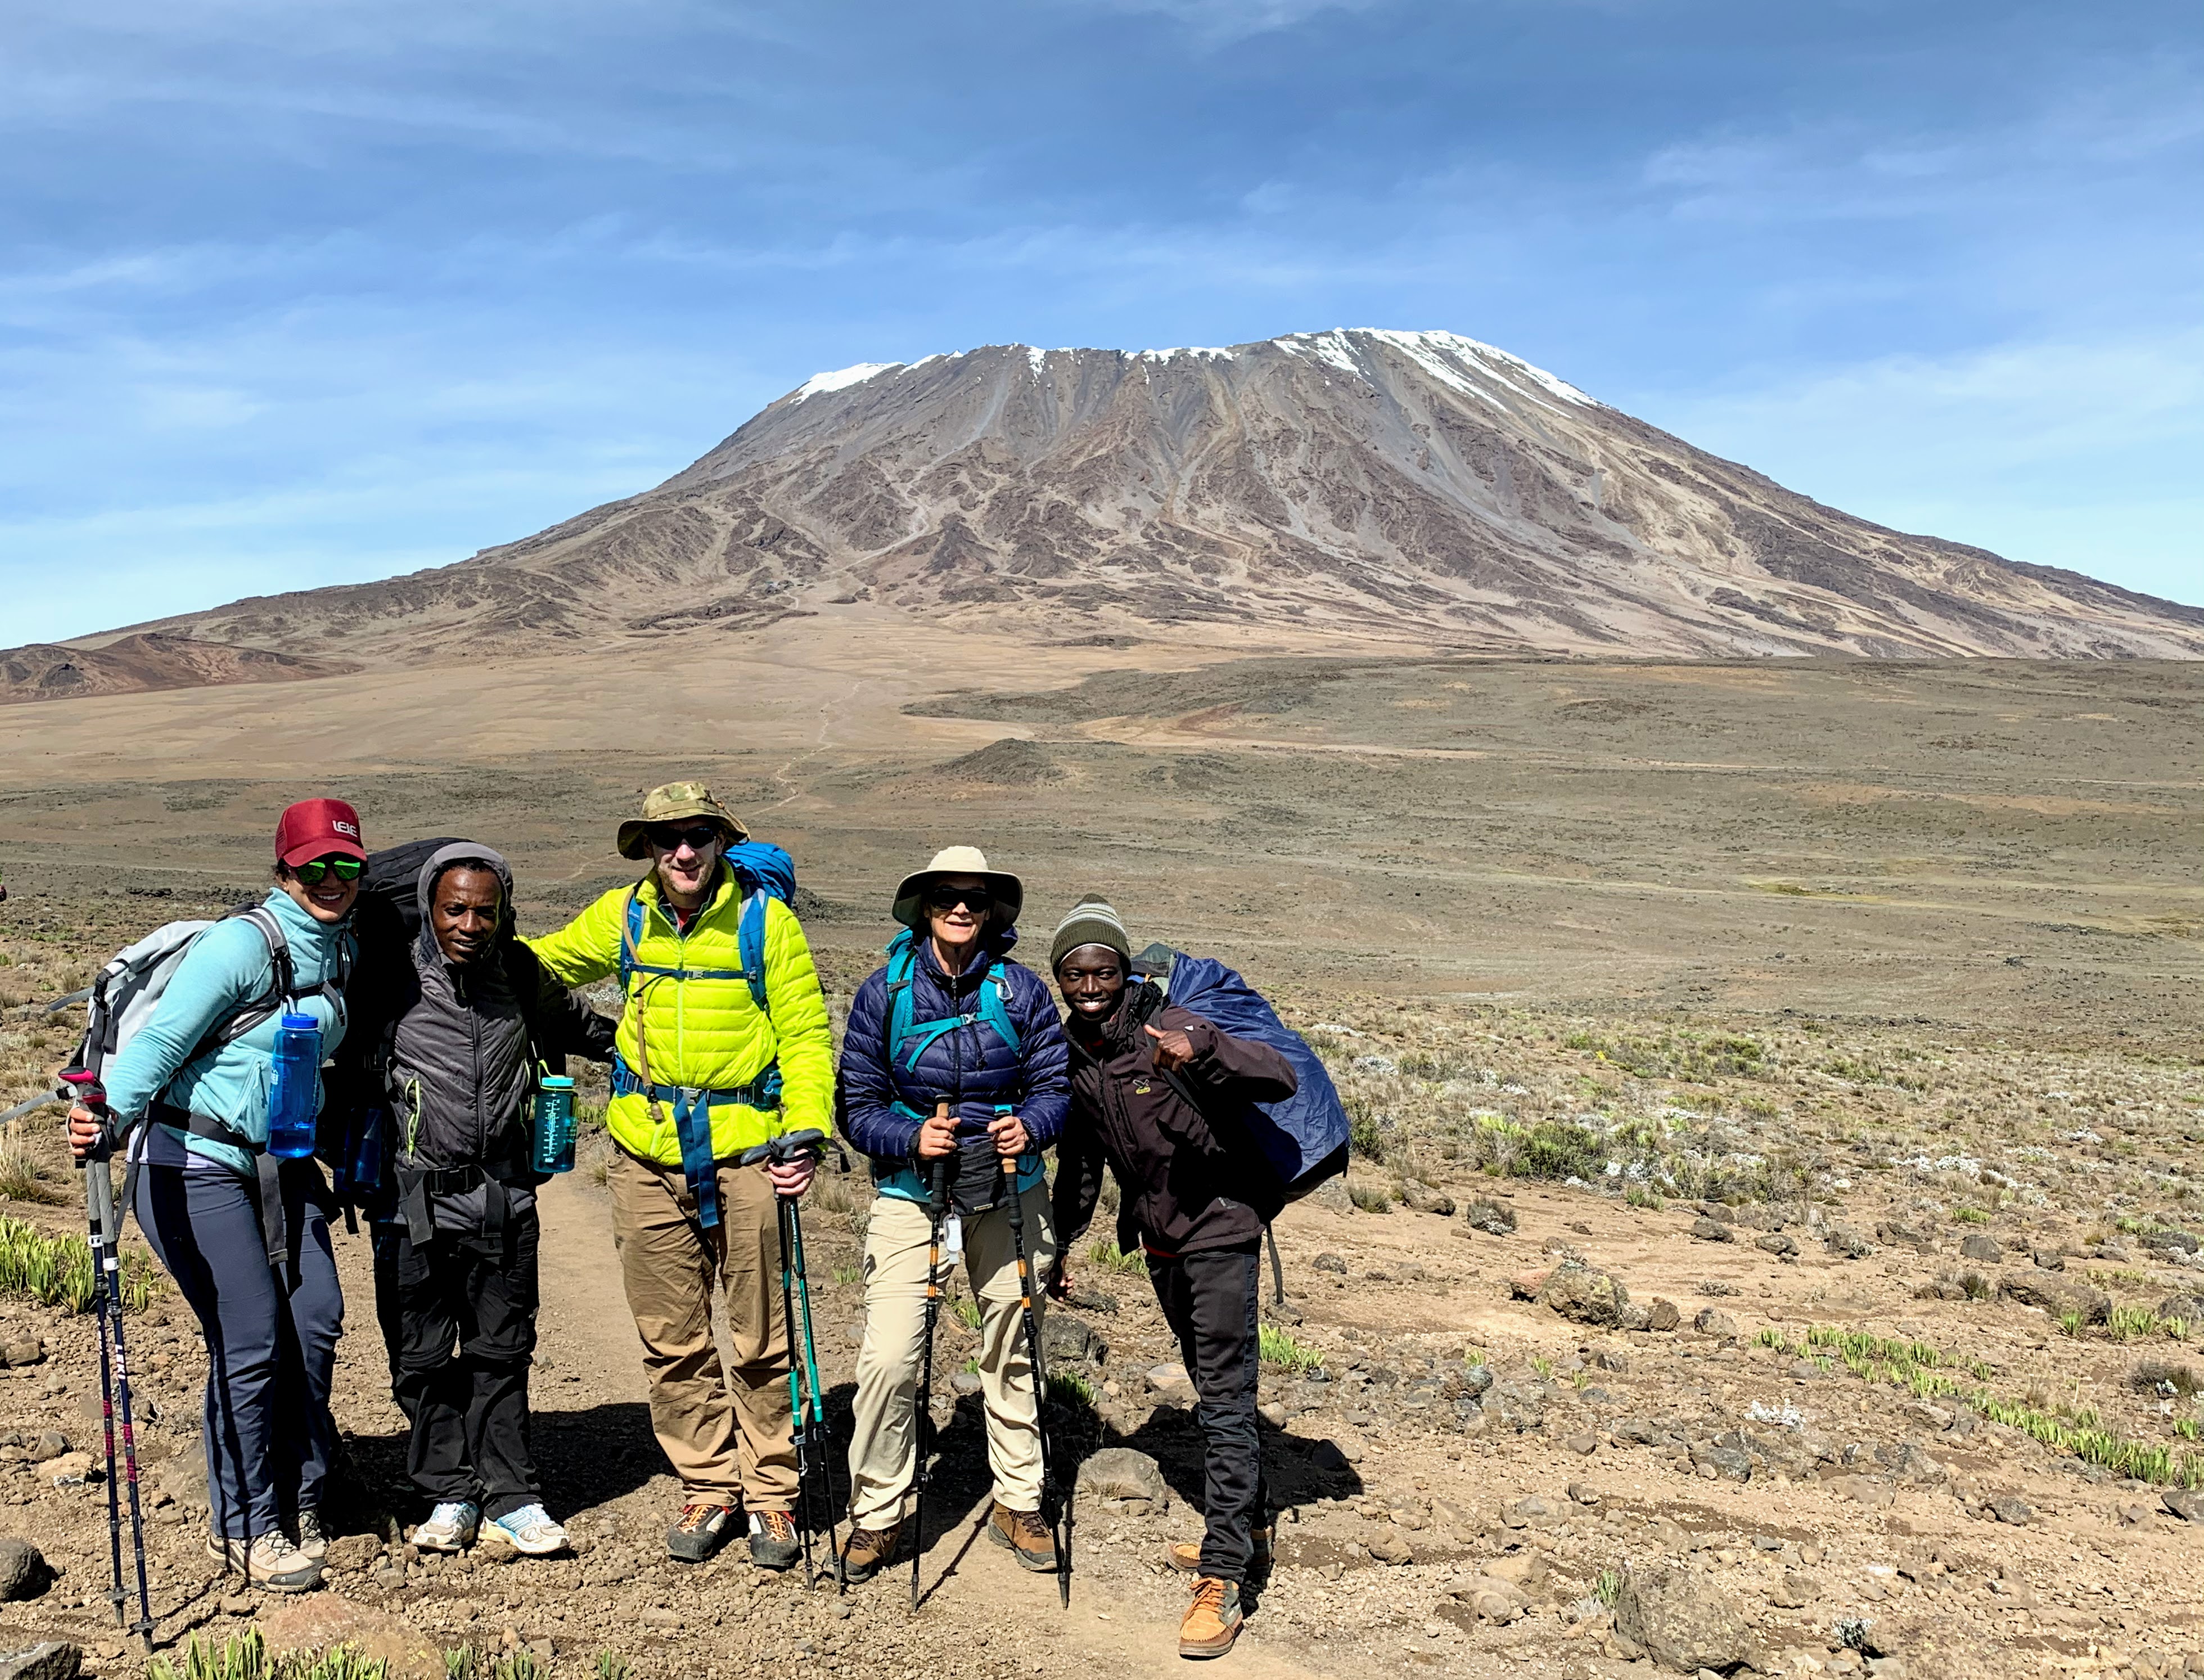
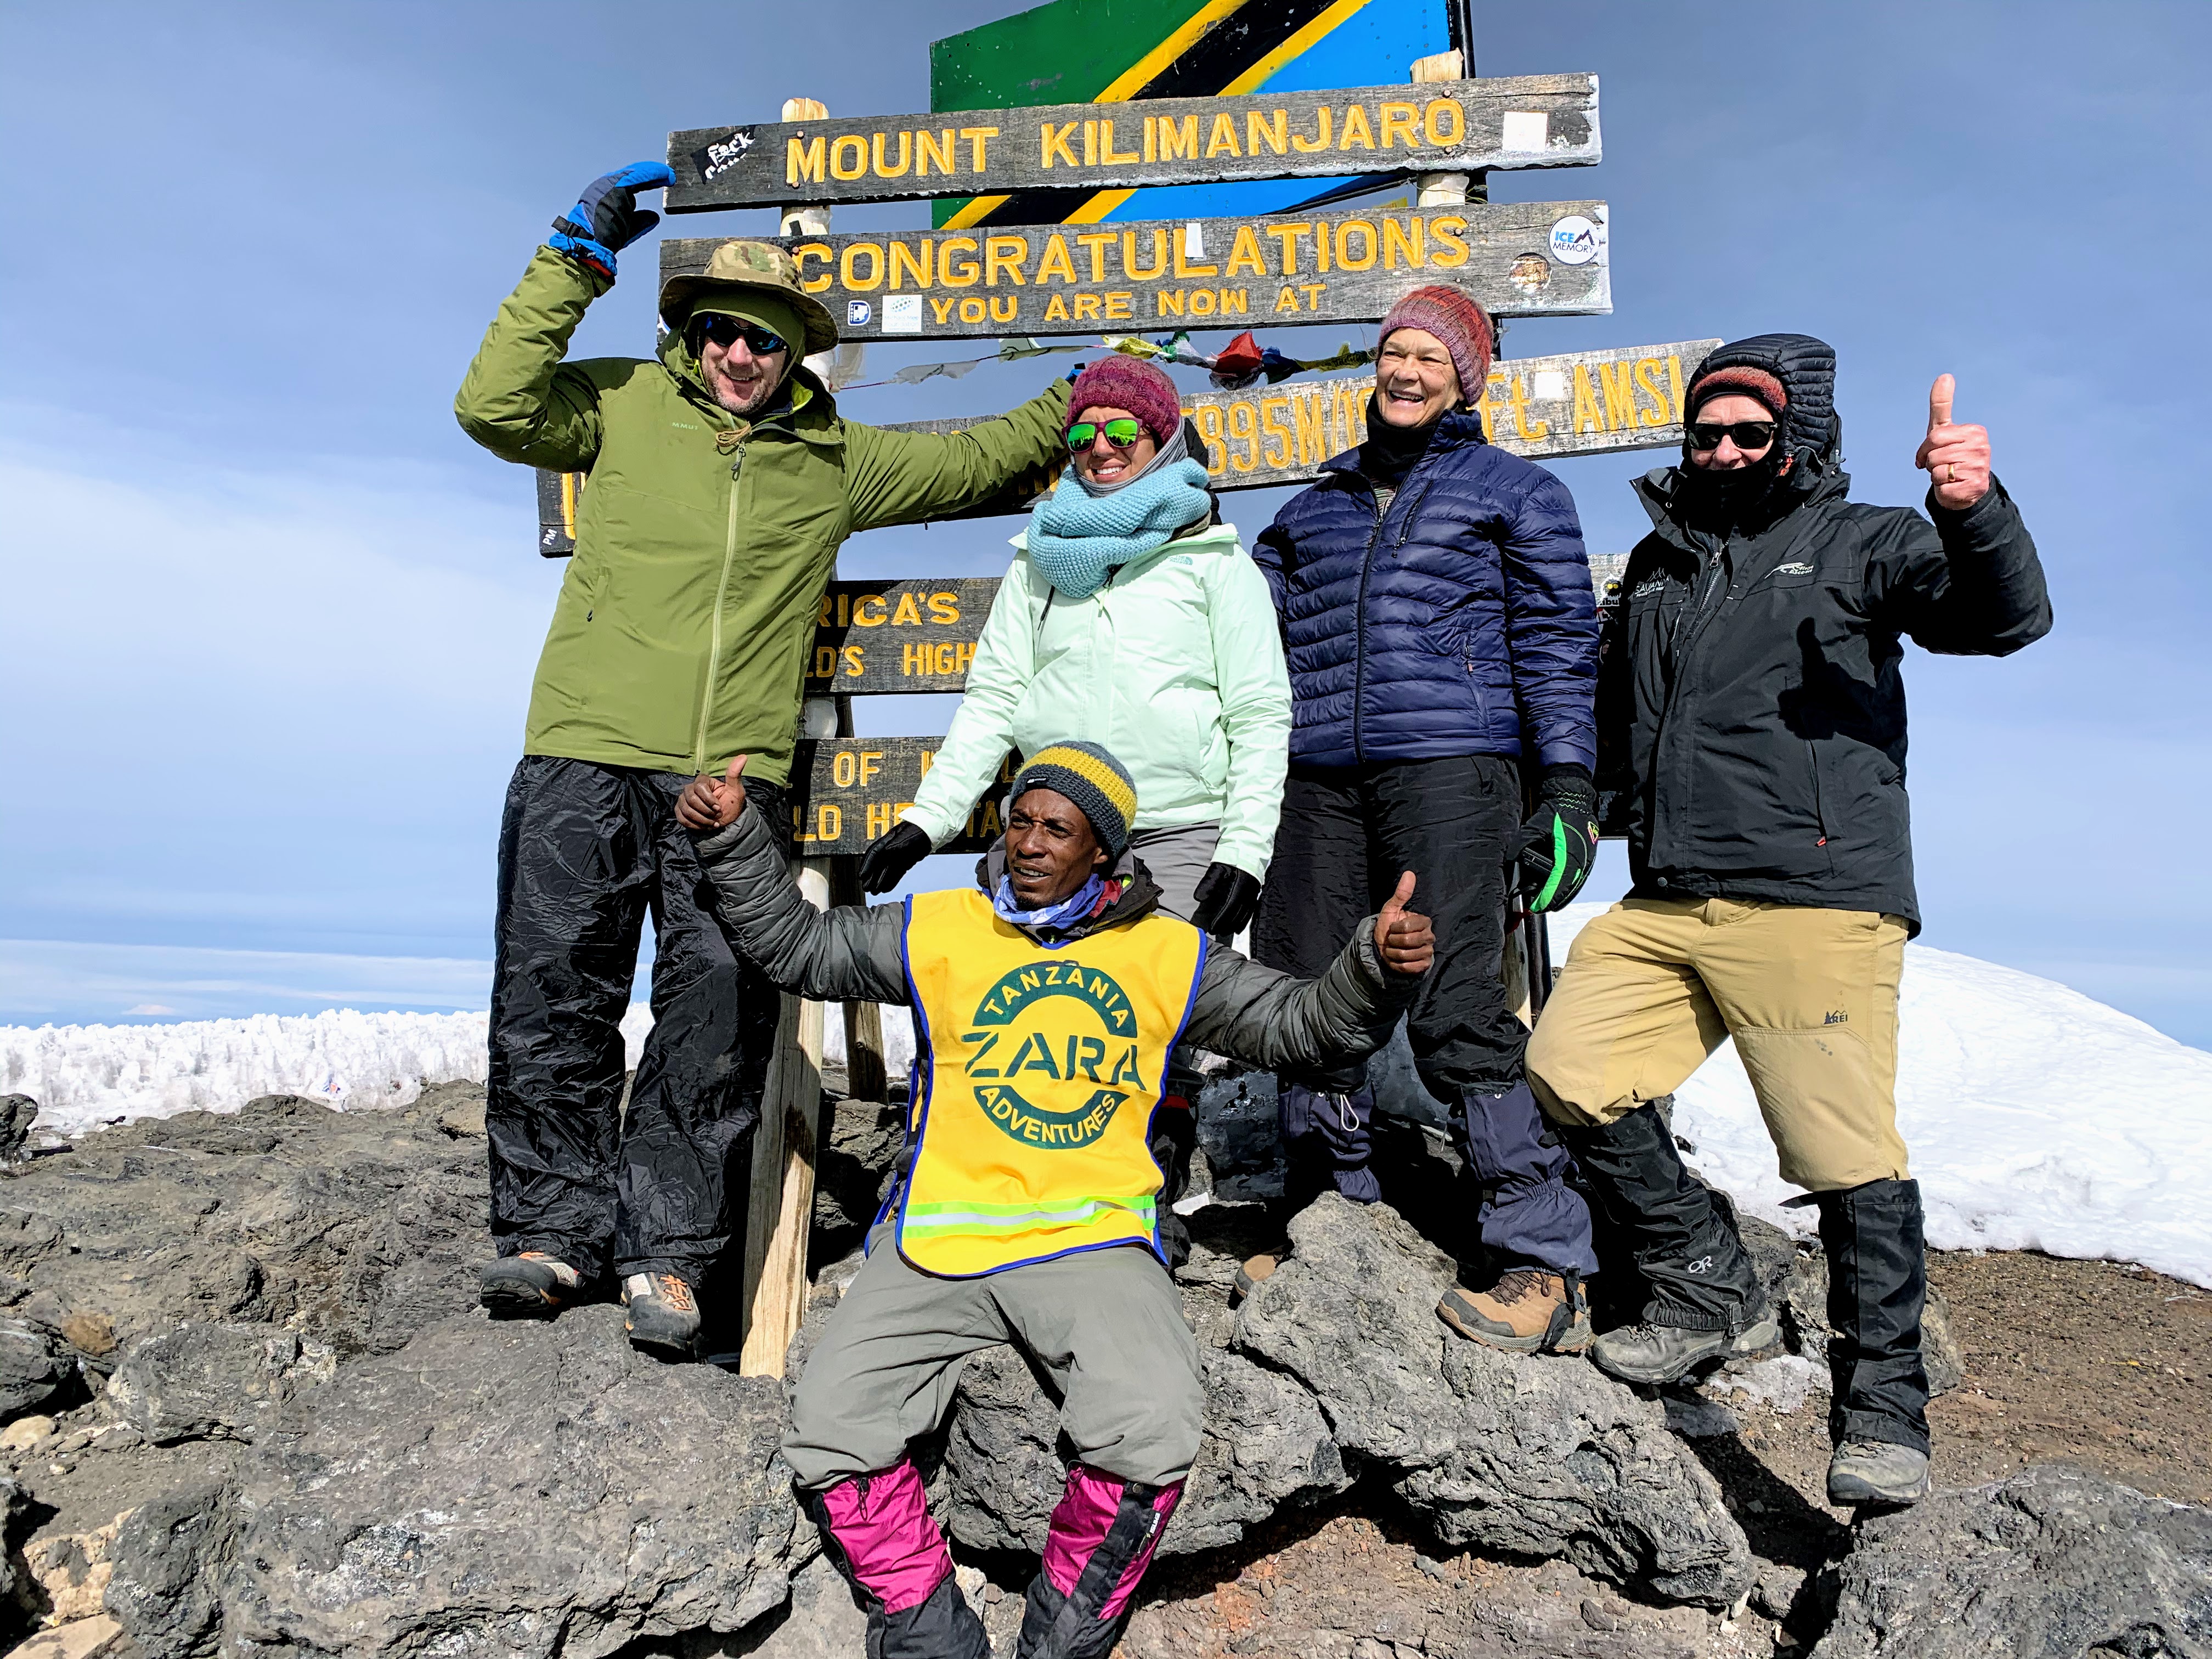
Finally, in the distance, we saw the famous Uhuru Peak sign and then heard a few squeals of delight and cheers up ahead before we rounded a corner and we could see it in front of us. Relief and excitement flooded through us and a few tears were shed. Embracing one another, we grinned our way through a photo op. We did it!! Even though there was a large group of climbers hot on our heels waiting for their turn, Joseph made sure that we had enough time to get all the photos we wanted. This was a special day and we were not going to rush it! Reaching the top of Kilimanjaro is a great achievement and for many people the culmination of a long process of planning, preparing, training and finally traveling to Tanzania to tackle the mountain. The feeling of being on the roof of Africa is one of exhilaration and relief mixed in with gratitude for one’s health and ability, and appreciation for the contribution of the guiding team and your own team members. The four of us, myself as well as Valerie, Carla and Mawgan, developed into a tightly knit unit very early on in the process, and it was fitting that we reached the summit together, as a team.

Uhuru Peak to Horombo Hut
With photos done and congratulations given and received, came the reality check that we were now faced with retracing every single step back to Kibo camp and then some. Our final destination for the day being Horombo Camp at 12,500 feet above sea level. By this time, we were all stretched to the limit and beyond. I heavily doubted my own ability to make it down the mountain. In hindsight, I think my kvetching about being totally ‘knackered’ was probably not good for team morale. Sorry guys!
However, we pushed on, a few choice expletives coming in handy to relieve the stress and blow off some steam. Before long, we were back at Stella Point. And then Gilman’s. From there, we slithered and grunted back down the way we came up, slipped and ‘scree-skied’ down the switchbacks, passed by Hans Meyer Cave in the other direction, and finally stumbled back into Kibo Camp like modern day zombies. Boots and all, without so much as removing a single layer of clothing, I crashed on top of my sleeping bag, falling into a hugely restorative one hour nap.
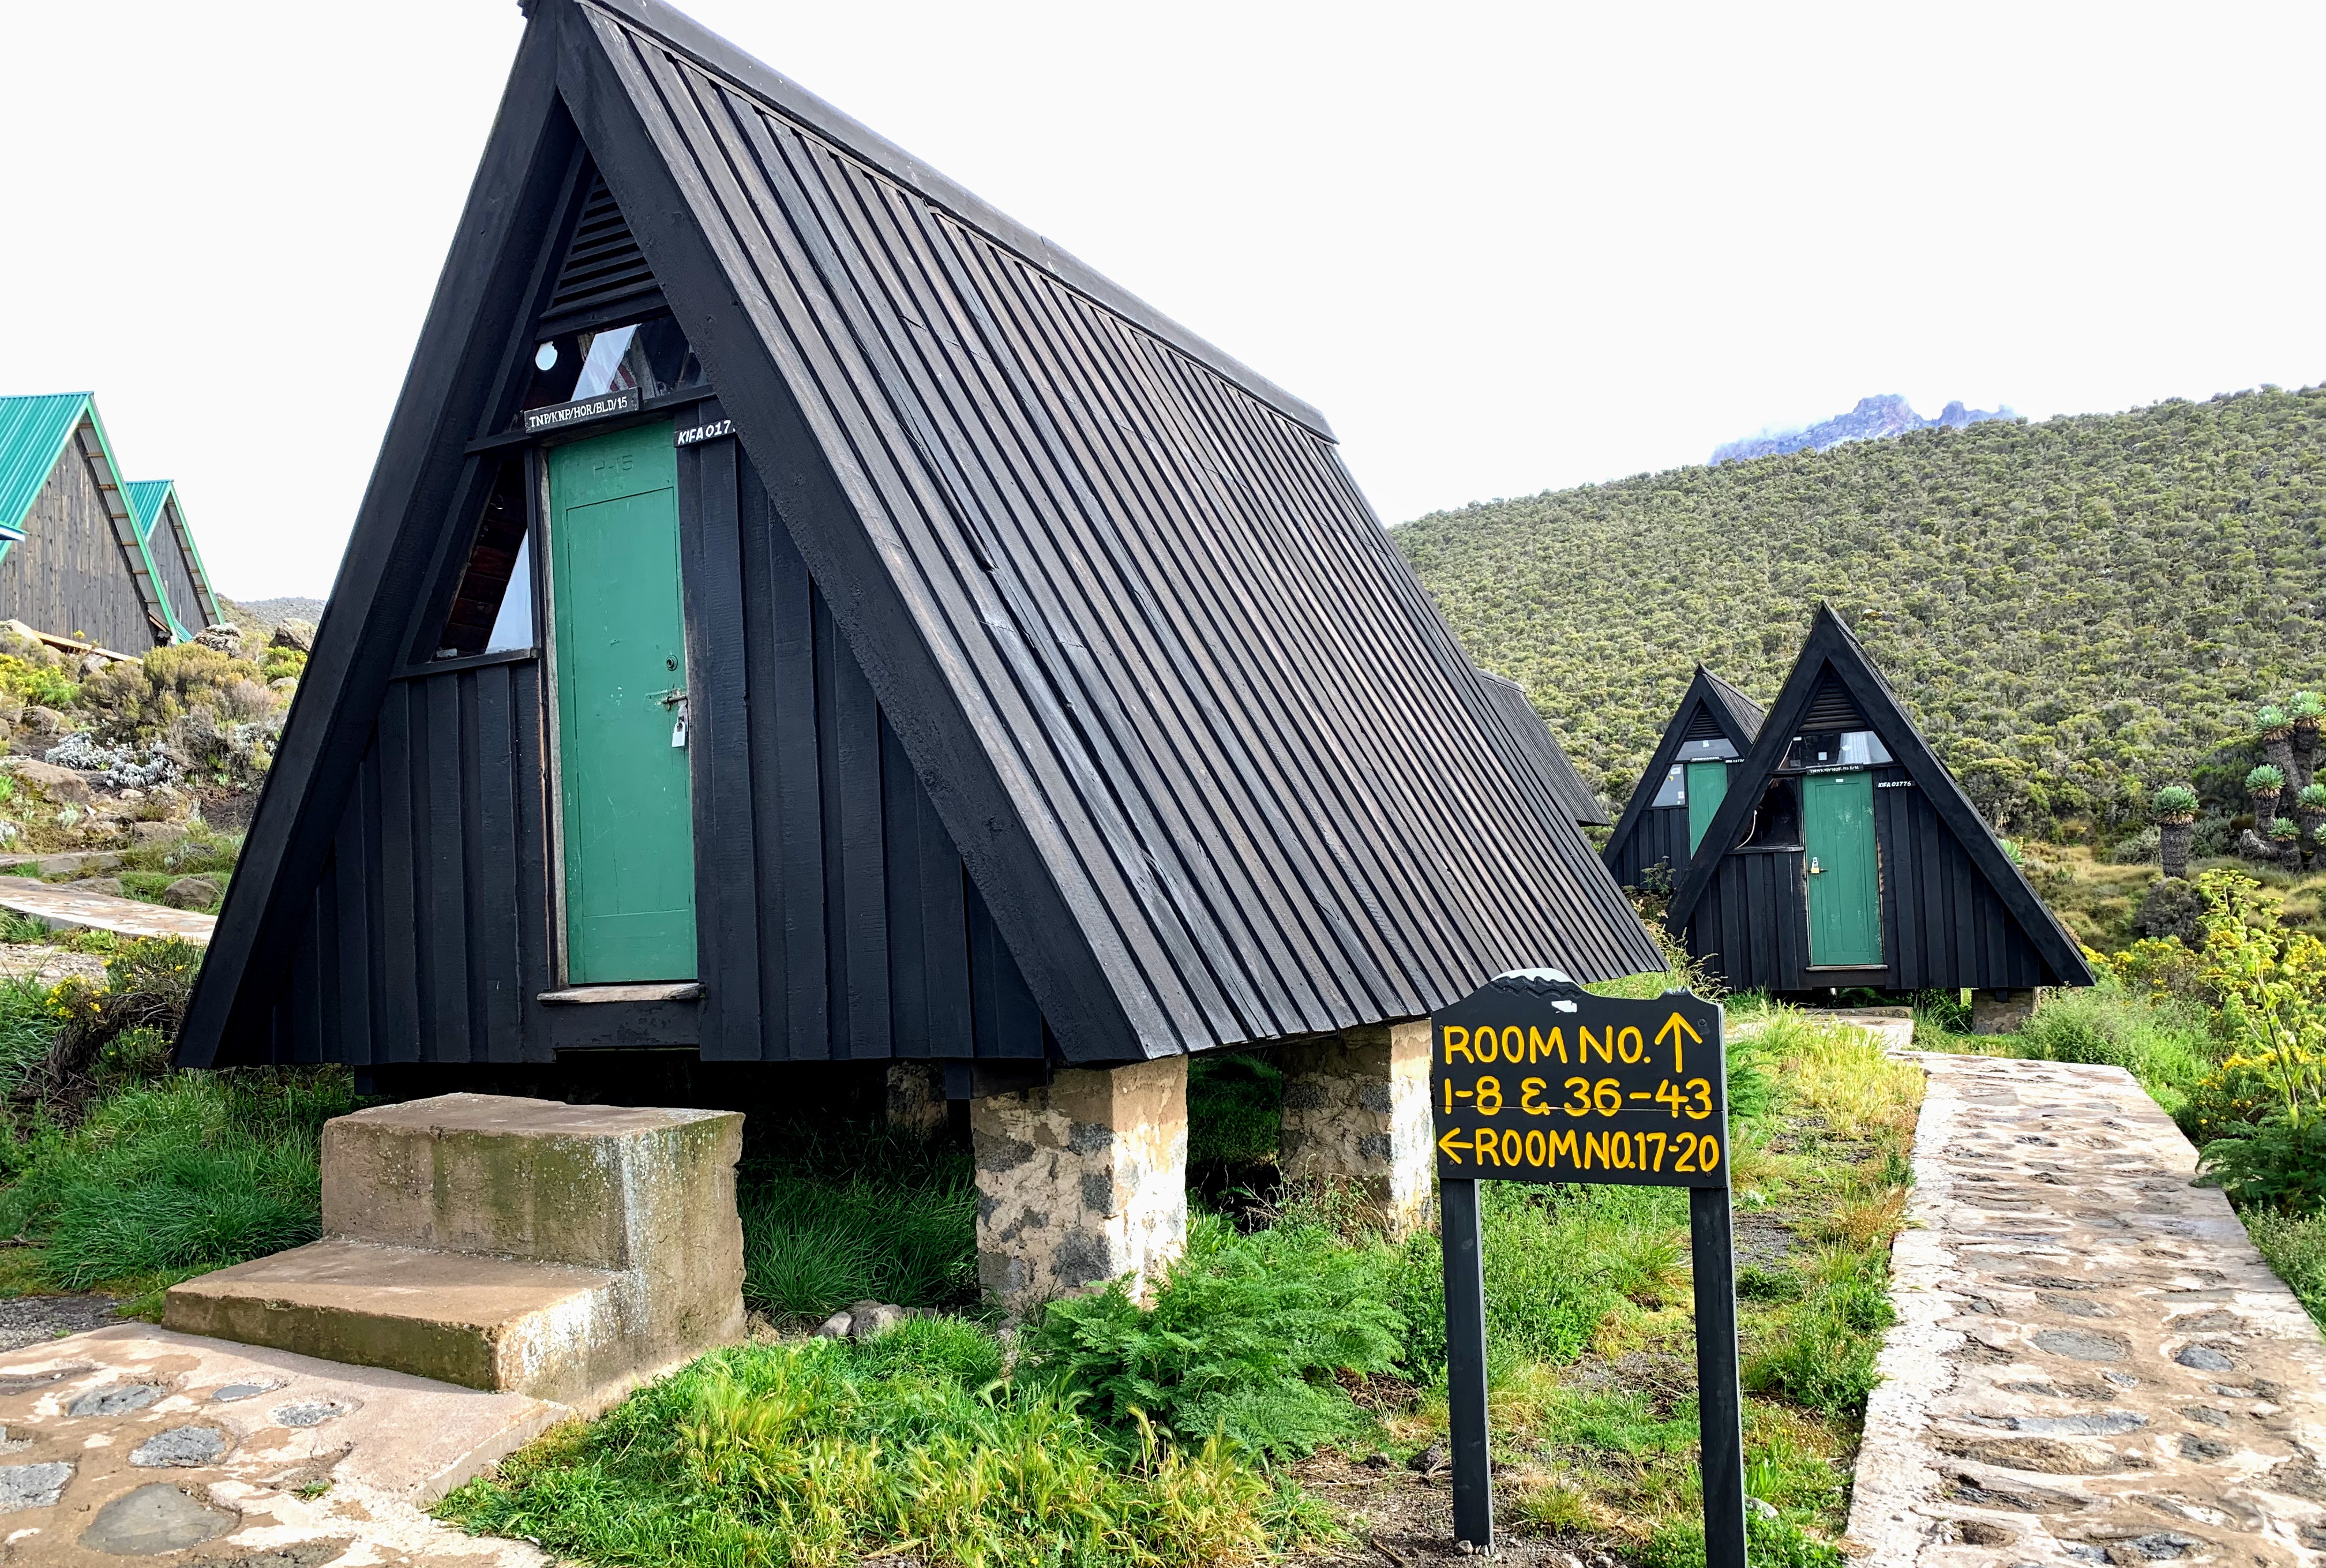
A little more than an hour later, we hit the road again, on a seemingly endless track down to Horombo, descending from 15,000 feet to just over 12,000 feet. We had to negotiate a simply awful trail, a veritable river of rocks, stretching ahead of use like a never-ending minefield. On and on and on it went. Summit day finally came to an end as the sun started to set. With our headlamps back on, we trundled over the rocks for the last kilometer or so into the surprisingly vibrant and busy Horombo Camp. For a modest additional cost of just over US$10 per person, we upgraded to two A-framed huts with bunk beds, relishing the prospect of sleeping horizontally for a change. It worked. We all had a good rest and felt a lot better the next morning.
Horombo Huts to Marangu Gate – We made it!!
The hike was far from over. The longest single walk of the entire trip – a massive 19 km (almost 12 miles) still lay ahead of us. After a couple of speeches, thank you’s and some singing on the part of our fantastic support crew, we refilled the water jugs, checked the snack supply, and picked up the backpacks one more time.
Remaining as careful as we could be, we hustled down the mountain trail as fast as our tired limbs and feet would take us. A solid six hours later, having passed through some gorgeous rain forest scenery (and some rain!), we emerged at Marangu Gate. It was over. After a few more photographs and a last lunch (chicken and french fries without ketchup), a short wait for our certificates and we piled into our minibus for the drive back to Moshi.

In one of the dumpiest of hotel rooms I’ve ever stayed in (#8 at the Springlands Hotel), I picked out some items to donate to our guiding and porter team, checked a few emails and let everyone know that we were ok. A late yet fun dinner at an exceptionally loud local restaurant ended up being the grand finale.
Still dazed and by now starting to experience calf and other leg muscle pain, being handed the official Kilimanjaro certificates by our head guide Joseph, felt like the tangible proof of the monumental effort we had individually and collectively put into conquering Kilimanjaro.
Bert’s Tips for Improving Your Chances to Summit
So what are my top tips for a successful Kilimanjaro climb? Here they are, based on my personal experience over two summits in 2018 (Machame Route) and 2020 (Rongai Route):
#1: Keep your feet happy and healthy.
This starts with buying and wearing in a good pair of well-fitting waterproof boots. Do not scrimp on this purchase. The line between success and failure on Kilimanjaro is a thin one and developing debilitating blisters can easily tilt you in the wrong direction. Personal hygiene is a challenge on the mountain with no access to showers, except cold ones on the Marangu Route. Whatever you do or do not do in this arena, don’t neglect your feet. Take immediate and decisive action to treat a blister or hot spot right away, before it becomes problematic. Use an antifungal like Tinactin daily and apply a lubricant like Glide (get it from a running store) on and between your toes, on your heels and other potential problem areas, before every hike. Prevention is way more important than cure, particularly over the space of a few crucial days.
Proper socks are super important. I’ve had great results with a thin liner sock (like the REI store brand), together with a double-layered hiking sock such as the Wrightsock ‘Coolmesh’ type. Take enough socks to start with a clean pair (liner and regular socks) every day, plus 2 spare sets in case of unexpected heavy rain or other mishap.
#2: Follow your head guide’s instructions and requests
Your head guide has summited Kilimanjaro probably dozens and even hundreds of times. He knows what works, he can anticipate issues and pitfalls, help you avoid failure and inspire you to deliver your best. As long as you listen to him and let him lead. If the pace initially seems painfully slow, there is a reason. If the head guide wants you to do an afternoon climb to gain some more altitude, after a long and perhaps punishing morning hike, do it. Don’t fret, don’t whine – you are paying good money for the chance to achieve something really special. So, shun all negativity from your mind and let your head guide help you realize your dream.
#3: Sleep when you can.
Get some sleep at night or during the day, whenever the opportunity arises. Whether it’s a 15-minute nap or a 6-hour slumber, it all adds up and it is vital, in fact critical for success. Bring good earplugs, a comfy pillow, whatever it takes to get you in a sleep mode. It may help to avoid caffeine and alcohol. A high quality sleeping bag which will keep you warm at temperatures as low as minus 20 degrees Fahrenheit is a good investment in more and better sleep. It means you can get into your sleeping bag with just a couple of layers of loose, comfortable sleepwear. To keep warm in a sleeping bag not designed for such low temperatures, you may end up having to wear multiple layers of clothing. This can be annoying, restrictive and not conducive at all to falling asleep easily and quickly. Plus of course being cold inside your sleeping is guaranteed to adversely affect your sleep duration and quality.
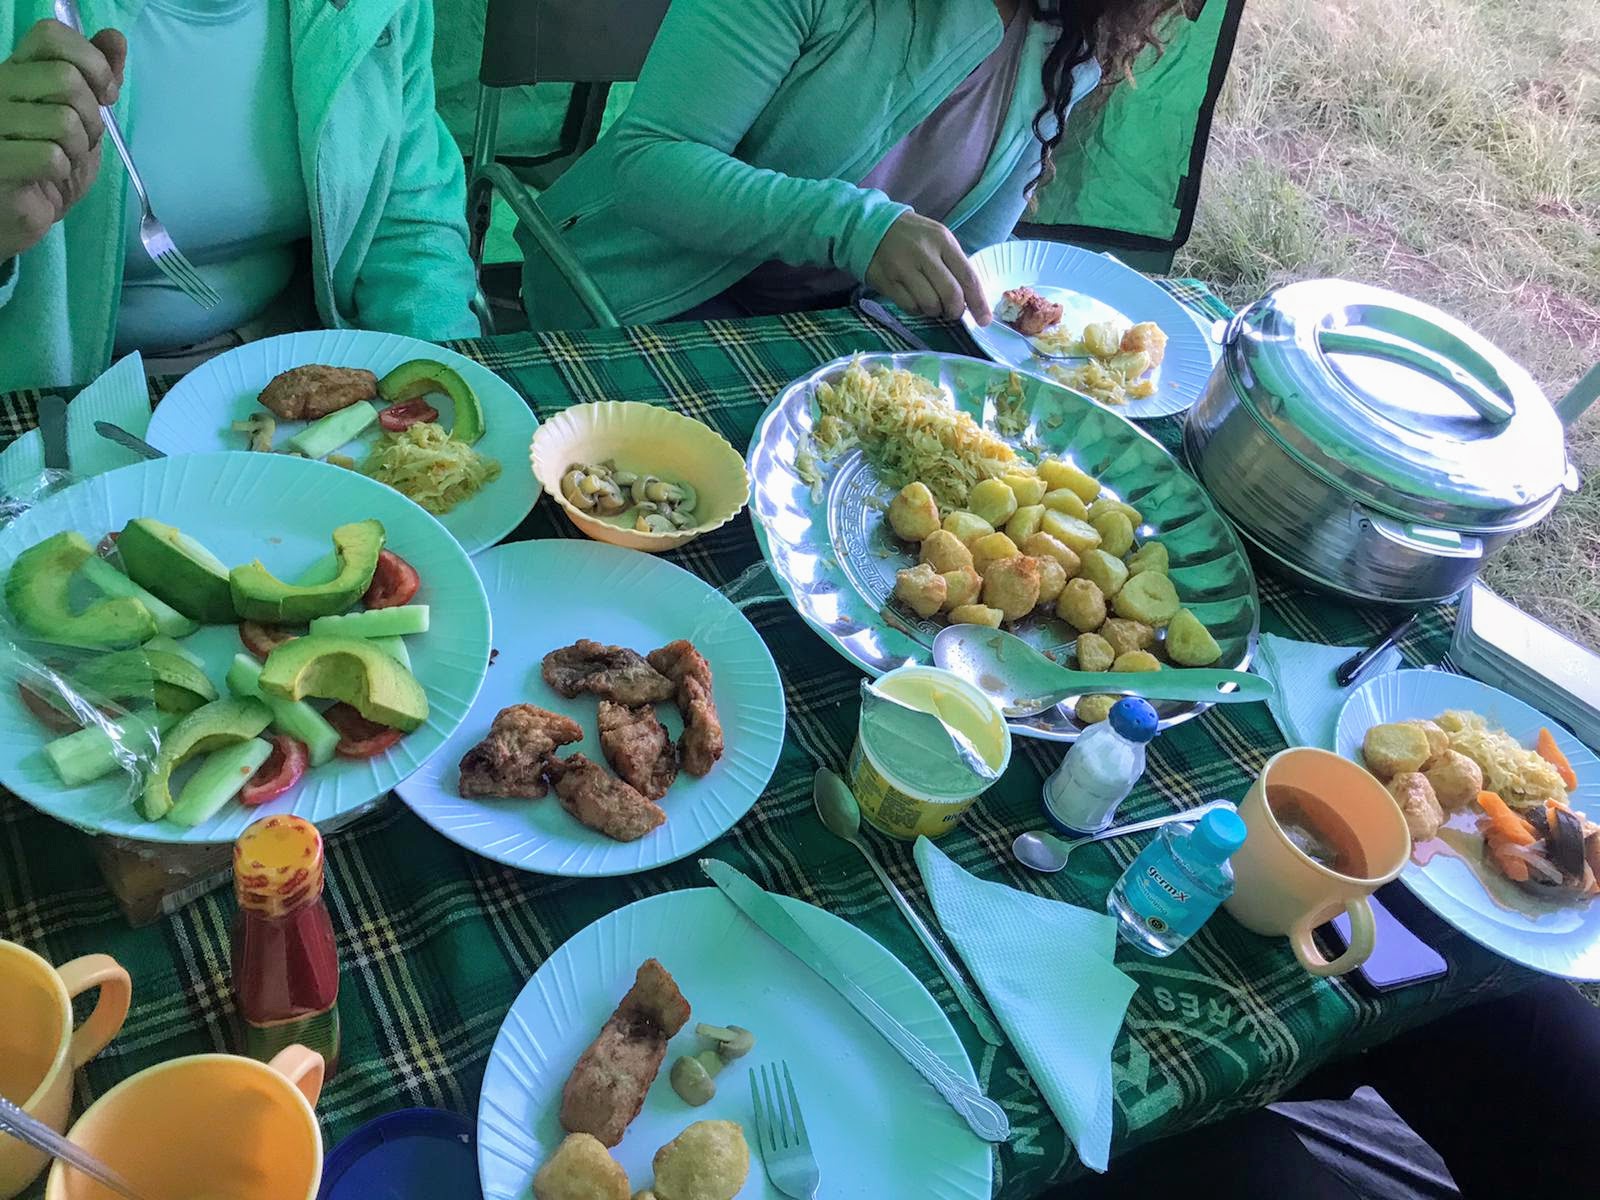
#4: Eat and drink regularly.
The food on Kilimanjaro is typically bland and predictable: chicken and chips, a variety of stews, lots of vegetables and pasta. And soups. If you are lucky your cook will prepare some local foods like ugali (rustic polenta) and beans. Even the most creative of mountain cooks are stymied by the limited range and quantity of fresh ingredients which the porters can carry all the way up, so don’t expect something new and exciting every day. You must eat though, to replenish the thousands of calories burnt every day. So, while you may not always feel ravenously hungry, decent nourishment is vital. Be sure to bring some energy bars with you; on our last trek I tried the Luna brand Blueberry and Lemon Zest varieties and they both hit the spot! Be creative and experiment, just make sure that you get your calories in. It is ok to indulge in sugary treats for these few days so by all means tuck into candy bars, chocolates, snack food and trail mixes – anything you find palatable.
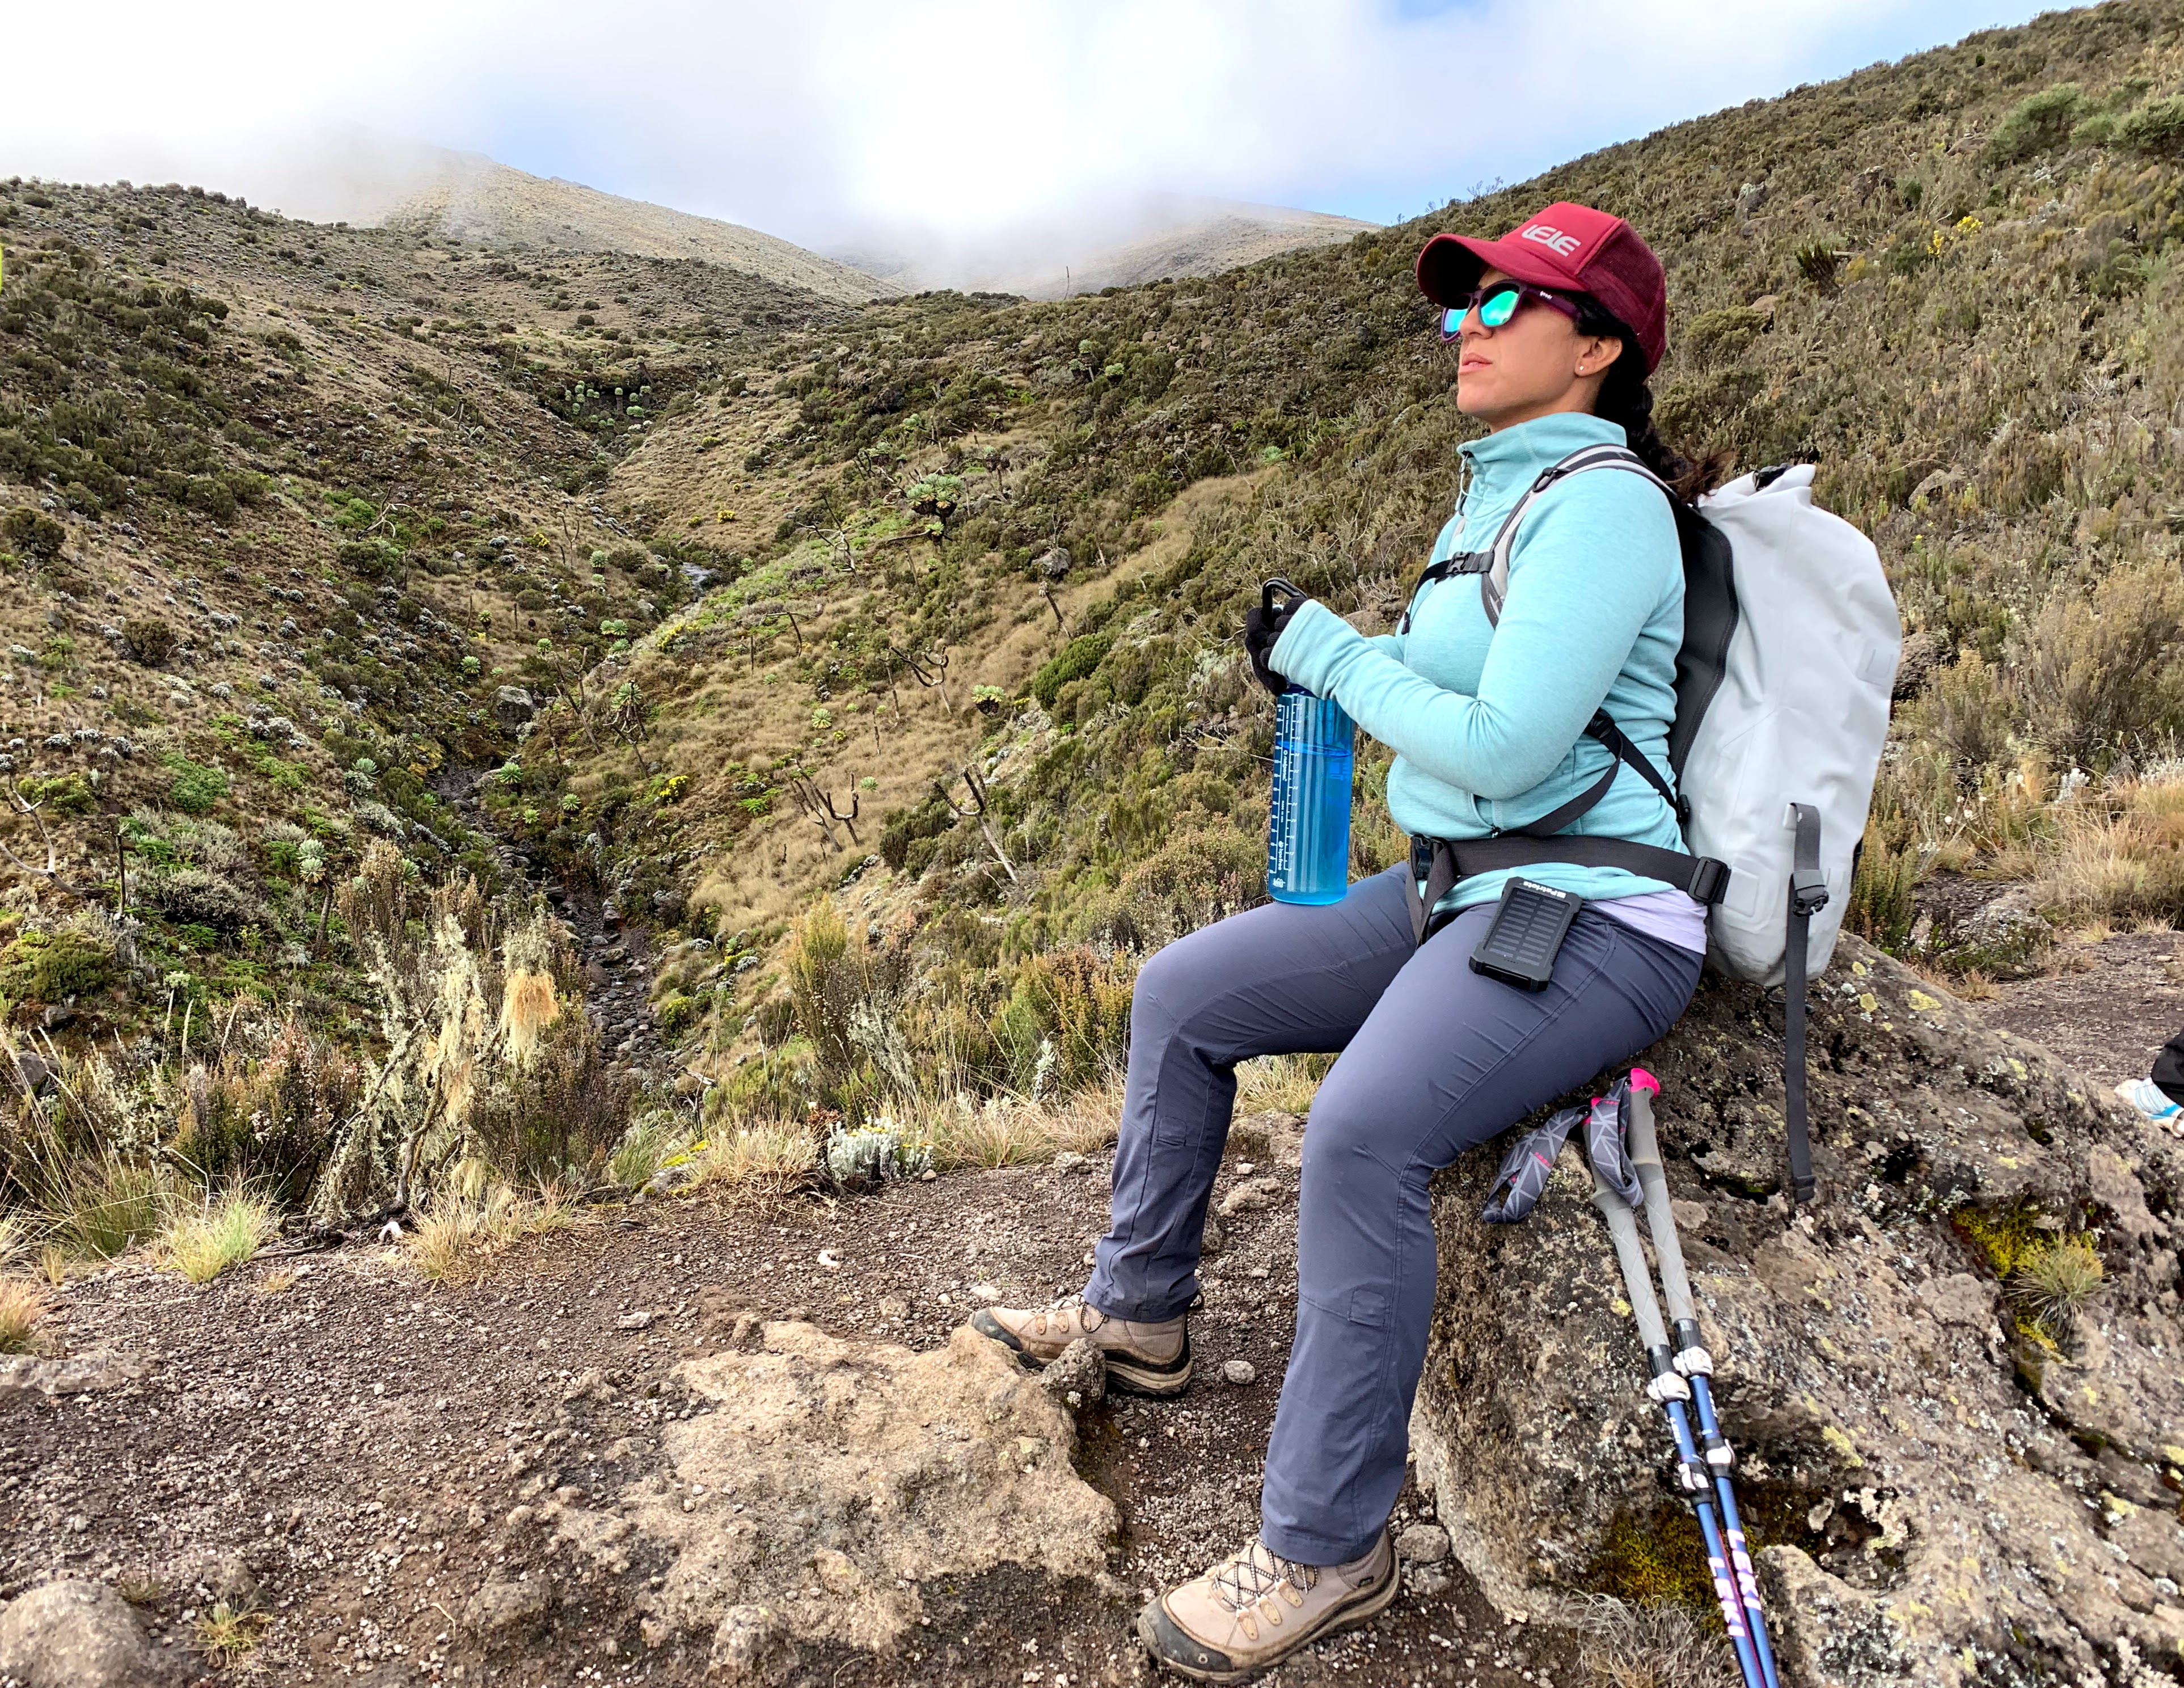
Your head guide will be checking regularly to make sure that you stay hydrated as that is of paramount importance. Whether you use a bladder system or individual Nalgene bottles – or both – make sure that you carry at least 3 to 4 liters of water on you; it is advisable to add some electrolytes to the bottled water.
#5: Take the Diamox.
Don’t shy away from a twice daily dose of Diamox (Acetazolamide), a diuretic which helps to prevent and reduce the symptoms of altitude sickness. Most climbers take about 125mg to 250mg or so – but be sure to consult a physician before doing so. Taking Diamox is no guarantee of success, but it does help a lot of people. The most common side-effects include some tingling in the extremities and excessive urination. Not a bad trade-off for achieving your goal. Persons who have an allergy to Diamox or sulfa drugs should clearly not take this drug – again, be sure to consult a medical specialist before taking any prescription medication.
#6: Train, train, train.
It is never too soon to start training for Kili but certainly you’d want to be on some kind of training regimen starting no less than 6 months prior to the summit date. Ideally of course, climb some mountains or hills with a backpack, with some weights. Start modestly and work your way up from a couple of days or so per week, increasing the distance and frequency as the climb approaches.
No hills? Find a levee wall or other decent sized hill or slope (steps if there is nothing else) and walk up and down with a weighted backpack for up to an hour or more, several times per week. Make this progressively harder and more challenging as the big day approaches. Be careful with weights on your back as too much can be dangerous, particularly if not carried high up and close to your upper torso. Even regular long hikes with your Kili boots and backpack (load it up progressively) will help with the preparation, hills or no hills.
In addition, and in combination with hiking, I suggest a series of single leg exercises to increase your ability to handle the thousands of ‘up’ and then thousands of ‘down’ steps required to get to the top. And down again. The exercises which I personally do include the following:
- Single leg step-ups. Start with a low, comfortable box height and work up from there, adding dumbbells as required later. Be sure to focus on using the front leg exclusively; avoid driving off the back leg. Finish on the front leg only. And then step down slowly.
- Single leg deadlift. Standing on your one leg, lift and extend the other leg backwards to reach a horizontal plane with your torso. As you bend over to do this, keep your shoulders back and lower your arms so that your hands touch the floor surface lightly. Stay controlled and don’t let your leg muscles relax to the point where you ‘sag’ to the left or right.
- Single leg squats. Standing on one leg and keeping the other one just off the floor behind you, lower your butt to the ground gently and slowly, without putting undue strain on your knee. Keep your body weight right above your feet and don’t let your knee sway or get too far forward. Start slowly, with just a few repeats.
- Regular weighted squats. Using preferably a barbell with weights (start modestly), work some ‘regular’ squats into the routine. Be sure to keep the weight back so that you feel the pressure in your heels, not your knees. Squats are good for the legs as well as the glutes. Nothing wrong with that!
- Walking lunges. Start with a dozen or so walking lunges and once you are comfortable, increase the number per set and the number of repetitions or add some weight to make it a bit more challenging.
- Calf lifts. Kilimanjaro can shred unprepared calves so take heed. Standing with the balls of both feet firmly on a low step or stair, lift up as high as you can onto your toes, and then gently lower your heels as much as your ankle flexibility allows. Rest your hands against a wall or counter to maintain your balance.
Work your way slowly up to about 3 sets of 12 each of these exercises, about 3 times per week, and you will be heading in the right direction. Increase the number of sets when it becomes easy or start adding some weight in the form of ankle weights, a weight belt or dumbbells.
It is a good idea to also include some aerobic distance exercises like running, biking or a rowing machine to build up endurance and good oxygen utilization. High intensity training like Crossfit is not recommended due to the potential for injury. However, there’s nothing stopping you from doing some high intensity running like fartleks (speedplay) which can be done anywhere. Just warm up properly and don’t make any sudden or large increases in volume or intensity, from one day or week to the next. Slowly slowly, just like the eventual ascent you are working towards!
There is no prohibition on including other training modalities and equipment like regular gym core and weight work, swiss ball, medicine ball, resistance bands or whatever you are already doing. And of course, if you already work with a personal trainer, that is your best-case scenario. A personal trainer will be able to customize your training program to get you into tip-top form for Kilimanjaro!
Back to Kilimanjaro – February 2021
For the next trip up to the summit – it will be via the Marangu (‘Coca Cola’) route in in February 2021 – here are some of the changes I will be making:
Getting a new sleeping bag capable of handling minus 20C to minus 30C temperatures
Taking a less squeaky sleeping pad
Consider using Dexamethasone (steroid) on summit day
Take a pill organizer and take some CBD along for muscle pain
Packing some clip-on crampons in case we run into thick snow and ice again.
![]()
Photographs by Bert Duplessis, Mawgan Grace and Val Pedrami.