
Kilimanjaro Lemosho Route - Trip Report
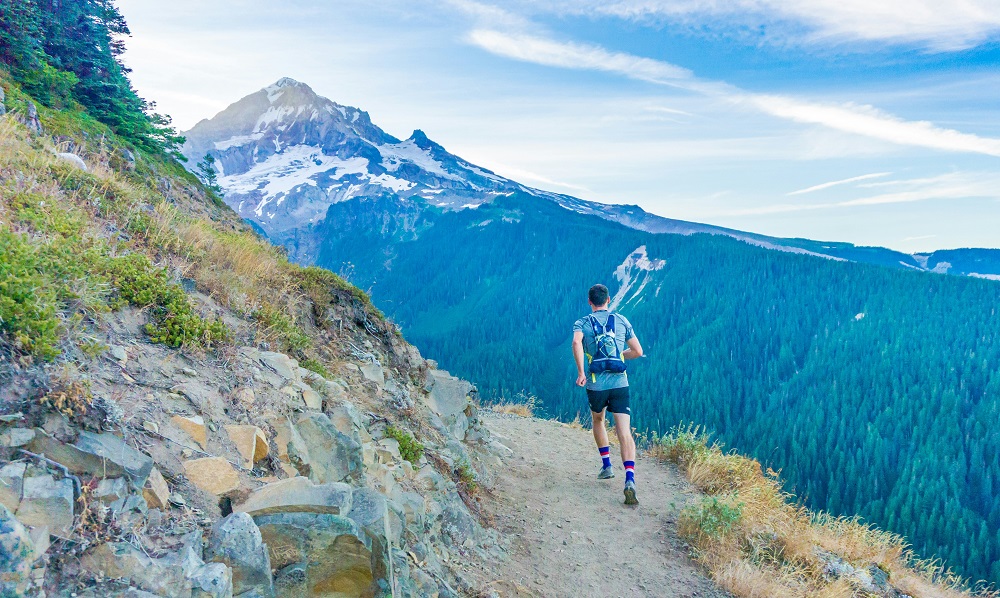
Is climbing Kilimanjaro easy? I had posed this question to myself once or twice before in the aftermath of previous Kili climbs, which included the Machame, Rongai and Marangu routes. My answer hasn’t changed. You might be lulled into thinking that it is so by day five on several of the major routes. By which time you’ve successfully negotiated a few steep and sometimes rocky uphill stretches, a couple of glacial valleys and notably, the Barranco Wall. And you’ve mastered some long, grinding hikes at altitude. All in all, you’re thinking, this is not going to be as hard as you had imagined it might be. Provided of course, that you’re not suffering too badly from the effects of altitude sickness, you’re sleeping ok and not overly fatigued.
And then everything changes. Somewhere between leaving base camp around midnight on summit day and getting down to the camp where you will be spending your last night on the mountain it becomes decidedly ‘not easy’. This is when you find out that Kilimanjaro is not a stroll in the park. In fact, most climbers are stretched to the very extreme of their limits over the span of about 14 hours, starting around midnight on summit day, which lasts well into the afternoon of the following day.
My most recent and likely penultimate attempt to hike Kili, with just Umbwe to go to make it a nice round ‘5’ number, was the Lemosho Route in February 2023. It is the longest of the popular tourist routes and the one with the highest success ratio. The reason being self-evident: more time spent on the mountain at altitude prior to summit day leads to better acclimatization which leads to a less fatigued, more energized summit attempt.
Just like the previous three times I had set out on a Kilimanjaro climb, day one on the Lemosho Route started with a drive from your Moshe or Arusha hotel. From where we spent the night, it was a 3-hour drive to the Londorossi Gate of Kilimanjaro National Park. The previous afternoon we had completed some formalities with the help of our lead guide Joseph Majuto, which meant that on our first day on the mountain we mostly had to wait in a tourist shelter with a lunch box, eating cookies and drinking boxed fruit juices. All while eyeing the other small groups of climbers doing the same thing. It takes longer than you might think – to get the permits ready – but you’ve got all day to get to the first campsite so no huge rush. Have another cookie.

Thu 17 Feb: Londorossi Gate to Big Tree – a rainforest stroll
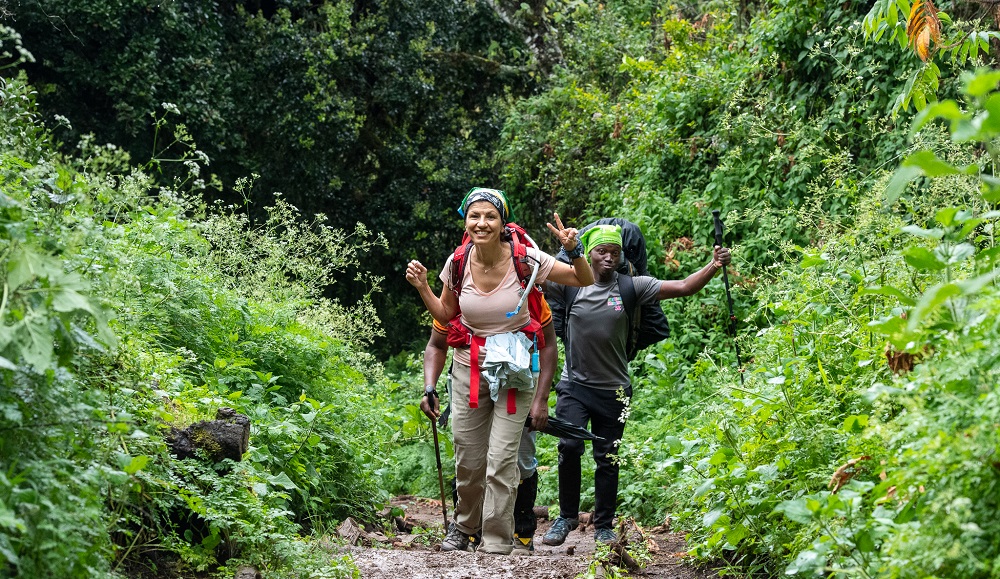
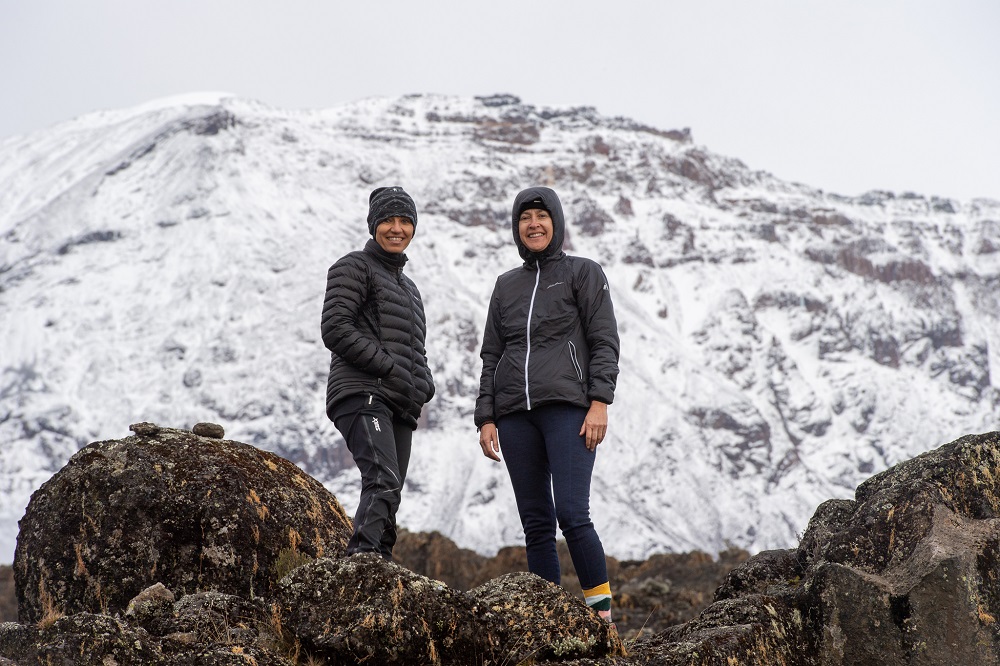
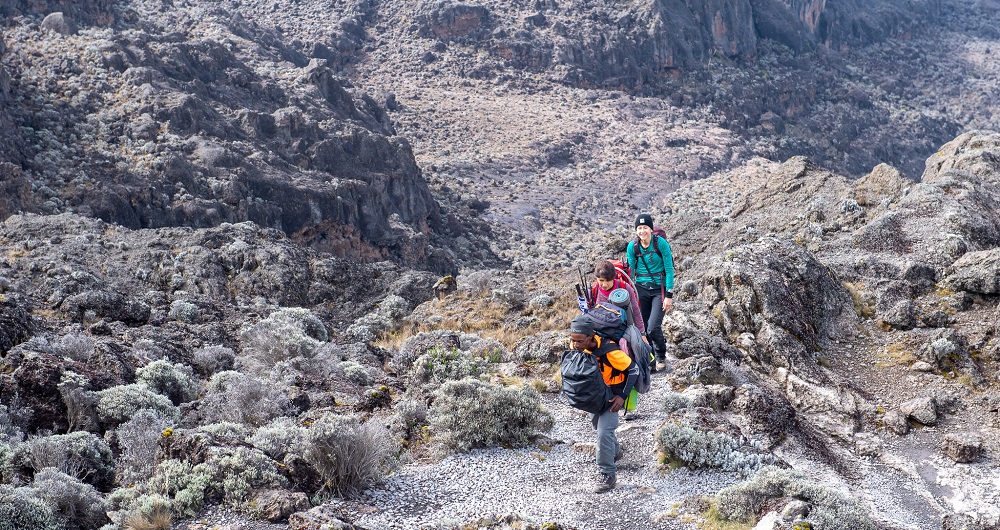
Just as we were setting off, even before we had emerged from the cover of the shelter, some light and then intermittently heavy rain started to fall. An early opportunity for our three team members to put our rain gear to the test. My new Arcteryx Atom AR shell handled the moisture admirably, although it was warmer than I had anticipated, with a good head of steam developing inside the jacket as we walked steadily uphill in moderately warm temperatures. My two team members were uber fit marathon runners and despite having done this a few times previously, I knew that I would have to bring my A-game to hang with the two women.
The 7 km (just over 4 miles) hike from Londorossi Gate to the Mti Mkubwa campsite – better known as Big Tree – traverses a beautiful, dense, rainforest with majestic trees towering over the dense undergrowth, consisting of a profusion of vines, shrubs and other leafy plants. On one of the previous climbs, this is where our party got absolutely drenched in a torrential rainfall storm. Which is why you need to be wearing proper, waterproof boots for any Kilimanjaro climb.
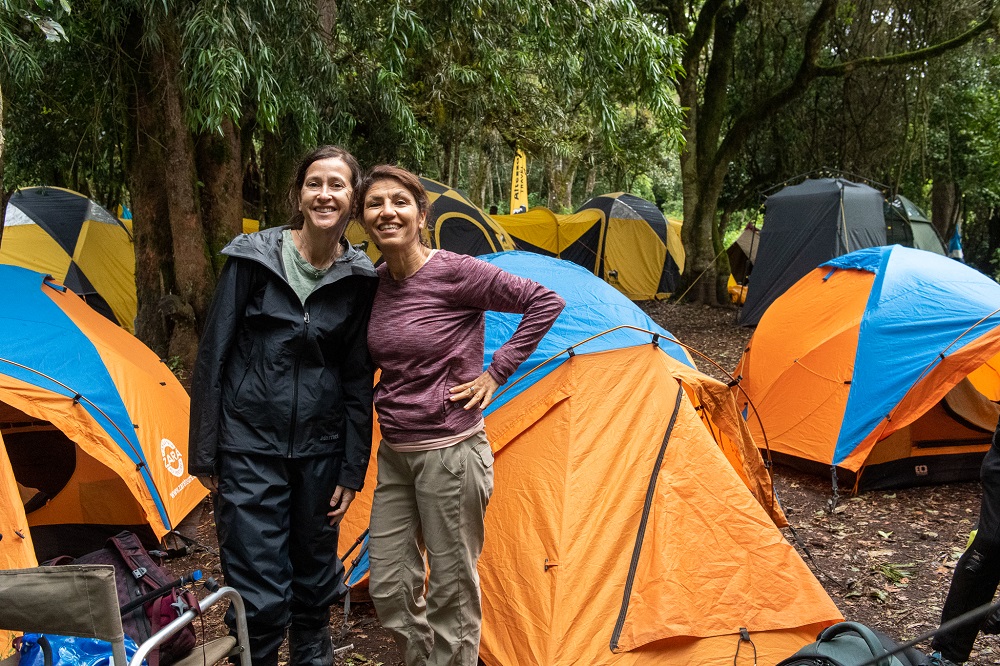
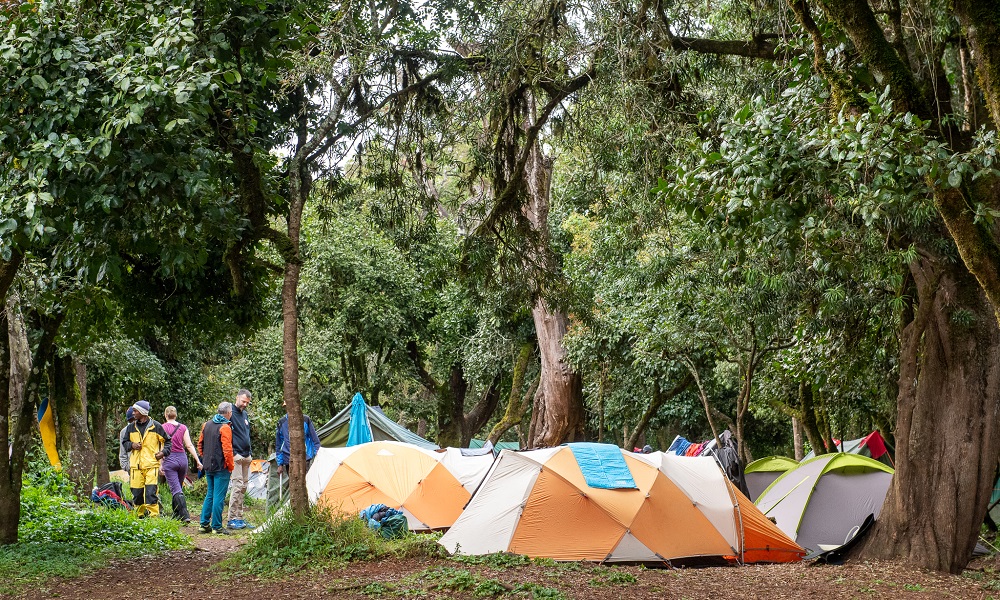
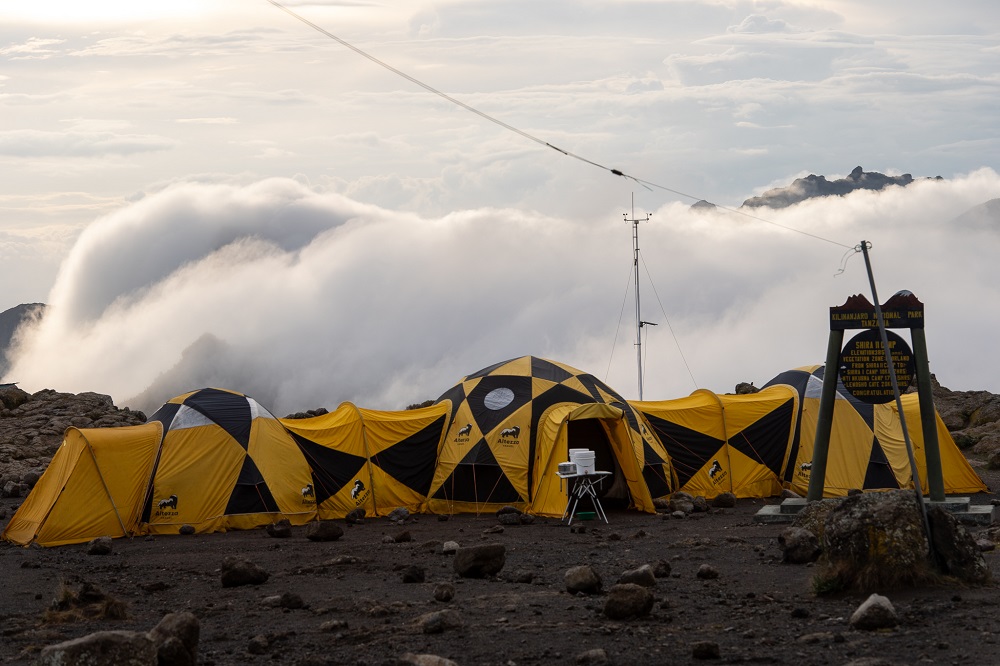
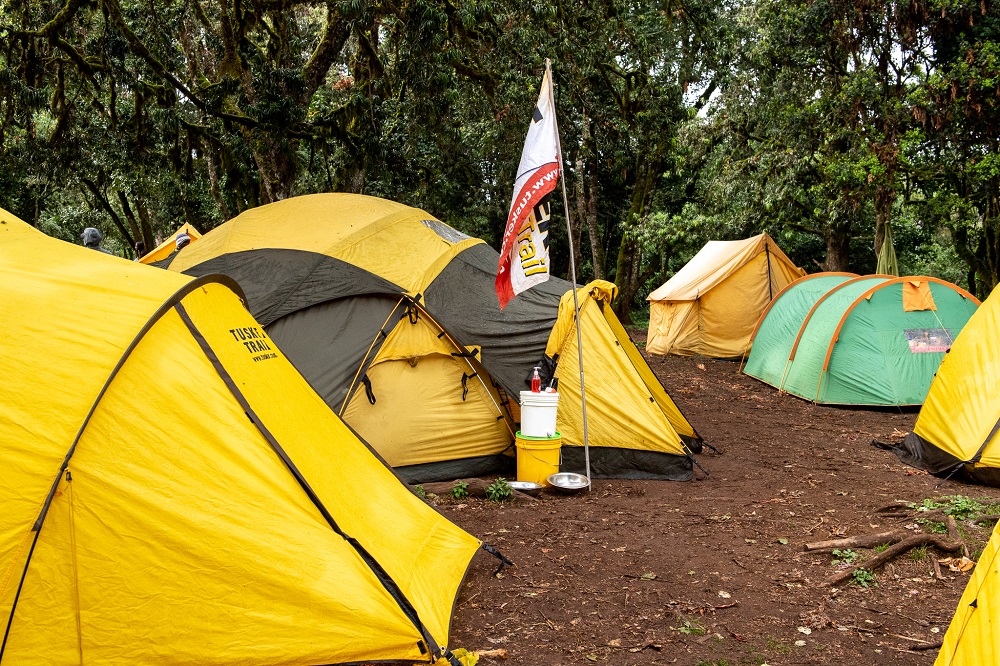
We arrived at the Big Tree campsite only to find that a surprisingly large number of tents had already been erected among the trees in a level area. I estimated that there were close to 50 tents spaced out in the woods. We dropped our stuff inside the tent and enjoyed some tea and popcorn while we waited for dinner. As if we hadn’t had enough of walking, we also took a stroll through the campsite. Then it was time for dinner: fish, potato croquettes, beans, a mixed salad and vegetable ‘sauce’. Pretty good. After doing the usual health questions (are you feeling dizzy, do you have a headache or difficulty breathing and a few others) and passing the pulse oximeter ‘test’ with flying colors, we called it a day. Nightlife? No such thing. Take your Kindle or a couple of books and rechargeable solar light.

Fri 18 Feb: Big Tree to Shira 1 – the hills get steep and the rain intensifies
We were up at 6:00 am for breakfast at 7:00 am, and departed just after 8:00 am. Even just three people can be slow getting ready, clearly. Right out of camp we encountered the first of two hills on the way. The first one was quite steep, followed by a fairly steep descent. The second hill seemed endless and presented us with the first real test on the hike. There wasn’t much in the way of switchbacks either, it was just up, up, up. Conditions were still quite warm and we were all sweating as we exited the rainforest, entering moorland habitat about an hour or so into the hike.
From that point, it took at least another hour of steep uphill hiking over uneven terrain until we reached the crest of the ridge. From there the trail stretched along a relatively even area for the next 40 minutes or so.
By now it had gotten really cold and a steady rain had started to come down. We had our rain gear on so we were ok but it was still pretty miserable and all three of us suffered from extremely cold hands.
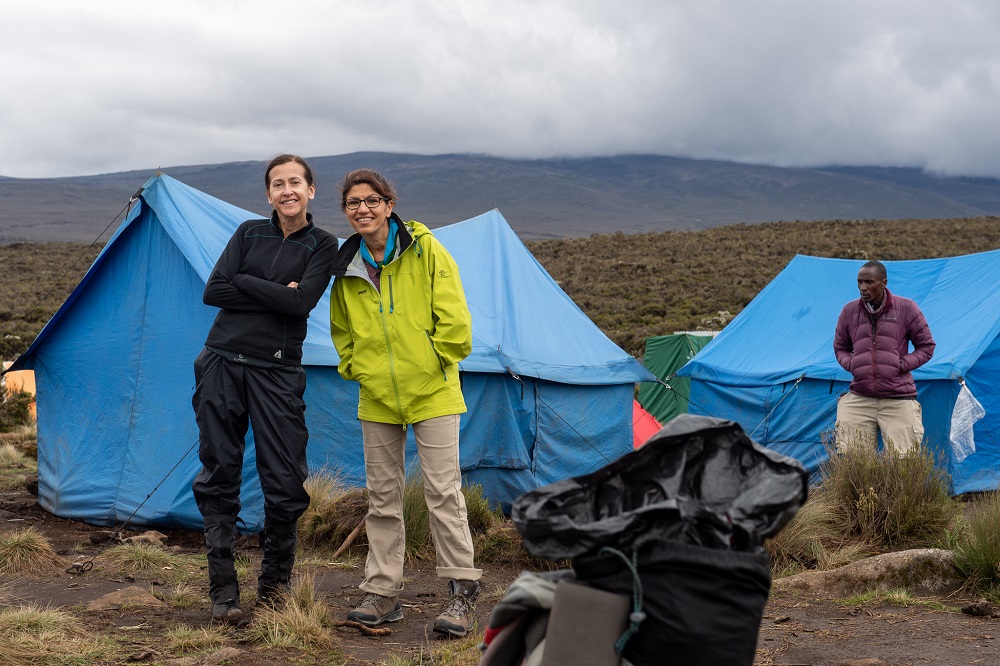
We reached Shira 1 campsite at just about 1:40 pm, cold and exhausted, and a cup of hot tea never tasted better. Ten minutes later, our assistant Davis served lunch, which consisted of spaghetti with a chicken sauce, fresh corn, and a pea, onion and tomato sauce. We tucked in and put a serious dent in the spaghetti. From there conditions improved considerably as the rain eventually abated and we enjoyed a couple of hours of partial sunshine.
We spent some time in the mess tent where we warmed our frozen fingers. Taking a walk through the campsite, we observed a Summits tent and met a couple of affable climbers from the UK, as well as a couple from Chapel Hill, NC. We took some photographs. Around 6:00 pm, hot water was delivered to the tent in a small basin for a sponge bath. Dinner was at 7:00 pm: rice, black beans and tomato sauce and fresh fruit. Again, it was early to bed, and I slept a solid 9 hours. That, in summary, is pretty much the nightly routine on a Kili climb, until summit day.
Sat 19 Feb – Shira 1 to Shira 2 – More rain, getting pelted in a sleet storm
To this point, this hike along the Lemosho Route was characterized by just one thing: rain. It rained every day without fail. Usually starting at around 11:00 am and invariably accompanied by heavy thunder. Fortunately, the thunder stayed high with no lighting bolts reaching the ground. At least not in our vicinity.
Rain, hiking and camping in the open are not a good mix. Over the course of several days the dampness gets into almost everything. By day three the base of our tents was damp and some of the Goretex clothing items were starting to fail to repel the moisture.
More than that, the rain and sleet also impacted our activities and the day to day routine. Everything becomes more difficult and tedious when it is wet and muddy. Starting with simple things like getting in and out of the tents. Crouching down to duck into and out of the low opening with mud everywhere is annoying at the best of times, and downright frustrating in the wet.
The hiking is also substantially impacted by long periods of rain and sleet. It slows everything down, from having to stop repeatedly to add rain gear, to slowing down over wet terrain, having to dodge puddles and muddy spots, and having to be even more deliberate than usual traversing over wet rock.
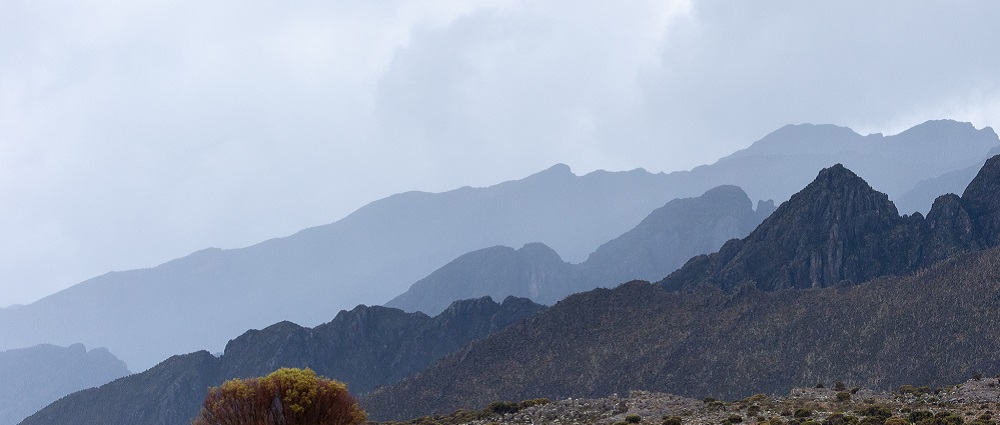
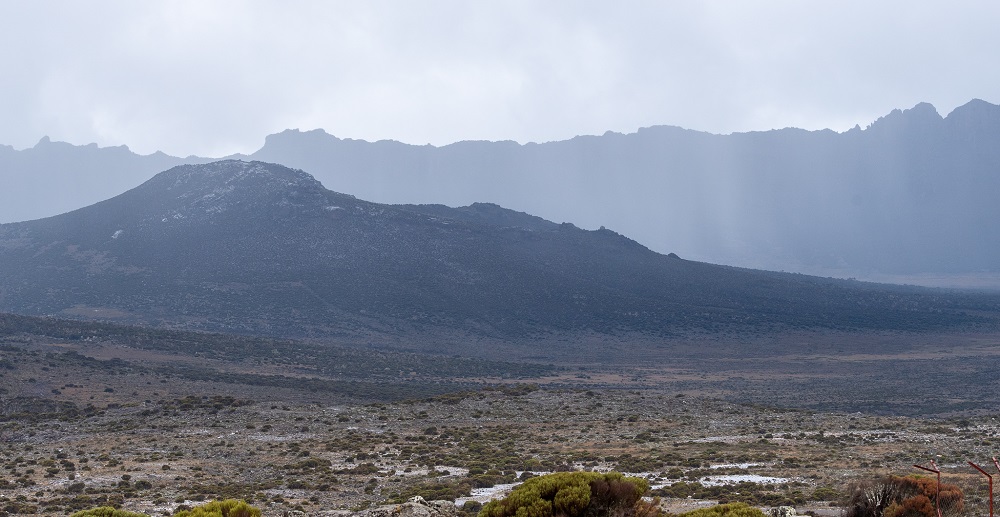
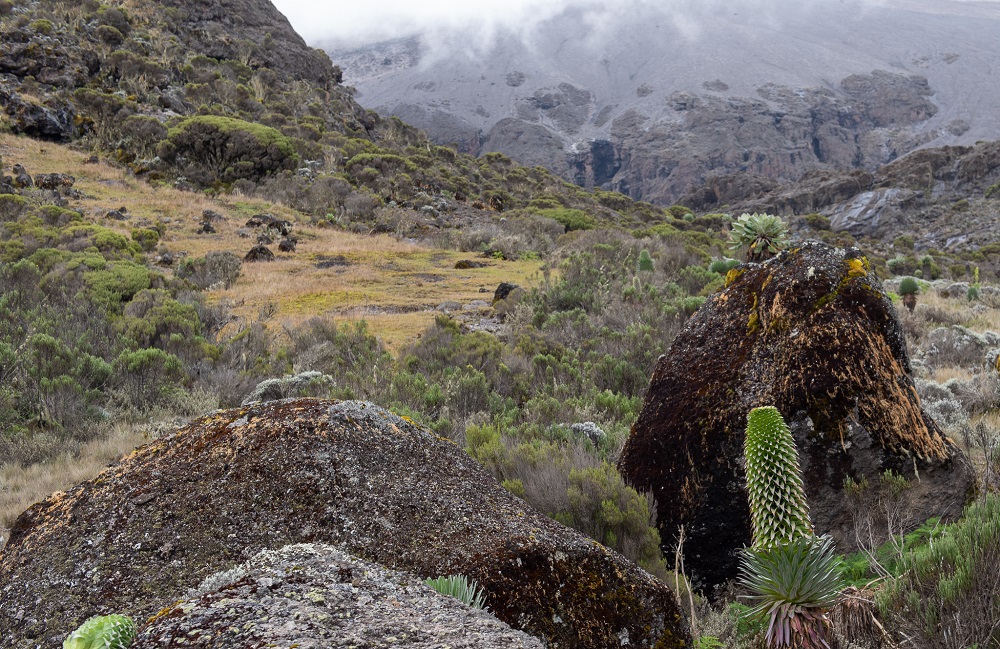
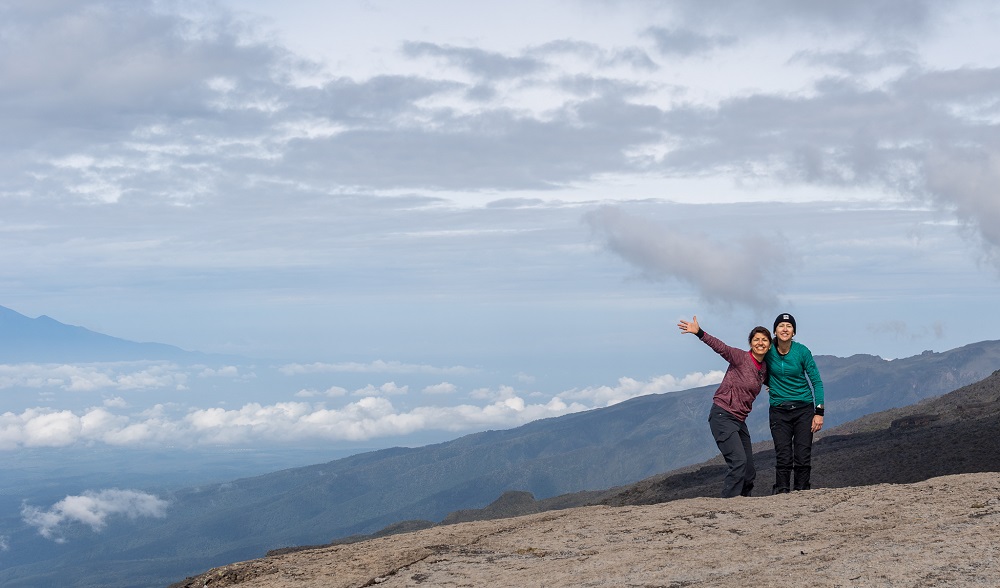
Another downside of chronically overcast weather: fewer opportunities to experience the scenery, which is one of the hallmarks of the Lemosho Route. We did have some good views of the Shira Plateau from Shira 1 camp, and great views of Kibo peak at the end of day 2 from Shira 1 and also from Shira 2. The second time around we could clearly see just how much more snow had accumulated in the previous 24 hours.
The hike from Shira 1 to 2 is about 10 km (6 miles) in distance and took us just about 4 hours, with a few rest stops, including one to don our rain gear.
It didn’t only rain a lot. For the better part of 40 minutes plus we were in a heavy sleet storm, with icicles pelting us on the head. We were apprehensive about encountering a proper hail storm when good protection would have been impossible to find. Things are slightly grim when ‘just icicles’ is the good news.
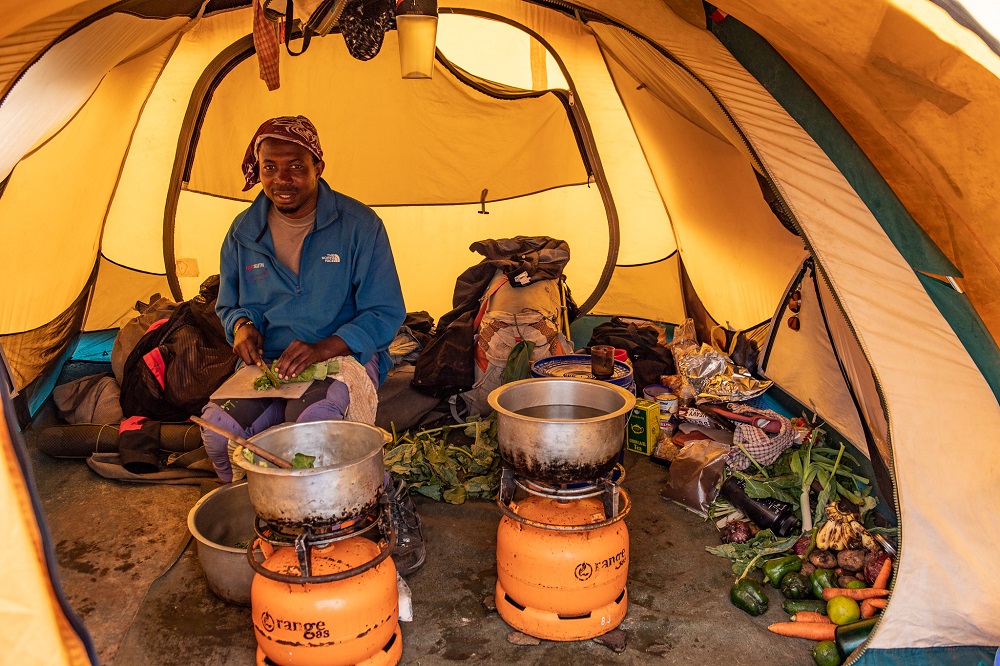
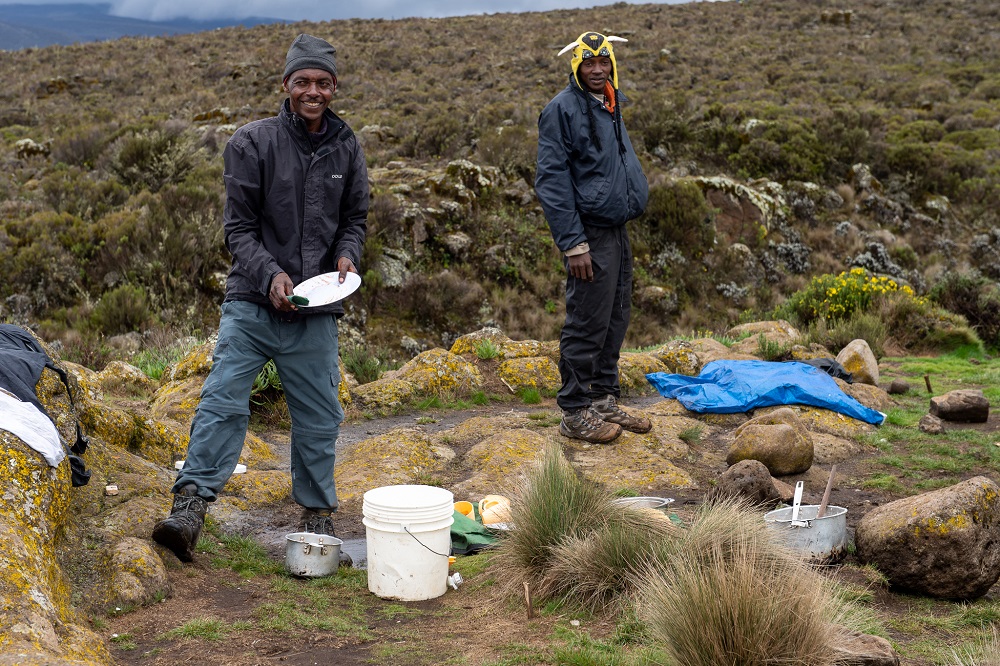
After an afternoon nap, we did a little walkabout, took a few more pictures and sat down for dinner at 6:30 pm. Homemade french fries, beef kabobs, and a bean stew, oranges and pineapple. And soup. We could not complain about the food. Earlier – for lunch – we had veggie sandwiches, the Kili cook’s tasty take on pizza and a hot soup as a starter. Incidentally, despite all the 45 miles or so of hiking, I don’t think any one of us lost much weight. No surprise there.
By nightfall – 8:oo pm – the sky had cleared and we could admire the starlit night sky, with the Milky Way and Orion being prominent.

Sun 20 Feb: Shira 2 to Barranco – via Lava Tower at 15,000 feet above sea level
This was the longest day of the route so far, all of 7 hours and 20 minutes or so, from Shira 2 camp to Barranco Camp. How long and how tough a day was it? Somewhat like doing one of Colorado’s 14,000 foot peaks, all the way up and all the way down in just one day. We started at just before 8:00 am, after an eventful night. At around 2:00 am a heavy rainstorm moved across our campsite. It wasn’t brief and it was quite intense, adding to our existing concerns about dampness getting into our ground mattresses and potentially into our sleeping bags. To some degree it did, but not as badly as we had feared.
At 6:30 am, the sun was shining and it would continue to do so intermittently until about 1:00 pm when we reached Lava Tower at 15,000 feet above sea level. This was a new altitude record for two of the three of us.
From the Lava Tower – which was the high point on the day’s hike – it was mostly downhill all the way to Barranco. Downhill doesn’t always translate to easy. It was heavy going pretty much all the way with rocks and boulders and steps up and steps down all the way. The area was still soaked from the previous day’s heavy precipitation, which made the footing slippery at times, and unpredictable.
The hike from Shira 2 to Lava Tower was no walk in the park either. Practically just meters out of camp, the rocky path started heading up and for the next two hours we walked steadily uphill, gaining considerable altitude. This portion of the hike culminates in a short ravine where we crested the hill, only to be confronted with more uphill in front.
At the sign pointing to Meyer’s Hut to the west we took a break, as did a few other hikers from Shira 2 who were enjoying a sitdown cup of tea. From there the trail winds steadily upward, across a saddle of sorts, and then links up with the Machame Trail a little further on.
Once the huge Lava Tower rocky outcrops came fully into view, we became more energized, our strength and energy having started to wane quite a bit. Understandably so, as at 15,000 feet the thin air does not deliver nearly as much oxygen as at sea level.
We enjoyed a packed lunch at Lava Tower, regained our strength and then set off for Barranco.
Dinner tonight: cheesy potatoes, elbow pasta and a white bean stew. Served with the Kili version of ‘vetkoek’ (deep fried fritters), and some fresh pineapple. As always, the guides do their best to urge you on to eat more – nutrition is all-important, as is hydration.
Mon 21 Feb: Crossing the Barranco Wall to Karanga Camp
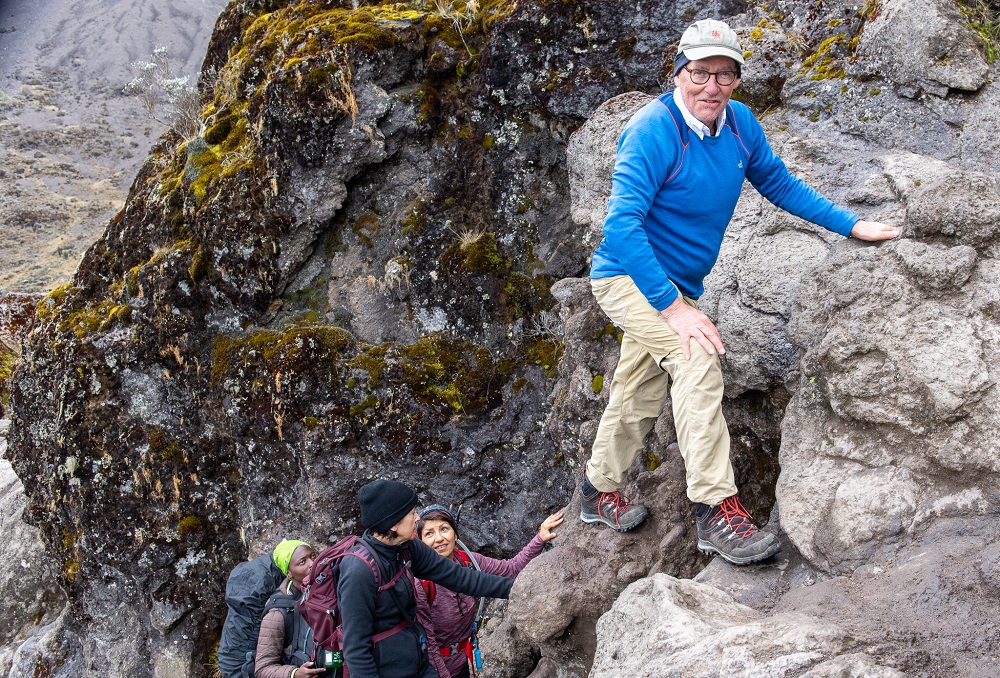
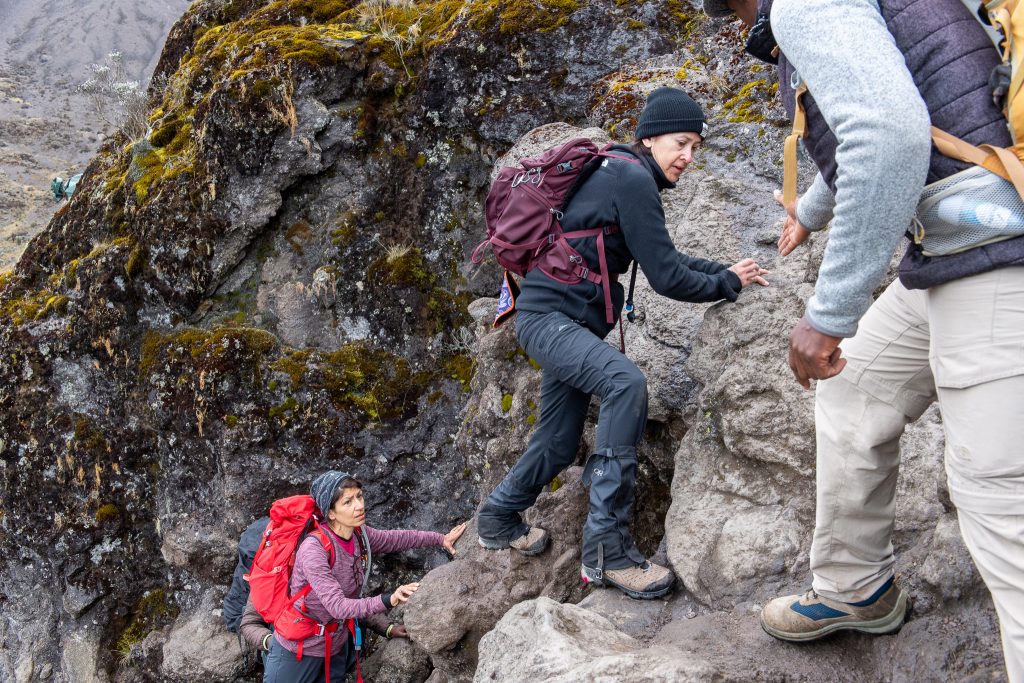
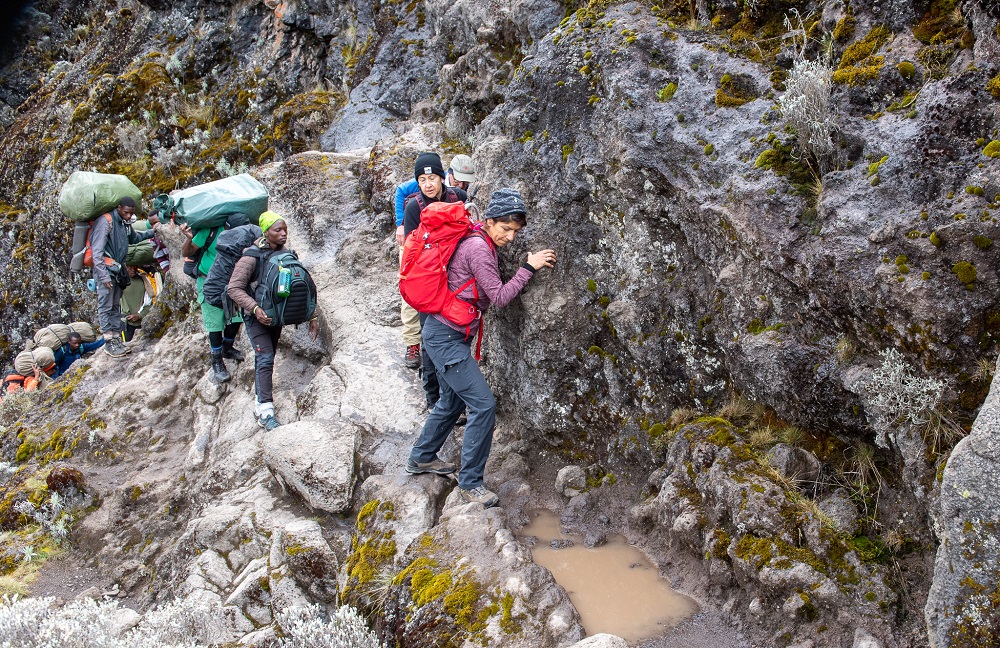
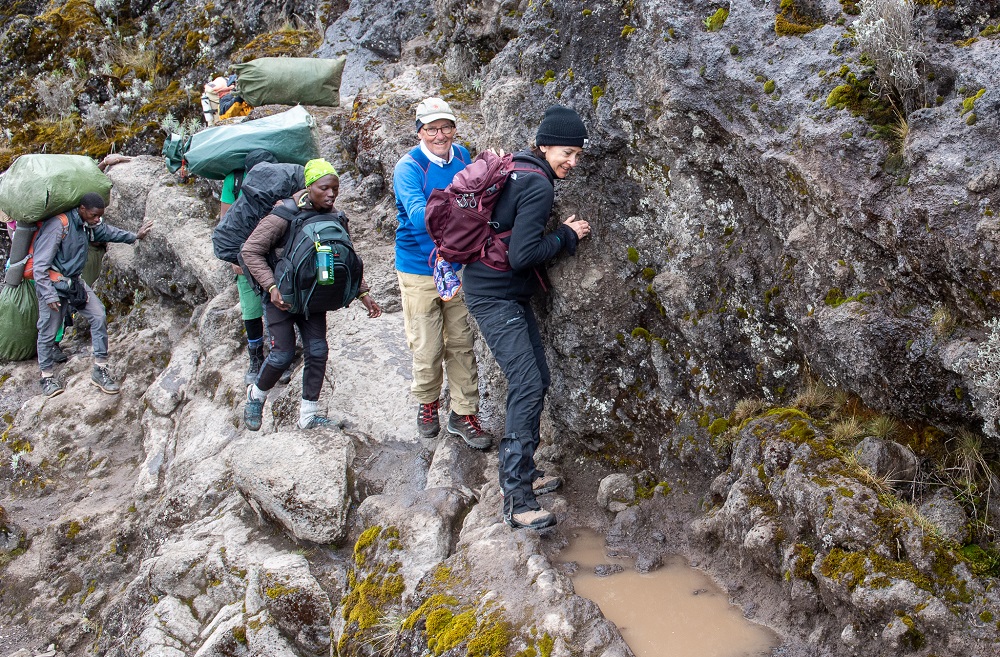
Late the previous day, we had looked across the campsite to the imposing, even somewhat intimidating Barranco Wall. If you take the Lemosho, Machame, or Umbwe route up Kilimanjaro, the only way to the top involves clambering up the Barranco Wall. The 900-foot cliff which towers over Barranco Camp, presents quite a challenge to the average hiker, with two particularly nerve-wracking spots. Fortunately, they are quite early in the ascent and within minutes of each other. The first one involves putting your weight on your left leg and swinging the right leg around to a rocky ledge. The other one is the well-known ‘kissing rock’ where you literally hug a big round rock as you try to stop yourself from toppling over backwards. Fortunately there’s always a guide close by to provide support.
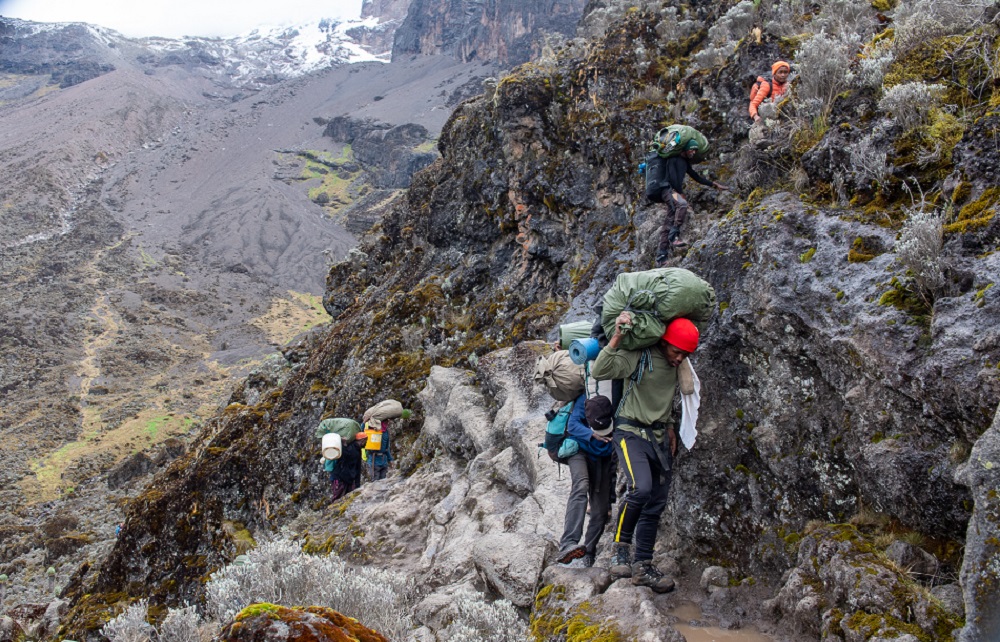
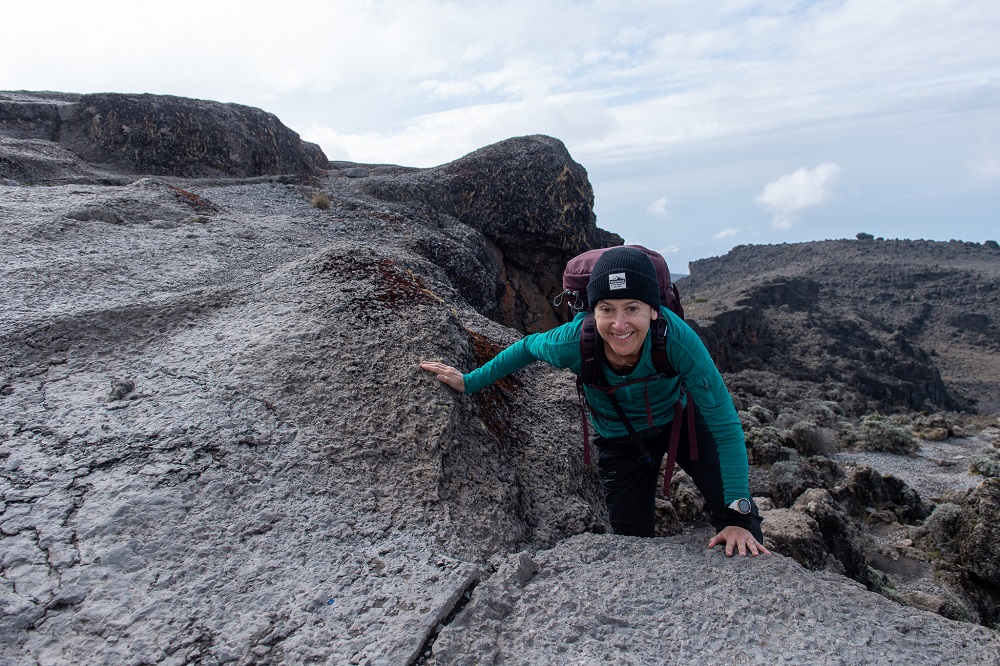
From there on, the climb continues up steeply, with several spots where both hands and feet are needed to negotiate the rocks. Clambering in other words. With some stops for water and to let porters by, it took us a good two hours to make it to the top, where there were some nice views of Mt. Meru in the distance.
From the top of the Barranco Wall it is another 2 hours to the next camp, Karanga, which overlooks a pretty valley.
About an hour or so out of Karanga, when hikers first see the camp, it appears to be no more than a 20 minute hike away. Reality sets in when you advance another 200 meters or so, and the full picture becomes clear. Before reaching camp, you have to hike down a steep, rocky, and in places, wet and muddy path, all the way down to a clear mountain stream, only to start up a steep, equally rocky path on the other side of the ravine. On the down side, there are many potentially dangerous spots where even a slight mistake, misjudgement, or a small lapse in concentration could have dire consequences. A fall could easily result in a serious injury, which would get you a one way ticket down the mountain in what would likely be an arduous and lengthy extraction process.
So my best advice is to prepare properly for the climb with significant attention to single leg strength and balance. Use your walking sticks, maintain a safe (slow) pace and pay close attention to where you plant your feet. Above all, never stray off the main trail for whatever reason. Short cuts or detours to get around slower hikes are to be avoided altogether. That is where accidents happen.
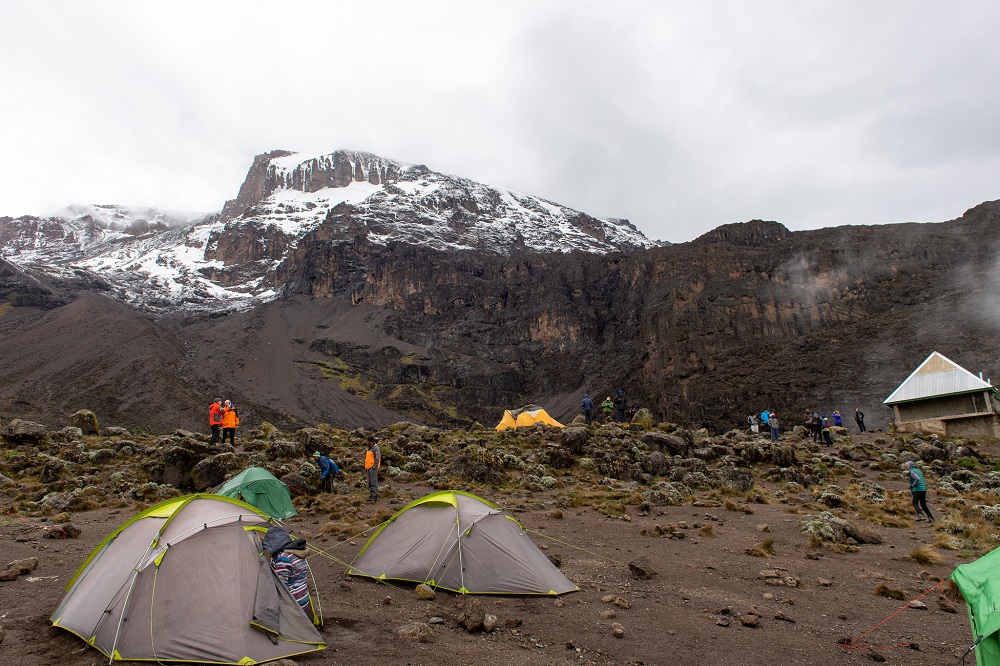
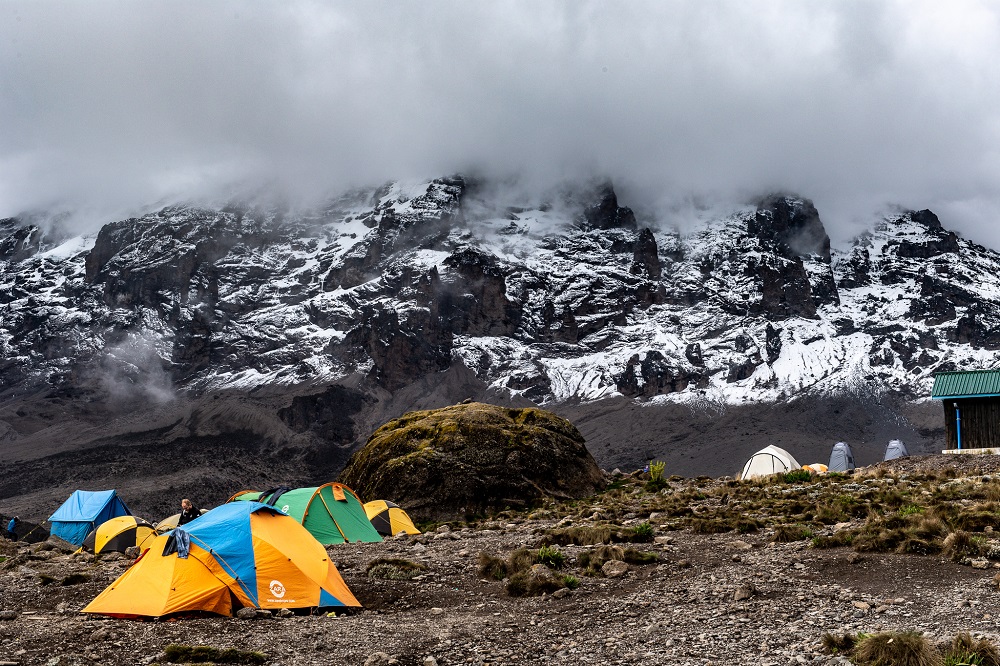
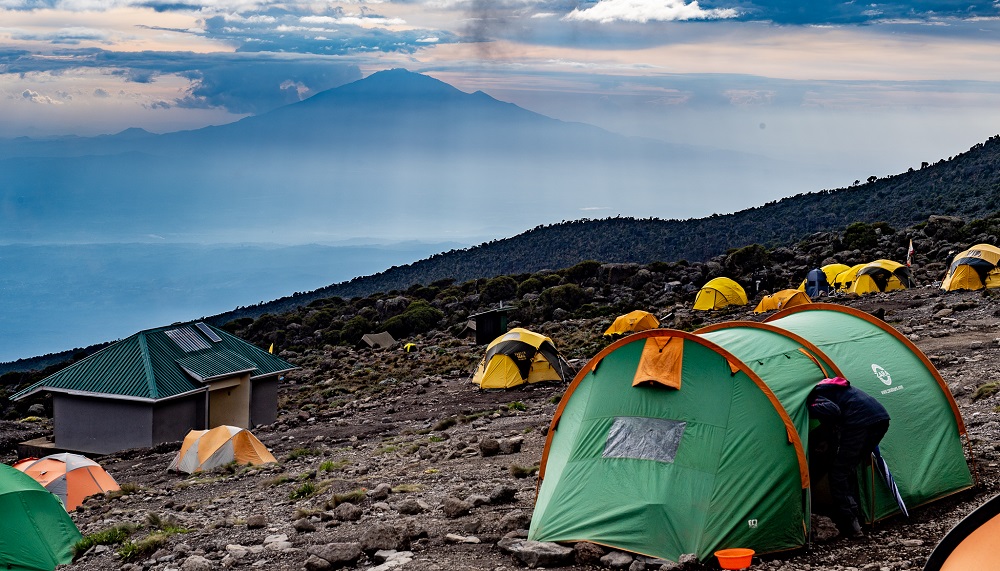
Karanga camp is set on a slope with Kibo prominent to the north. Some hikers bypass Karanga and continue on to Barafu – another 3 hours of hiking – only to make their summit attempt starting later on the same day. I don’t think that is a good idea at all, considering the time and energy expended to make it from Barranco up the Barranco Wall and through the several steep valleys en route to Karanga. Starting off summit day with a sleep deficit, on depleted leg muscles and at considerable altitude, is just not the smart move.
We made it to Karanga Camp around noon, just in time for a hot lunch. In the afternoon we did a Kilimanjaro version of Wordle, took a hike around the campsite, and made use of a couple of intermittent periods of sunlight to put out some solar charging devices.
All the while Kibo loomed in the background, a silent but very powerful reminder of what lay ahead of us the following day.
Tue 22 Feb: Karanga Camp to Barafu – Preparing for the summit attempt
After another good night of sleep – at least for yours truly – we went through the usual morning routine of getting ready for another day of camping on Mt. Kilimanjaro.
It starts with storing your sleeping bag and mattress, getting dressed, setting aside the items for your day pack, and packing everything else into your duffel bag. There’s fluids to be prepared such as using Steri tablets or adding Nuun or Gatorade powder to the supplied boiled water. Apply sunscreen, including a high SPF product for your lips, make sure your camera or smartphone is charged, get your hat and sticks and off you go.
On this day we had a relatively short hike ahead of us, of about 3 hours, from Karanga to Barafu, which would be the base camp for the actual summit attempt. Which would start late on the evening of 22 February hopefully culminating with the three of us reaching Uhuru Peak around 8:00 to 9:00 am on Wed 23 February.
The walk to Barafu was steadily uphill through noticeable rocky terrain. If the gods of antiquity were petulant children who tossed around large and small boulders in helter-skelter fashion, this is what the end result would be. Rocks and boulders in every direction, with precious little in the way of vegetation and almost nothing green. This was true Alpine desert. The only climate zone left? The snow cap at the summit. The last uphill into Barafu is steep and rocky and at an altitude of around 15,000 feet above sea level. It was a formidable test.
We reached Barafu fully ready for some food and a lot of rest. Which is exactly what we proceeded to do. We enjoyed probably one of the best lunches of the trip so far, a hearty and altogether delicious vegetable stew, with some white rice on the side. Just what the doctor ordered. By 2:00 pm we were ready to at least attempt to take a nap to recharge the batteries for the most demanding hike most of us would ever do. Eight or nine hours to go until we would set off on the climactic portion of our 9-day Kilimanjaro adventure. It was with a mix of anticipation, excitement and just a little nervousness that we retired to our tents that afternoon.
By 6:00 pm (none of us actually having slept a wink), we were back in the mess tent for a light dinner. A light icy rain started to fall during dinner, perhaps not the best harbinger of things to come on summit day or rather night. Little did we know then how things would turn out.
Just like on my previous three successful climbs, I did not sleep at all, using the afternoon and early evening hours to rest and prepare. Getting ready for the summit attempt takes a lot of planning and selection of suitable gear. Other than one’s climbing boots, the choice of a waterproof shell is critical. This is the one garment without which a Kilimanjaro climb can quickly turn miserable if not unbearable. It is of paramount importance to stay warm and dry and for that you need a good shell.
I wore an Arcteryx Beta AR shell for the first time and it was the bomb. 100% waterproof, warm, and with tighteners at the sleeves to keep moisture out. Good pockets with zippers, a proper hood and lightweight to boot. The large size means it is roomy enough to fit comfortably over several other layers, including a heavy fleece.
A light breakfast was served just after 10:00 pm, and following that we made the usual final adjustments & preparations. Put on gaiters, checked on our water and Gatorade supply, made sure we had our sunglasses, suntan lotion and extra batteries for the headlamp. It turned out that my extra batteries had been left behind in a bag in Arusha. It would cost me dearly later the following day. Other important final checks? Have your liner and heavy gloves ready from the word go. Cold fingers and hands are no fun and can be distracting. My set of heavy REI skiing mittens worked well. In your backpack also include your camera and extra batteries (keep them warm) and a 30 + SPF lip balm. This is vital – so many people leave Kili with cracked, blistered lips – do not let it happen to you!
Wed 23 Feb: Uhuru Summit attempt – Disaster strikes
Finally, around 11:00 pm, as a snow flurry came down, we started out of Barafu Camp. Having completed the Machame Route in 2016, I remembered that there was a rather nasty stretch of rocks and steep uphill right out of the gate leaving Barafu. Sure enough, we were huffing and puffing almost immediately. The treacherous, even dangerous uphill stretch was much worse than I had remembered. It was rough, with huge rock slabs to be negotiated under less than ideal (wet, icy, snowy) conditions.
If I were ever to climb this route again (which is unlikely), I would absolutely make Kosovo my final base camp, not Barafu. Kosovo is about an additional hour’s hike further up the mountain, past Barafu. Climbing out of Kosovo – which we did when we hiked the Machame Route – is the smart move. Of course, that means having to include the steep, hilly stretch (leading out of Barafu) as part of the hike from Karanga the previous day. Seeing as that hike is less than 3 hours, it makes eminently good sense. It makes your summit day attempt much less strenuous not having to contend with that awful, rocky hill first thing out of the gate.
Once we had negotiated the steep, nasty stretch, we made pretty good progress and I was starting to feel confident about summiting. Conditions were ideal with no wind or snow, and it wasn’t exceptionally cold. I was just thinking that we were well on our way, with the rocky stretch leading to Stella Point being the only really difficult portion ahead, when an event occurred which would change everything almost instantaneously.
One person in our party just said, “I’m feeling a little dizzy,” almost immediately started to wobble a bit and took a few steps to a large rock, where she lost consciousness. As it turned out, she would not be able to recall any of the subsequent events until she reached about 12,000 feet elevation at Millenium Camp on the way back down.
Later on, we realized that our team mate was suffering from HACE – High Altitude Cerebral Edema. I was aware of HACE and its cousin HAPE – High Altitude Pulmonary Edema – having done extensive reading prior to my first Kili attempt. Unless and until one of them unfolds in front of your eyes these conditions remain theoretical constructs in your mind.
It was scary experiencing it first-hand and seeing your friend go from walking normally to being completely out of it in a matter of less than two minutes. If untreated, HACE can be fatal. We all knew what had to be done: the climber had to get emergency oxygen and be rushed to a lower altitude.
That is exactly what happened. An oxygen tube was connected and the emergency descent was started practically immediately, with assistant guide Winford taking the lead and moving ahead of us downhill at a rapid pace, physically supporting the stricken hiker. The remaining two climbers followed – at a substantially slower pace – with head guide Joseph. We paused for a short while at Barafu where the decision was made to evacuate right out of the park, and to not overnight at Mweka which would ordinarily be the case.
We still had not seen our friend but was told that she was feeling a lot better. The descent from Barafu to Mweka is a tough downhill slog of about 3 hours along an abysmally bad, substandard, rock-strewn track. Negotiating this dangerous descent after a successful summit – as I had done before – is tough, but doing it in the dark was crazy. It is pathetic that the Kilimanjaro authorities make that particular track the only option down for hikers completing the Machame, Lemosho or Umbwe summit attempts. Since 2016 – when I first hiked down along the road after a Machame climb – few if any improvements had been made. To make matters worse we were walking in near total darkness from 3:00 am until 6:30 am. Being without spare batteries, my headlamp petered out halfway down the track, which made every step more difficult than it should have been. Fortunately we made the hazardous trek without twisting an ankle or worse.
We were finally reunited with our friend at Mweka Campsite. She was feeling much better but clearly still the worse for wear, groggy and fatigued. We had a long 10 km (6 mile) stretch of road ahead of us to the Mweka Gate. It took us the better part of 3 hours to complete the beautiful yet tiring walk through the rainforest. With dozens of porters passing us every mile or so, we took what felt like thousands of steps down to where the jeep track terminated. Relief was in sight! Minutes later we were bundled into a vintage ambulance and drove the last few miles to Mweka Gate.
From there it was about 40 minutes back to our Moshi Hotel where we collected our valuables and left luggage, took a very mch overdue and welcome hot shower and handed over the gratuity to Joseph and Winford to be distributed among the team. It was time to say goodbye to our stalwart guides and to head back to Arusha for the night. The next day we said our own goodbyes and went on our way to Houston, San Antonio and Johannesburg, respectively. The trip didn’t end quite the way we would have liked it to, but it was a major achievement to have climbed as high as we did under really trying circumstances.
Three common Kilimanjaro climb pitfalls to avoid
What are the three most common mistakes made in the planning and execution of a Kili climb?
#1: Not adding an additional acclimating day and opting for the minimum # of days on a climb
Unless you are a super-conditioned athlete – and even then – attempting the Lemosho route in just seven days instead of 8, the Machame Route in just six days or the Marangu Route in just five, is looking for trouble. Spending an additional day on the mountain at altitude makes a huge difference in the chance for a successful summit. So spend a bit more time in Tanzania and pay the extra money for one more day: it will be worth your while. This is even more important on the shorter routes like Marangu and Umbwe, both of which can theoretically be done in 5 days. Definitely add an extra night on these climbs; even then your body is going to have a tough time to adjust due to the short, rapid ascent.
#2: Flying into Kilimanjaro the night before starting your Kili climb
This is not a good idea, particularly if you live in a city close to sea level and you have to take one or more long flights crossing as many as 9 or 10 time zones to get to Tanzania. Departing from sea level, spending 30-plus hours on the journey, only getting to Tanzania the night before – and then setting out on the climb the very next day – is decidedly risky. Like asking your body to go from zero to 60 mph overnight.
On the other hand, spending 3 nights or so in Tanzania at around 1,500 meters above sea level, such as in the Arusha or Moshe area, can make a decisive difference for the better. You’ve already made a significant investment in time and money to get this far, so don’t risk it by starting up the mountain too soon. Spending a few nights at a lodge such as Ngare Sero, on the lower slopes of Mt. Meru just outside Arusha, will be hugely beneficial. There’s plenty of activities to keep you busy, including hiking on the lower slopes of Mt. Meru. Get over the jet lag, rest up a bit and give your body a chance to acclimate to the mile-high altitude before you pile on more altitude over the next few days. If you’re keen, we can even arrange a 3-day hike of Mt. Meru which would be the ideal fine-tuning of your Kilimanjaro preparation.
#3: Starting off at too fast a pace
You’ve done the training, you’re feeling fit and you want to get to the top. Fast. So off you go, charging up the mountain, right out of the gate. Big mistake. Kili is not a race and there is no special certificate for beating the pack. It takes 6 or 7 days or even more, and the real test only starts around midnight on summit day. That is when a Kili climb goes from relatively easy to sometimes super difficult, depending on the conditions. Not conserving your energy earlier on will cost you dearly then. Always mind your guide’s entreaties to go slowly. Pole pole.
Of course, several other factors come into play including good physical preparation, proper equipment, picking the best time of the year for your climb, and having a competent head guide in charge.
How to improve your chances to summit Kilimanjaro:
#1: Keep your feet happy and healthy
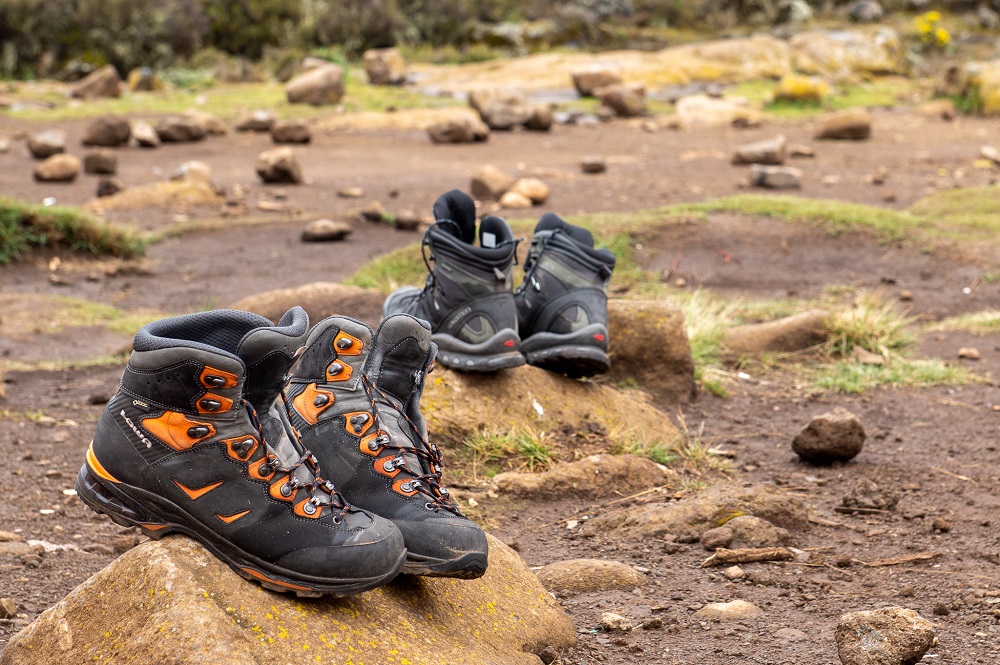
This starts with buying and wearing in a good pair of well-fitting waterproof boots. Do not scrimp on this purchase. The line between success and failure on Kilimanjaro is a thin one and developing debilitating blisters can easily tilt you in the wrong direction. Personal hygiene is a challenge on the mountain with no access to showers, except cold ones on the Marangu Route. Whatever you do or do not do in this arena, don’t neglect your feet. Take immediate and decisive action to treat a blister or hot spot right away, before it becomes problematic. Use an antifungal like Tinactin daily and apply a lubricant like Glide (get it from a running store) on and between your toes, on your heels and other potential problem areas, before every hike. Prevention is way more important than cure, particularly over the space of a few crucial days.
Proper socks are super important. I’ve had great results with a thin liner sock (like the REI store brand), together with a double-layered hiking sock such as the Wrightsock ‘Coolmesh’ type. Take enough socks to start with a clean pair (liner and regular socks) every day, plus 2 spare sets in case of unexpected heavy rain or other mishap.
#2: Follow your head guide’s instructions and requests
Your head guide has summited Kilimanjaro probably dozens and even hundreds of times. He knows what works, he can anticipate issues and pitfalls, help you avoid failure and inspire you to deliver your best. As long as you listen to him and let him lead. If the pace initially seems painfully slow, there is a reason. If the head guide wants you to do an afternoon climb to gain some more altitude after a long and perhaps punishing morning hike, do it. Don’t fret, don’t whine – you are paying good money for the chance to achieve something really special. So, shun all negativity from your mind and let your head guide help you realize your dream.
#3: Sleep when you can
Get some sleep at night or during the day, whenever the opportunity arises. Whether it’s a 15-minute nap or a 6-hour slumber, it all adds up and it is vital, in fact critical for success. Bring good earplugs, a comfy pillow, whatever it takes to get you in a sleep mode. Avoid caffeine and alcohol. A high quality sleeping bag which will keep you warm at temperatures as low as minus 20 degrees Fahrenheit is a good investment in more and better sleep. It means you can get into your sleeping bag with just a couple of layers of loose, comfortable sleepwear. To keep warm in a sleeping bag not designed for such low temperatures, you may end up having to wear multiple layers of clothing. This can be annoying, restrictive and not conducive at all to falling asleep easily and quickly. Plus of course being cold inside your sleeping is guaranteed to adversely affect your sleep duration and quality.
#4: Eat and drink regularly
The food on Kilimanjaro is typically bland and predictable: chicken and chips, a variety of stews, lots of vegetables and pasta. And soups. If you are lucky your cook will prepare some local foods like ugali (rustic polenta) and beans. Even the most creative of mountain cooks are stymied by the limited range and quantity of fresh ingredients which the porters can carry all the way up, so don’t expect something new and exciting every day. You must eat though, to replenish the thousands of calories burnt every day. So, while you may not always feel ravenously hungry, decent nourishment is vital. Be sure to bring some energy bars with you; on our last trek I tried the Luna brand Blueberry and Lemon Zest varieties and they both hit the spot! Be creative and experiment, just make sure that you get your calories in. It is ok to indulge in sugary treats for these few days so by all means tuck into candy bars, chocolates, snack food and trail mixes – anything you find palatable.
Your head guide will be checking regularly to make sure that you stay hydrated as that is of paramount importance. Whether you use a bladder system or individual Nalgene bottles – or both – make sure that you carry at least 3 to 4 liters of water on you; it is advisable to add some electrolytes to the bottled water.
#5: Take the Diamox
Don’t shy away from a twice daily dose of Diamox (Acetazolamide), a diuretic which helps to prevent and reduce the symptoms of altitude sickness. Most climbers take about 125 mg daily and up to 250 mg before summit day. Be sure to consult a physician before doing so. Taking Diamox is no guarantee of success, but it does help a lot of people. The most common side-effects include some tingling in the extremities and excessive urination. Not a bad trade-off for achieving your goal. Persons who have an allergy to Diamox or sulfa drugs should clearly not take this drug – again, be sure to consult a medical specialist before taking any prescription medication.
#6: Train, train, train
It is never too soon to start training for Kili but certainly you’d want to be on some kind of training regimen starting no less than 6 months prior to the summit date. Ideally of course, climb some mountains or hills with a backpack, with some weights. Start modestly and work your way up from a couple of days or so per week, increasing the distance and frequency as the climb approaches.
No hills? Find a levee wall or other decent sized hill or slope (steps if there is nothing else) and walk up and down with a weighted backpack for up to an hour or more, several times per week. Make this progressively harder and more challenging as the big day approaches. Be careful with weights on your back as too much can be dangerous, particularly if not carried high up and close to your upper torso. Even regular long hikes with your Kili boots and backpack (load it up progressively) will help with the preparation, hills or no hills.
In addition to, and in combination with hiking, I suggest a series of single leg exercises to increase your ability to handle the thousands of ‘up’ and then thousands of ‘down’ steps required to get to the top. And down again. The exercises which I personally do include these:
- * Single leg step-ups
- * Single leg deadlifts
- * Single leg squats
- * Regular weighted squats
- * Walking lunges
- * Calf lifts
It is a good idea to also include some aerobic distance exercises like running, biking or a rowing machine to build up endurance and good oxygen utilization. Maybe even some high intensity running like fartleks (speedplay) which can be done anywhere. Just warm up properly and don’t make any sudden or large increases in volume or intensity from one day or week to the next. Slowly slowly, just like the eventual ascent you are working towards!
There is no prohibition on including other training modalities and equipment like regular gym core and weight work, swiss ball, medicine ball, resistance bands or whatever you are already doing. And of course, if you already work with a personal trainer, that is your best-case scenario. A personal trainer will be able to customize your training program to get you into tip-top form for Kilimanjaro!
If you are ready to take on the challenge of Kilimanjaro, call our Houston office at 1-800-513-5222 any time during business hours, Monday to Friday, CDT or email me at bert@fisheaglesafaris.com.
YOU MIGHT ALSO BE INTERESTED IN
10th September 2021
Chindeni and the Bushcamp Company, Zambia
By late July we found ourselves at Chindeni, a small Bushcamp Company property
3rd October 2022
Camp Okavango, Botswana
Camp Okavango is in the heart of the permanent part of the Delta. In this idyllic setting there are no vehicles, and it is just a short walk
14th October 2023
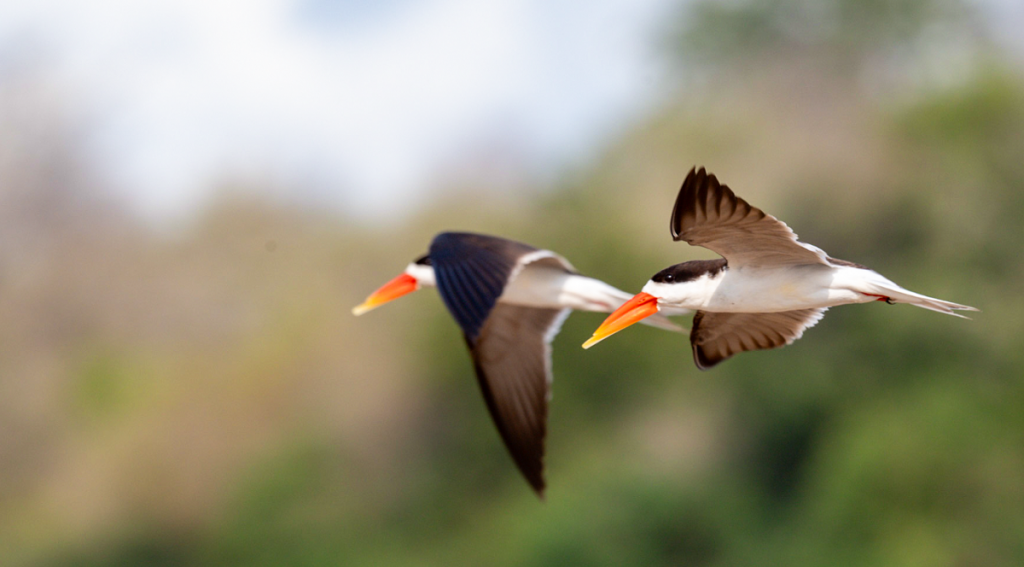
From My Safari Notebook: Wildlife Photography
Birds in flight and wildlife photographers have an uneasy relationship. Things go wrong as often as they go right. Getting focus-lock on a moving subject

SUBSCRIBE TO OUR NEWSLETTER

READERS FAVOURITES
4th August 2022
On Safari At Belmond Eagle Island Lodge, Okavango Delta
What is the ‘secret sauce’ for an unforgettable few days on safari in Botswana? It starts with the animals, of course. The elephants, lions, giraffes, hippos
10th September 2021
Chindeni and the Bushcamp Company, Zambia
By late July we found ourselves at Chindeni, a small Bushcamp Company property
